
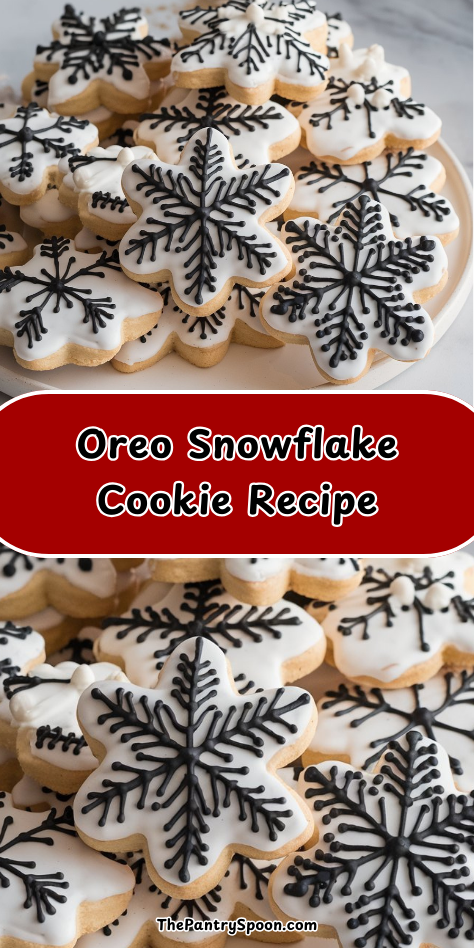
I can’t wait to share these Oreo Snowflake Cookies with you. They’re my absolute favorite no-bake holiday treat, combining the irresistible combination of Oreos and cream cheese with a gorgeous white chocolate coating.
The best part? They look like you spent hours in the kitchen, but they’re actually quite simple to make. Perfect for cookie exchanges, holiday parties, or just enjoying by the fire with a cup of hot cocoa.
Want to know my secret for getting that perfect snowflake design?
Why You’ll Love these Oreo Snowflake Cookies
Magic happens when Oreos transform into these festive treats. I’m talking about cookies that practically melt in your mouth with that perfect balance of chocolate and cream cheese. No baking required!
Can you imagine anything simpler for your holiday gathering?
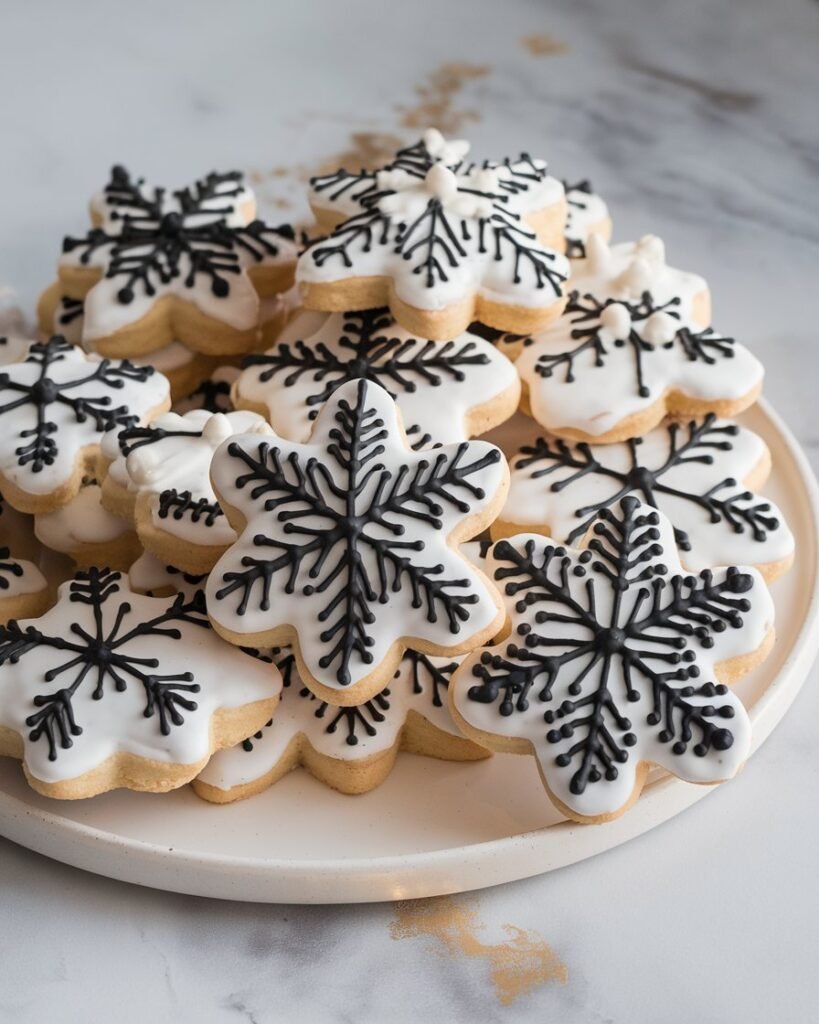
These snowflake beauties look impressive but take minimal effort. The white chocolate coating creates a canvas for your creativity, while the familiar Oreo flavor keeps everyone coming back for more.
Perfect for gifting, party platters, or midnight snacking with hot cocoa. A sweet little secret? They actually taste better the next day as flavors meld together.
What Ingredients are in Oreo Snowflake Cookies?
You’ll need just a handful of simple ingredients to create these no-bake holiday treats that look like they took hours to make.
- 1 package Oreo cookies
- 8 oz cream cheese, softened
- 12 oz white chocolate or vanilla candy melts
- Edible snowflake decorations or white icing for decoration
When shopping for ingredients, quality matters for the white chocolate especially—choose a brand that melts smoothly for that perfect snowy coating, and make sure your cream cheese is fully softened to avoid any lumps in your cookie mixture.
How to Make these Oreo Snowflake Cookies
Step 1: Crush the Oreos
Take your package of Oreo cookies and crush them into fine crumbs. You can use a food processor for lightning-fast results, or place them in a ziplock bag and roll over them with a rolling pin if you’re looking for a bit of stress relief.
Step 2: Mix with Cream Cheese
Add 8 oz of softened cream cheese to your Oreo crumbs and mix until completely smooth. The mixture should be dark and glossy, with no white streaks of cream cheese visible—kind of like edible modeling clay that you’re definitely allowed to taste.
Step 3: Shape into Balls
Using a small cookie scoop or spoon, portion the mixture and roll between your palms to form neat balls. They don’t need to be perfect, but uniform sizing means they’ll all set at the same rate.
Step 4: Chill the Mixture
Place your Oreo balls on a parchment-lined tray and refrigerate for at least 1 hour. This firming-up step is non-negotiable, folks—skip it and you’ll have a dipping disaster on your hands.
Step 5: Melt the White Chocolate
Gently melt 12 oz of white chocolate or vanilla candy melts in a microwave-safe bowl, stirring every 30 seconds until smooth.
White chocolate can be finicky, so low and slow is the name of the game.
Step 6: Dip and Coat
Working with a few balls at a time (keeping the rest chilled), dip each one into the melted white chocolate and place back on the parchment paper.
A fork or dipping tool works wonders here for minimal mess and maximum coating.
Step 7: Decorate with Snowflakes
Before the chocolate sets, quickly add your edible snowflake decorations or pipe white icing designs on top.
Speed matters here—those balls are like little chocolate clocks ticking toward solidification.
Step 8: Final Chill
Return your decorated cookies to the refrigerator until completely firm.
The patience required here is directly proportional to how impressive these will look on your holiday cookie platter, so hang in there.
For making larger batches of these festive treats, a professional kitchen mixer can make the cream cheese and Oreo mixing process much easier and more efficient.
What to Serve with Oreo Snowflake Cookies
These festive little treats are the star of any holiday spread, but they play well with others too.
Try serving them alongside a steaming mug of hot chocolate with a peppermint stick stirrer—the warm, minty chocolate creates a perfect temperature contrast with the chilled cookies. For a coffee lover’s dream, pair with an iced vanilla latte that echoes the white chocolate coating.
If you’re hosting a cookie exchange, balance the sweetness with some fresh strawberries for dipping or a small bowl of salted nuts.
And for the ultimate dessert platter, nestle these snowflake beauties next to some traditional gingerbread cookies—the spicy-sweet combo is absolutely magical.
These make perfect after-dinner treats or mid-afternoon pick-me-ups when you need a little holiday spirit.
Oreo Snowflake Cookies Substitutions and Variations
• Cookie Base Options: Golden Oreos create a vanilla-forward treat, while Mint Oreos add a revitalizing holiday twist.
Those chocolate-filled ones? Absolutely decadent.
• Dietary Adjustments: Look for gluten-free sandwich cookies as an Oreo alternative.
For dairy concerns, substitute plant-based cream cheese and dairy-free white chocolate chips.
- Festive Add-ins: Fold crushed peppermint candies or finely chopped dried cranberries into the mixture before rolling into balls for a pop of color and flavor.
- Coating Alternatives: No white chocolate? Regular chocolate works beautifully (though less “snowy”).
A drizzle of melted peanut butter chips creates lovely contrast.
• Decoration Ideas: Beyond snowflakes, try silver dragées, colored sprinkles, or a light dusting of edible pearl dust for winter shimmer.
A tiny pinch of sea salt on top balances the sweetness perfectly.
Leftovers and Storage for these Oreo Snowflake Cookies
These little snowflake delights actually get better with time! Store your cookies in an airtight container in the refrigerator for up to 1 week.
Place parchment paper between layers to prevent sticking—nobody wants their pretty snowflakes merging into one giant blob.
Freezing works beautifully too. Arrange cookies in a single layer to freeze solid (about 2 hours), then transfer to freezer bags where they’ll keep for up to 3 months.
Just remember to label them, or you might forget about your hidden treasure!
For the best texture, let refrigerated cookies sit at room temperature for 15 minutes before serving. If frozen, thaw in the refrigerator overnight.
The white chocolate coating creates a protective seal that keeps these cookies from drying out, but they’re definitely at their prime when consumed within the first 3-4 days.
Final Thoughts
These Oreo Snowflake Cookies transform the humble sandwich cookie into something truly magical. The combination of cream cheese and Oreo crumbs creates a truffle-like center that melts in your mouth, while the white chocolate coating adds a festive touch that’s hard to resist.
They’re perfect for holiday gatherings, cookie exchanges, or as homemade gifts during the winter season. The snowflake decorations make them especially appropriate from December through February, when we all need a little sparkle to brighten dark winter days.
In a season filled with complicated recipes and time-consuming traditions, these no-bake treats remind us that sometimes the simplest creations bring the most joy.


