
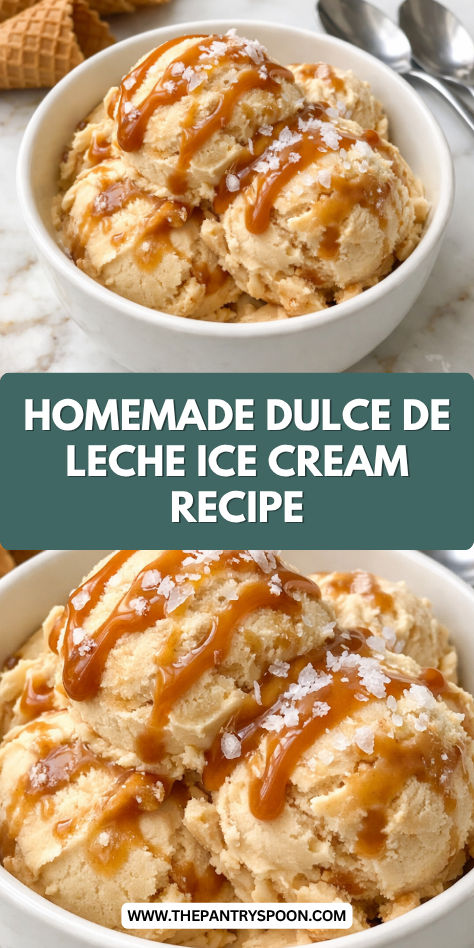
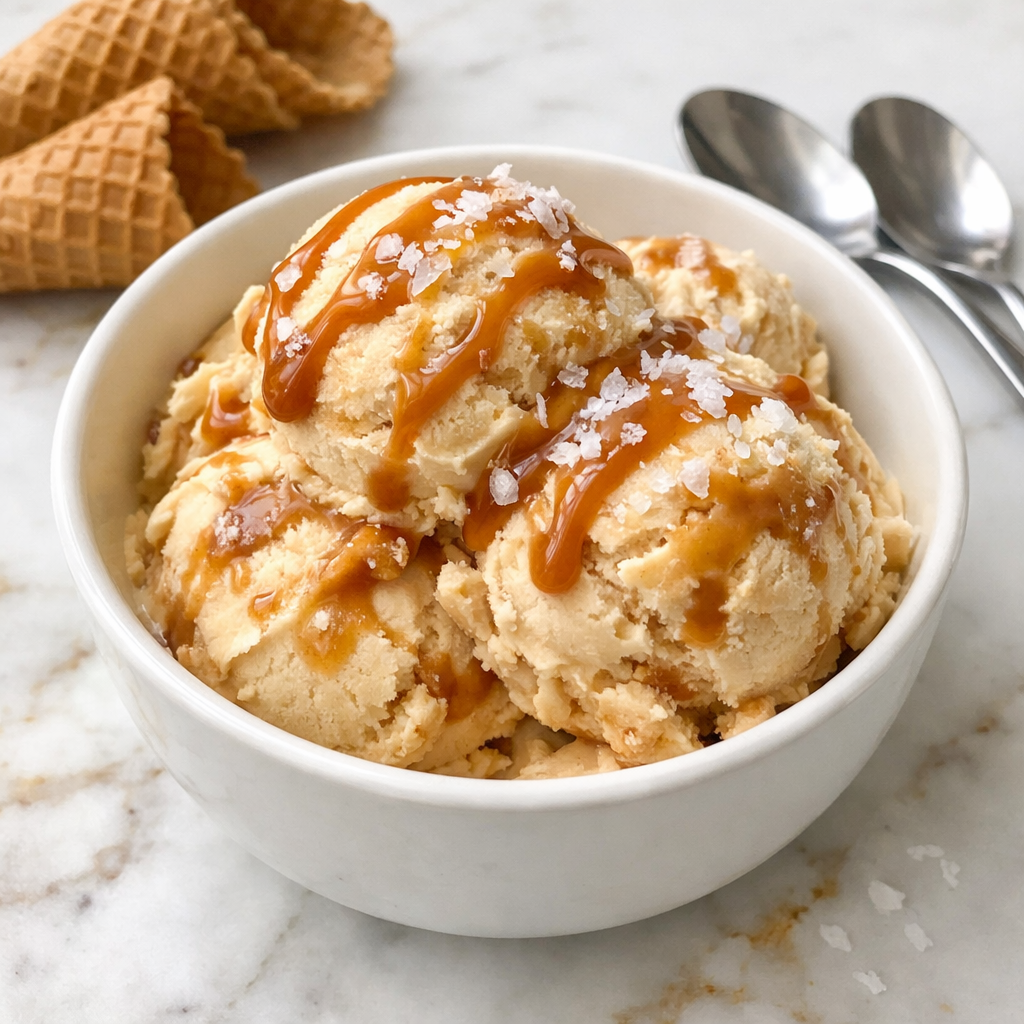
I’m so excited to share my dulce de leche ice cream recipe with you today. There’s something magical about the rich caramel flavor swirled through creamy homemade ice cream that makes my taste buds dance.
If you’ve never tried making ice cream from scratch, this might just be the perfect recipe to start with.
The combination of silky custard base and ribbons of dulce de leche creates a dessert that’ll have everyone asking for seconds. Want to know my secret for the creamiest texture?
Why You’ll Love this Homemade Dulce de Leche Ice Cream
Once you taste this homemade dulce de leche ice cream, you’ll wonder why you ever bothered with store-bought versions.
The rich caramel notes blend perfectly with the creamy custard base, creating that melt-in-your-mouth texture you can’t get from commercial brands.
I love how the ribbons of extra dulce de leche create little pockets of sweetness throughout.
It’s like finding treasure in each spoonful.
And can we talk about the velvety smoothness?
The egg yolks work magic here, folks.
Perfect for summer gatherings or, let’s be honest, midnight snacking straight from the container.
What Ingredients are in Homemade Dulce de Leche Ice Cream?
This decadent dulce de leche ice cream requires just a handful of quality ingredients to create that rich, caramel-infused dessert that’ll make your taste buds dance.
- 1 ½ cups heavy cream
- 1 ½ cups whole milk
- 1 ½ cups dulce de leche (divided – 1 cup for the base, ½ cup for swirling)
- 6 egg yolks
- ½ cup sugar (optional, depending on how sweet you like your ice cream)
- ½ teaspoon vanilla extract
- Pinch of salt
The quality of your dulce de leche matters tremendously here—store-bought works perfectly fine, but if you’re feeling ambitious, homemade dulce de leche takes this ice cream to an entirely new level of deliciousness.
How to Make this Homemade Dulce de Leche Ice Cream
Grab your saucepan and combine 1½ cups heavy cream, 1½ cups whole milk, and 1 cup of dulce de leche (save the remaining ½ cup for later).
Warm this mixture over medium heat until it’s steaming, but not boiling—we’re looking for that sweet spot where it’s hot enough to melt the dulce de leche but not so hot that it scalds.
Step 2: Prepare The Egg Mixture
While your base is warming, whisk together 6 egg yolks, ½ cup sugar (if using—remember this is optional depending on your sweet tooth), ½ teaspoon vanilla extract, and that tiny pinch of salt in a separate bowl.
These yolks are the secret to that creamy, custard-like texture that makes homemade ice cream so superior to the store-bought stuff.
Step 3: Temper The Eggs
Now comes the tricky part (though it’s really not that bad).
Slowly pour about a cup of the warm milk mixture into your egg mixture while whisking constantly.
This gradual approach “tempers” the eggs, warming them gently without scrambling them—because nobody wants dulce de leche scrambled egg ice cream, right?
Step 4: Cook The Custard
Pour the tempered egg mixture back into your saucepan with the remaining milk mixture.
Cook over low heat, stirring constantly with a wooden spoon or silicone spatula for about 6-10 minutes until the custard thickens enough to coat the back of your spoon.
Patience is key here—rush this step and you might end up with dulce de leche soup instead of ice cream.
Step 5: Chill The Mixture
Transfer your custard to a clean bowl and let it cool to room temperature.
Then cover and refrigerate until thoroughly chilled, preferably overnight but at least 4 hours.
Want to speed things up? Place the bowl in an ice bath and stir occasionally to cool it faster, as the recipe tips suggest.
Step 6: Churn The Ice Cream
Pour your chilled custard into your ice cream maker and churn according to the manufacturer’s instructions, usually about 20-25 minutes.
For the smoothest, most professional results, consider using a high-end stand mixer with an ice cream attachment that ensures perfect churning every time.
The mixture should reach a soft-serve consistency when it’s ready—thick enough to hold its shape but still a bit soft.
Step 7: Add The Dulce de Leche Swirl
Transfer about half of your churned ice cream to a freezer-safe container.
Dollop several spoonfuls of the reserved ½ cup dulce de leche on top, then add the remaining ice cream and more dulce de leche.
Use a knife or skewer to gently swirl the dulce de leche throughout, creating those beautiful caramel ribbons that make each bite a surprise.
Step 8: Freeze Until Firm
Cover your container and freeze until the ice cream is firm enough to scoop, at least 4 hours or overnight.
This final freezing stage is where your patience really pays off—the texture develops and the flavors meld together into something truly spectacular.
What to Serve with Homemade Dulce de Leche Ice Cream
This silky, caramel-infused ice cream deserves some thoughtful companions to make dessert time truly special.
A warm slice of cinnamon-dusted apple pie creates that perfect hot-cold contrast that makes your taste buds dance. For something lighter, fresh berries—particularly raspberries or sliced strawberries—cut through the richness beautifully with their slight tartness.
Coffee lovers, take note: a shot of espresso poured over a scoop creates an instant affogato that’ll make you wonder why you ever ordered dessert at a restaurant.
For extra indulgence, try crumbled shortbread cookies or toasted pecans sprinkled on top for a delightful textural contrast.
And if you’re serving this at a dinner party, a small glass of Pedro Ximénez sherry alongside makes for a sophisticated pairing that’ll have your guests thinking you’re a culinary genius.
Homemade Dulce de Leche Ice Cream Substitutions and Variations
- Lighter Option: Swap half-and-half for heavy cream, or use all whole milk for a less rich version (texture will be slightly less creamy).
- Dairy-Free: Try full-fat coconut milk and coconut cream instead of dairy (adds a tropical hint that works beautifully with caramel flavors).
- Lower Sugar: Skip the optional sugar—the dulce de leche provides plenty of sweetness for most palates.
- Flavor Twists: Add ½ teaspoon of cinnamon or a tablespoon of dark rum for depth; fold in chopped chocolate-covered pretzels for sweet-salty crunch.
- Seasonal Add-ins: Swirl in roasted banana puree in summer; add pumpkin spice in fall; fold in crushed peppermint candies for holiday flair.
- Quick Topping Ideas: Warm chocolate sauce, toasted coconut flakes, or a sprinkle of flaky sea salt—because sometimes it’s the finishing touch that makes all the difference.
Leftovers and Storage for this Homemade Dulce de Leche Ice Cream
This luscious ice cream keeps beautifully in the freezer for up to two weeks when stored in an airtight container.
For best texture, press a piece of plastic wrap directly against the surface before sealing to prevent ice crystals from forming.
When serving from frozen, let the ice cream sit at room temperature for about 5-10 minutes to soften slightly—this brings out the full caramel notes and creates that perfect scoopable consistency.
Unlike some desserts, this dulce de leche ice cream actually develops more complex flavor after a day or two in the freezer, as the caramel notes have time to deepen and meld.
If you notice any texture change after prolonged storage, a quick 10-second whirl in a food processor can refresh it completely.
Final Thoughts
This dulce de leche ice cream sits at that perfect intersection of impressive and achievable—rich caramel depth balanced by the simple creaminess of a classic custard base.
What makes it special isn’t just the decadent flavor, but those beautiful ribbons of pure dulce de leche running throughout each scoop.
It’s my go-to dessert for summer gatherings and holiday meals alike, when something special is called for but time remains precious.
There’s something deeply satisfying about watching guests close their eyes with that first taste, momentarily transported by something you’ve created from scratch in your own kitchen.


