
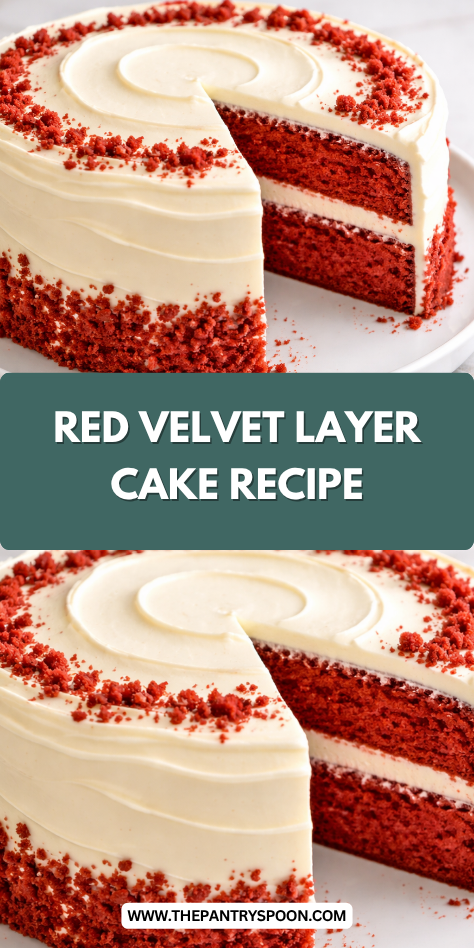
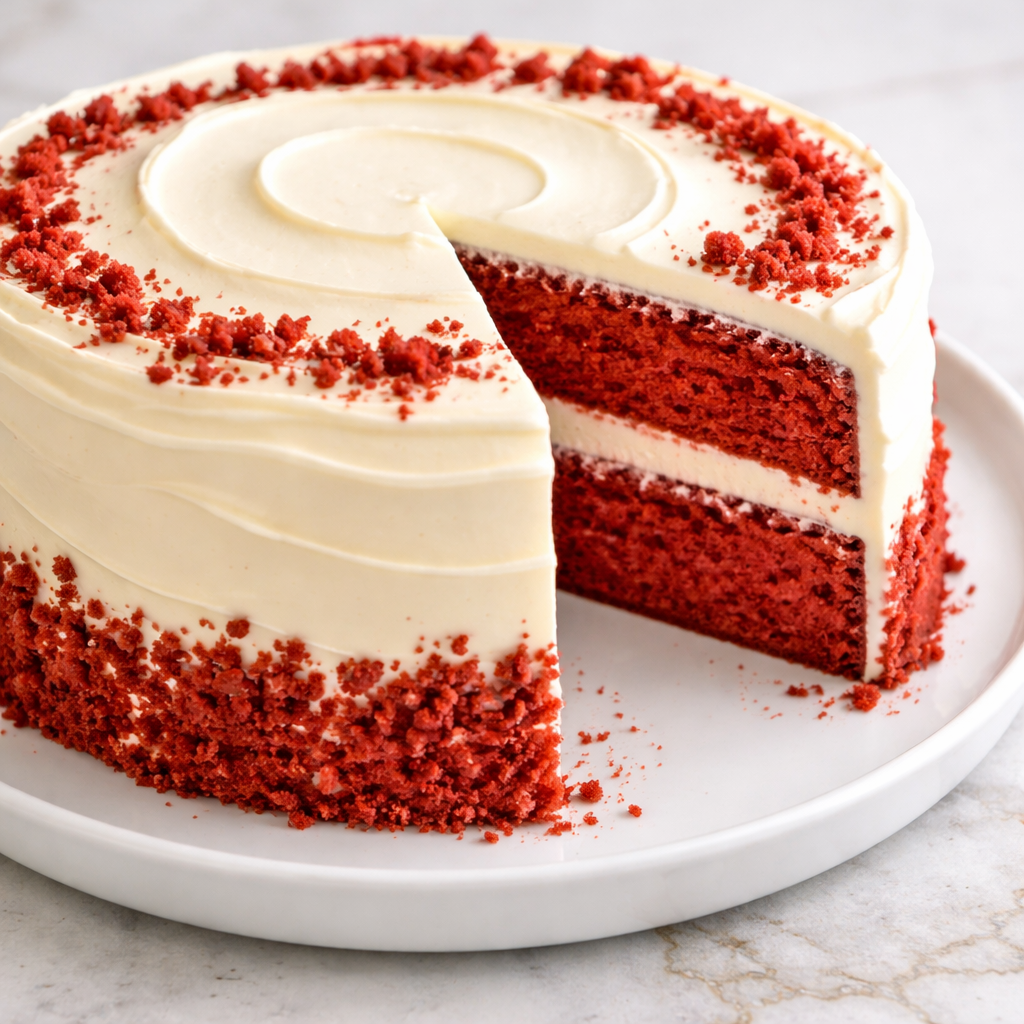
I’m thrilled to share my favorite red velvet layer cake recipe with you today. There’s something magical about cutting into those vibrant crimson layers topped with cloud-like cream cheese frosting.
It’s one of those desserts that looks complicated but actually comes together with simple pantry staples and a bit of patience.
Want to create a showstopper dessert that’ll have everyone asking for seconds? This velvety delight might just become your new signature cake.
Why You’ll Love this Red Velvet Layer Cake
While many desserts come and go, this Red Velvet Layer Cake stands the test of time for good reason.
I’m obsessed with how the cocoa powder gives it that subtle chocolate flavor without overpowering the signature tanginess. The vibrant red color makes this cake absolutely showstopping—perfect for birthdays, holidays, or just because it’s Tuesday.
What truly sets this recipe apart? The cream cheese frosting, my friends. Rich, smooth, and just the right amount of sweet.
Plus, it’s surprisingly simple to make. No fancy techniques required, just basic ingredients that transform into something magical when combined.
What Ingredients are in Red Velvet Layer Cake?
For this stunning red velvet layer cake, you’ll need a combination of pantry staples and a few special ingredients that create that signature flavor and color we all adore.
- 1 ⅓ cups all-purpose flour
- 1 tablespoon cocoa powder
- ¾ teaspoon baking soda
- 1 cup sugar
- ½ teaspoon salt
- 1 large egg
- ½ cup vegetable oil
- 1 teaspoon vanilla extract
- ⅔ cup milk
- ½ ounce red gel food coloring
- 8 ounces cream cheese (for frosting)
- 1 tablespoon vanilla extract (for frosting)
- 5 cups powdered sugar (for frosting)
How to Make this Red Velvet Layer Cake
Step 1: Preheat Your Oven
Preheat your oven to 350°F and grease an 8-inch cake pan.
Nothing ruins the baking mood faster than realizing halfway through mixing that your oven isn’t hot yet.
Step 2: Mix the Dry Ingredients
In a large bowl, combine 1⅓ cups all-purpose flour, 1 tablespoon cocoa powder, ¾ teaspoon baking soda, 1 cup sugar, and ½ teaspoon salt.
This blend of ingredients creates that subtle chocolate undertone that makes red velvet so distinctive.
Step 3: Add the Wet Ingredients
To your dry mixture, add 1 large egg, ½ cup vegetable oil, 1 teaspoon vanilla extract, and ⅔ cup milk.
Mix everything together for 1-2 minutes until you have a smooth batter—no lumps allowed in this velvety masterpiece.
Step 4: Create That Signature Red Color
Stir in ½ ounce of red gel food coloring until completely incorporated.
This is where the magic happens, transforming your batter into that iconic deep red that makes everyone’s eyes widen when you slice into it.
Step 5: Bake to Perfection
Pour your batter into the prepared pan and bake for 25-28 minutes, or until a toothpick inserted in the center comes out clean.
Let’s be honest, the smell wafting through your kitchen will make waiting nearly impossible.
Step 6: Cool the Cake
Allow the cake to cool in the pan for about 10 minutes, then transfer to a wire rack to cool completely.
Patience is key here—a warm cake will turn your frosting into a melty mess.
Step 7: Prepare the Cream Cheese Frosting
Beat 8 ounces of cream cheese with 1 tablespoon vanilla extract until fluffy, then gradually add 5 cups of powdered sugar until smooth.
This tangy, sweet frosting is what makes red velvet cake truly complete.
Step 8: Frost Your Masterpiece
Once the cake has completely cooled, spread your cream cheese frosting generously over the top and sides.
For a professional touch, use a spatula to create swirls and peaks in the frosting—they’ll catch everyone’s eye when you bring this beauty to the table.
For even more professional results, a premium baking stand mixer will make achieving that perfectly smooth and lump-free batter much easier.
What to Serve with Red Velvet Layer Cake
This showstopping red velvet cake deserves perfect companions to round out your dessert spread. A scoop of vanilla bean ice cream creates the ultimate hot-and-cold contrast when the cake is slightly warm.
For a revitalizing balance, serve with fresh berries—strawberries and raspberries look particularly stunning against that red backdrop.
Coffee is the classic pairing, but have you tried a glass of cold milk? Nothing cuts through rich cream cheese frosting quite like it.
For something more sophisticated, a sparkling rosé or dessert wine makes this an elegant finale to dinner parties.
And if you’re feeling extra indulgent, a small dish of chocolate-covered strawberries alongside gives guests options to mix and match flavors. Who says you can’t have it all?
Red Velvet Layer Cake Substitutions and Variations
Need to adapt this classic cake? No problem! Here are some easy swaps and creative twists:
- Flour alternatives: Swap all-purpose for a 1:1 gluten-free flour blend, or try cake flour for an even softer texture.
- Dairy-free options: Replace milk with almond, oat, or coconut milk. For frosting, use dairy-free cream cheese and vegan butter.
- Less sugar: Reduce sugar to 3/4 cup in the cake, or try 3-4 cups powdered sugar in frosting.
- Natural coloring: Skip artificial dye and use 1/2 cup beet puree or juice for a natural red tint.
- Flavor boosters: Add 1 tsp cinnamon, orange zest, or 1/4 cup mini chocolate chips to the batter.
- Fancy toppings: Sprinkle with chocolate shavings, candied pecans, or edible gold dust for special occasions.
- Seasonal twist: Mix fresh berries into the frosting or add them between layers for a summery version.
Leftovers and Storage for this Red Velvet Layer Cake
Your red velvet cake will stay moist and delicious for several days when stored properly. Here’s how to keep it at its best:
- Counter storage: Tightly cover with plastic wrap or place in an airtight container for up to 2 days at room temperature.
- Refrigeration: Store in the fridge for up to 5 days. The cream cheese frosting actually firms up nicely when chilled.
- Freezer option: Wrap individual slices or the whole unfrosted cake tightly in plastic wrap and aluminum foil. Freezes beautifully for up to 3 months! Thaw overnight in the refrigerator.
- Serving tip: For the best texture and flavor, let refrigerated cake sit at room temperature for 20-30 minutes before serving. This softens the frosting and brings out the cake’s subtle cocoa flavor.
Some folks (myself included) think red velvet cake tastes even better on day two when the flavors have had time to meld!
Final Thoughts
Red velvet cake holds a special place in dessert tradition with its subtle cocoa notes and stunning crimson color.
This single-layer version delivers all the charm of the classic with considerably less fuss. What makes this recipe truly special isn’t just its gorgeous hue, but the perfect balance between the tender crumb and that dreamy cream cheese frosting.
It’s ideal for birthdays, holiday gatherings, or simply brightening an ordinary Tuesday when life calls for something a bit more special than cookies.
Red velvet has a way of making any moment feel celebratory, turning even the simplest gatherings into occasions worth remembering.


