
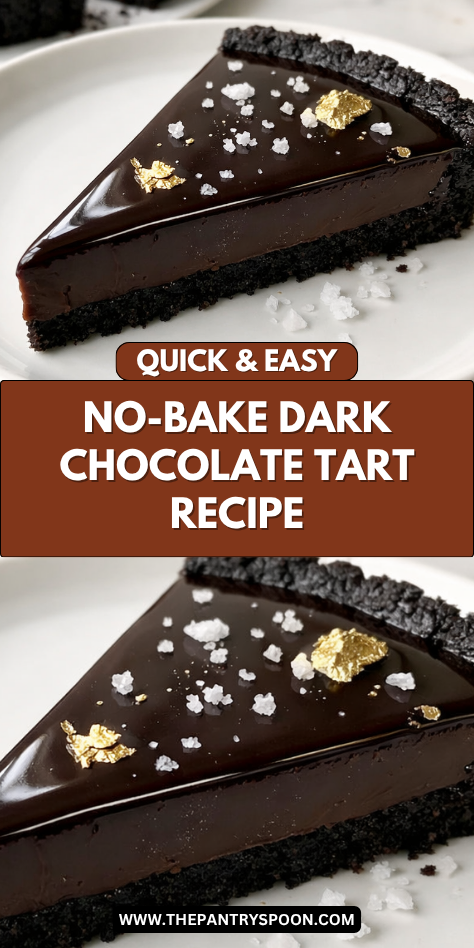
I’ve got to be honest with you, this no-bake dark chocolate tart is my secret weapon for impressing guests without breaking a sweat.
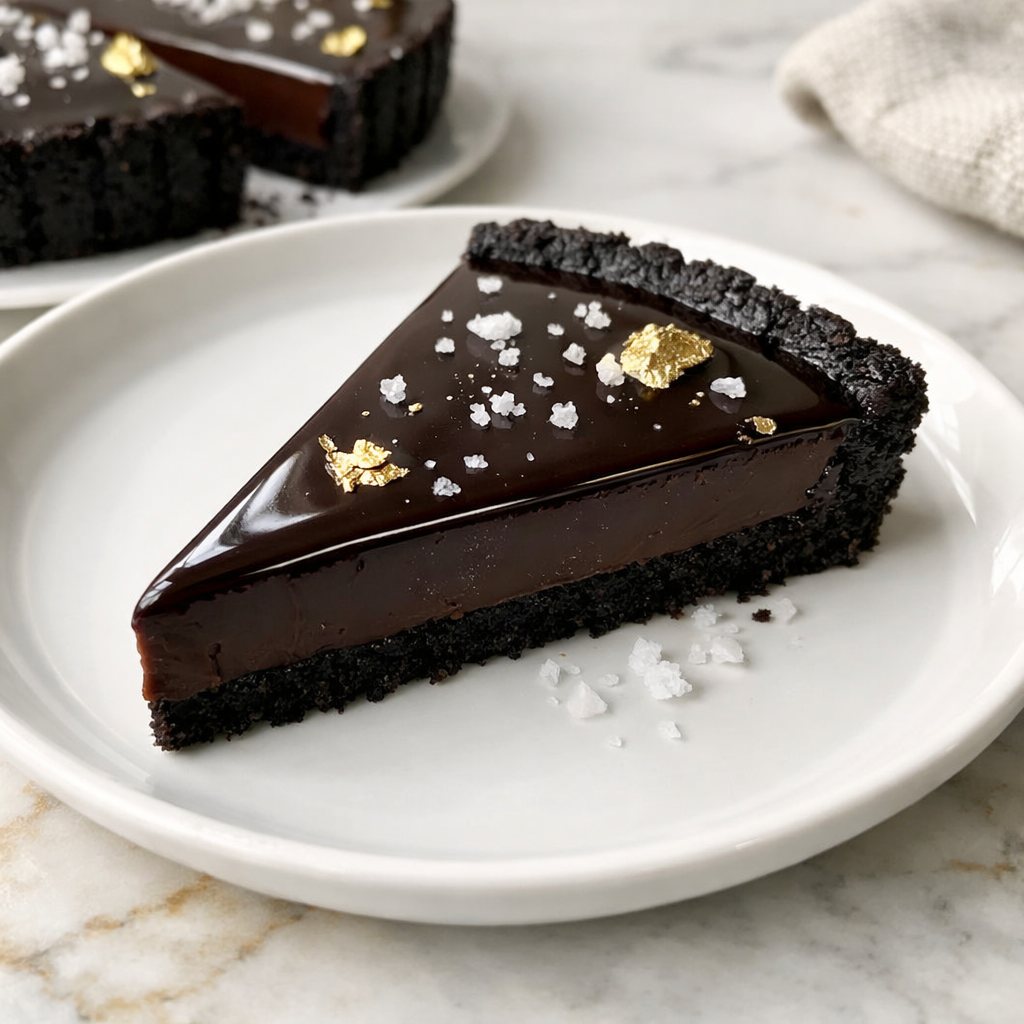
There’s something magical about the contrast between that crunchy Oreo crust and silky-smooth chocolate filling that makes everyone think you spent hours in the kitchen.
And on hot summer days? It’s a lifesaver. No oven required, just 15 minutes of prep, then let the fridge do all the work. But the real question is, what little twists can make this decadent dessert uniquely yours?
Why You’ll Love this No-Bake Dark Chocolate Tart
When you’re craving something decadent but don’t want to turn on the oven, this no-bake dark chocolate tart is your new best friend. It combines a crunchy Oreo crust with a silky-smooth chocolate filling that melts in your mouth.
The best part? You’ll only need a handful of ingredients and about 15 minutes of prep time. Perfect for summer days or last-minute dinner parties. Can’t finish it all at once? No problem—it keeps beautifully in the fridge for days, getting even better as the flavors deepen.
What Ingredients are in No-Bake Dark Chocolate Tart?
To create this lusciously smooth and decadent dessert, you’ll need just a handful of simple ingredients that combine to make something truly special.
- 25 Oreo cookies
- 5 tablespoons unsalted butter, melted (for the crust)
- 1½ cups semi-sweet chocolate chips
- 1 cup heavy cream
- 2 tablespoons unsalted butter (for the filling)
- 2 tablespoons granulated sugar
- Fresh berries for topping (raspberries, strawberries, or blackberries work beautifully)
Feel free to adjust the sweetness level by adding more or less sugar depending on your chocolate preference, and don’t skimp on quality chocolate chips—they’re the star of the show and will determine the richness of your final dessert.
How to Make this No-Bake Dark Chocolate Tart
Step 1: Prepare the Oreo Crust
Take your 25 Oreo cookies and crush them into fine crumbs using a food processor or the good old plastic bag and rolling pin method.
Mix these crumbs with 5 tablespoons of melted unsalted butter until the mixture resembles wet sand.
Step 2: Form the Tart Shell
Press the Oreo mixture firmly into your tart pan, creating an even layer across the bottom and up the sides.
The back of a measuring cup works wonders for getting those edges just right, and honestly, who doesn’t love playing with cookie crumbs?
Step 3: Chill the Crust
Pop your prepared crust into the refrigerator to chill and set while you prepare the filling.
This helps the crust hold its shape and prevents it from crumbling when you add the chocolate mixture.
Step 4: Prepare the Chocolate Filling
In a saucepan over medium-low heat, combine 1 cup of heavy cream, 1½ cups of semi-sweet chocolate chips, 2 tablespoons of unsalted butter, and 2 tablespoons of granulated sugar.
Stir gently until everything melts together into a glossy, smooth mixture that makes you want to dip a finger in (though I’d wait for it to cool a bit).
For more complex desserts, a professional stand mixer would make the process even smoother and give you consistent results every time.
Step 5: Fill the Tart Shell
Remove your chilled crust from the refrigerator and pour the warm chocolate filling into it, spreading it evenly with a spatula.
Give the pan a gentle tap on the counter to release any air bubbles—those little troublemakers can ruin the smooth surface we’re aiming for.
Step 6: Chill Until Set
Return your tart to the refrigerator and let it chill for at least 4 hours, though overnight is even better if you can resist that long.
The waiting is the hardest part, but that smooth, silky texture is worth every minute of anticipation.
Step 7: Decorate and Serve
Just before serving, top your tart with fresh berries arranged in whatever pattern strikes your fancy.
The bright, tart berries provide the perfect counterpoint to the rich chocolate—a marriage made in dessert heaven.
What to Serve with No-Bake Dark Chocolate Tart
This decadent chocolate tart deserves some thoughtful accompaniments to make it truly shine. A dollop of lightly sweetened whipped cream adds a cloud-like contrast to the rich chocolate—just beat some heavy cream with a touch of vanilla and you’re set.
For a more sophisticated pairing, a small glass of dessert wine like port or a good espresso cuts through the richness beautifully.
Need something invigorating? A scoop of vanilla ice cream or raspberry sorbet brings a temperature contrast that makes each bite even more interesting.
And don’t underestimate the power of a simple berry sauce—just blend some fresh strawberries with a bit of sugar and lemon juice.
This tart makes an impressive finale to any dinner party, but honestly, it’s perfect for an indulgent afternoon treat too.
No-Bake Dark Chocolate Tart Substitutions and Variations
- Topping Ideas: Beyond berries, try candied orange peel, toasted nuts, coconut flakes, or a light dusting of sea salt.
- Lighter Version: Use dark chocolate (70% cacao) and reduce sugar for a less sweet, more intense chocolate experience.
Leftovers and Storage for this No-Bake Dark Chocolate Tart
This decadent chocolate tart keeps beautifully in the refrigerator for up to 5 days when stored in an airtight container.
The flavors actually develop and intensify after a day, making it a perfect make-ahead dessert for special occasions.
For longer storage, you can freeze individual slices:
- Wrap each piece tightly in plastic wrap, then foil
- Freeze for up to 2 months
- Thaw in the refrigerator overnight
To serve refrigerated leftovers, let the tart sit at room temperature for 15-20 minutes before enjoying—this softens the filling slightly for the perfect texture.
The crust may lose some crispness over time, but the rich chocolate flavor remains divine.
Just add fresh berries right before serving for the perfect finishing touch.
Final Thoughts
This no-bake dark chocolate tart strikes that perfect balance between impressive and effortless. The contrast between the crunchy Oreo crust and silky chocolate filling creates a dessert that feels both indulgent and sophisticated, without requiring any actual baking skills.
It’s my go-to for dinner parties and holiday gatherings when time is tight but I still want something that looks and tastes like it took hours. The simplicity of chocolate and berries brings us back to dessert fundamentals, reminding us that sometimes the most straightforward combinations are the most satisfying.
In a world of complicated recipes, there’s something comforting about creating something so delicious with so little fuss.


