
If you’ve been searching for a chocolate chip cookie that stays soft and chewy even the next day, this is the one to try.
I tested this recipe at home a few times until I got that bakery-style texture just right — soft in the middle, slightly golden on the edges, and never cakey or dry.
I’ll walk you through the small things that make a big difference, like how long to mix the dough and when to pull them out of the oven. These are the kind of cookies that disappear fast, so you may want to make a double batch.

Why You’ll Love This Recipe
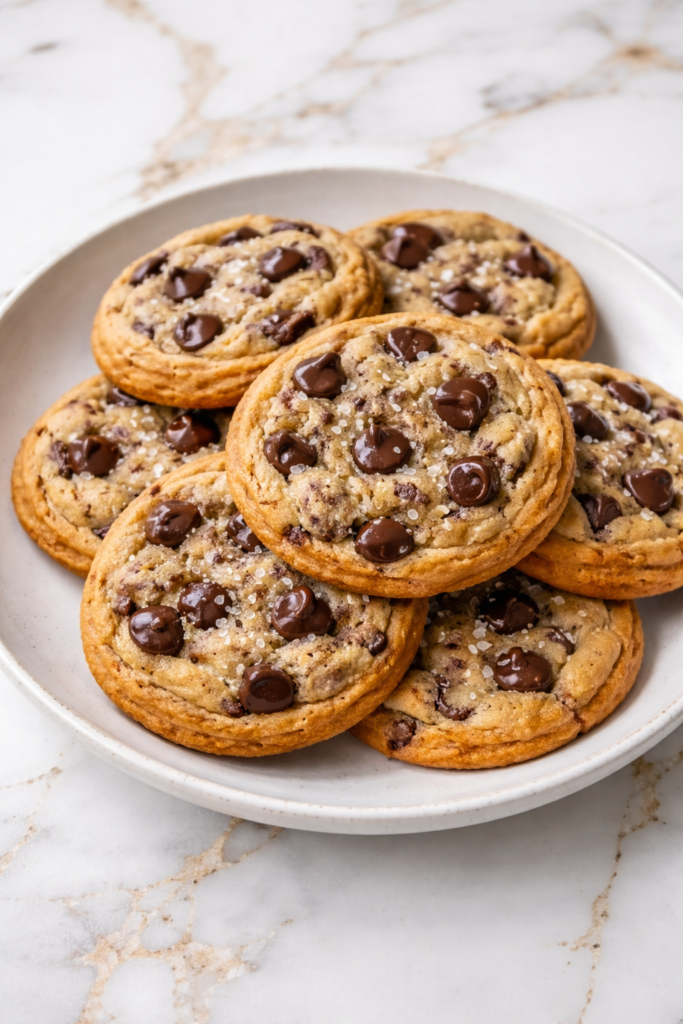
These Soft and Chewy Chocolate Chip Cookies (Bakery Style) are designed to deliver everything you expect from a bakery treat right in your own kitchen. They are thick, rich, and perfectly balanced with crisp edges and irresistibly soft centers. Each bite is loaded with gooey chocolate, making them feel indulgent without being overly complicated to prepare.
One of the best things about this recipe is how approachable it is, even for beginner bakers. The steps are simple and straightforward, but the results feel elevated and impressive. It is a great recipe to make with kids or to prepare when you want a reliable dessert that always turns out beautifully.
These cookies are also highly versatile and can be adapted to suit your preferences. Whether you like extra chocolate, a hint of salt on top, or a slightly crispier finish, this dough can be adjusted with ease. It is the kind of recipe that becomes a staple in your home over time.
Serves: 20 people
This recipe yields about 20 large, bakery-style cookies, depending on how generously you portion the dough. They are perfect for sharing at gatherings, packing into treat boxes, or enjoying throughout the week.
If you prefer smaller cookies, you can easily divide the dough into more portions. Just remember to slightly reduce the baking time to maintain that soft and chewy texture.
Ingredients You’ll Need
- 1 cup (2 sticks) unsalted butter, softened
- 1 cup brown sugar, packed
- 1/2 cup granulated sugar
- 2 large eggs, room temperature
- 2 teaspoons vanilla extract
- 2 3/4 cups all-purpose flour
- 1 teaspoon baking soda
- 1/2 teaspoon baking powder
- 1 teaspoon salt
- 2 cups semi-sweet chocolate chips
Pro Tips
For that classic bakery-style texture, make sure your butter is softened but not melted. Properly softened butter creams smoothly with the sugars and creates a light, fluffy base that helps the cookies rise beautifully.
Using more brown sugar than white sugar is key to achieving a soft and chewy texture. Brown sugar adds moisture and a subtle caramel flavor that enhances the overall richness of the cookies.
Chilling the dough is highly recommended if you want thick, bakery-style cookies. Even 30–60 minutes in the refrigerator helps prevent spreading and deepens the flavor.
Do not overmix the dough once you add the dry ingredients. Mixing just until combined keeps the cookies tender instead of tough.
For an extra bakery-style touch, press a few additional chocolate chips onto the tops of the dough balls before baking. This gives the cookies a more polished and visually appealing finish.
Bake the cookies until the edges are set but the centers still look slightly underbaked. They will continue to cook on the baking sheet and develop that perfect chewy center.
Tools You’ll Need
- Large mixing bowl
- Hand mixer or stand mixer
- Measuring cups and spoons
- Rubber spatula
- Baking sheets
- Parchment paper
- Cookie scoop or ice cream scoop
- Cooling rack
Substitutions and Variations
If you prefer a richer flavor, you can substitute part of the butter with browned butter. This adds a deep, nutty taste that pairs beautifully with chocolate.
For a slightly different texture, try using a mix of chocolate chips and chocolate chunks. This creates pockets of melted chocolate throughout the cookies.
You can swap semi-sweet chocolate chips for dark chocolate or milk chocolate depending on your taste. Each option brings a unique sweetness and intensity to the final result.
To make the cookies a bit more indulgent, consider adding chopped nuts like walnuts or pecans. They add a pleasant crunch and balance the softness of the cookie.
For a fun twist, sprinkle a small pinch of flaky sea salt on top of each cookie before baking. This enhances the sweetness and gives the cookies a more gourmet feel.
Make Ahead Tips
This cookie dough benefits greatly from being made ahead of time, which makes it perfect for busy schedules or planned gatherings. You can prepare the dough and store it tightly covered in the refrigerator for up to 72 hours. This resting period allows the flavors to deepen and results in a richer, more complex cookie.
If you prefer to freeze the dough, scoop it into individual portions first for convenience. Place the dough balls on a baking sheet to freeze until solid, then transfer them to a freezer-safe container for up to 2 months. This makes it easy to bake just a few cookies at a time whenever the craving strikes.
When baking from chilled or frozen dough, there is no need to thaw completely. Simply add an extra 1–3 minutes to the baking time and watch for the edges to turn golden. This method helps maintain that thick, bakery-style texture.
Instructions
Step 1: Preheat and Prepare
Preheat your oven to 350°F and line your baking sheets with parchment paper. This helps the cookies bake evenly and prevents sticking.
Remove the chilled dough from the refrigerator if you prepared it ahead. Let it sit for a few minutes if it feels too firm to scoop.
Step 2: Portion the Dough
Using a large cookie scoop or ice cream scoop, portion the dough into evenly sized balls. Aim for about 2–3 tablespoons of dough per cookie for that classic bakery size.
Place the dough balls onto the prepared baking sheets, spacing them about 2–3 inches apart. This gives them enough room to spread without overlapping.
Step 3: Shape for Bakery Style
Roll each dough ball gently in your hands to create a smooth surface. For a more rustic bakery look, you can leave them slightly uneven on top.
Press a few extra chocolate chips onto the tops of each dough ball. This creates a visually appealing finish and ensures chocolate in every bite.
Step 4: Bake the Cookies
Place the baking sheets in the preheated oven and bake for 10–12 minutes. The edges should be golden while the centers remain soft and slightly underbaked.
Rotate the baking sheet halfway through if your oven has hot spots. This ensures even baking and consistent color.
Step 5: Cool Properly
Remove the cookies from the oven and allow them to rest on the baking sheet for 5–10 minutes. This step helps them set without losing their soft centers.
Transfer the cookies to a cooling rack to cool completely. They will continue to firm up slightly as they cool.
Step 6: Serve and Enjoy
Serve the cookies warm for the ultimate gooey chocolate experience. They are equally delicious at room temperature with a soft, chewy bite.
Pair them with milk, coffee, or tea for a comforting treat any time of day. These cookies are perfect for sharing or savoring slowly.
Serving Suggestions
Serve these cookies slightly warm with a glass of cold milk for a classic and comforting pairing. The creamy milk balances the rich chocolate and enhances the overall flavor.
For a more indulgent dessert, place a scoop of vanilla or chocolate ice cream between two cookies. This creates a bakery-style ice cream sandwich that feels extra special.
These cookies also pair beautifully with a hot cup of coffee or espresso. The slight bitterness of the coffee complements the sweetness of the cookies perfectly.
If you are serving guests, arrange the cookies on a large platter with a light dusting of powdered sugar. This simple presentation makes them feel bakery-worthy and inviting.
You can also crumble the cookies over ice cream or yogurt for added texture and flavor. This is a great way to repurpose any extra cookies in a creative way.
Pack them into lunchboxes or treat bags for a sweet homemade surprise. They travel well and stay soft for days.
Leftovers and Storage
Store leftover cookies in an airtight container at room temperature for up to 5 days. Keeping them sealed properly helps preserve their soft and chewy texture.
If you want to keep them even softer, place a slice of bread in the container with the cookies. The cookies will absorb the moisture from the bread and stay fresh longer.
For longer storage, you can refrigerate the cookies in a sealed container for up to a week. Allow them to come to room temperature before serving for the best texture.
These cookies also freeze very well after baking. Place them in a freezer-safe container with parchment between layers and freeze for up to 2 months.
To reheat, warm the cookies in the microwave for about 10–15 seconds. This restores their soft texture and brings back that fresh-from-the-oven feel.
Nutrition and Benefits
- These cookies provide a comforting balance of carbohydrates and fats, making them a satisfying treat when enjoyed in moderation. They are ideal for sharing during family moments or special occasions.
- Using real butter and quality chocolate chips enhances both flavor and ingredient quality. This allows you to enjoy a homemade dessert without unnecessary additives.
- The inclusion of brown sugar contributes to moisture and a softer texture, while also adding a subtle depth of flavor. This makes each bite feel rich and well-rounded.
- Baking at home allows you to control portion sizes and ingredient choices. You can adjust sweetness levels or incorporate higher-quality ingredients based on your preferences.
- Preparing cookies together as a family can encourage creativity and build confidence in the kitchen. It turns a simple recipe into a meaningful and enjoyable experience.
Recipe FAQ
Why are my cookies spreading too much?
This usually happens if the butter is too warm or the dough was not chilled. Try refrigerating the dough for at least 30 minutes before baking. This helps the cookies hold their shape better.
How do I get thicker cookies?
Chilling the dough is the most effective way to achieve thicker cookies. You can also slightly increase the flour by a tablespoon or two. Avoid flattening the dough before baking.
Can I use salted butter instead of unsalted?
Yes, you can use salted butter if needed. Simply reduce or omit the added salt in the recipe. This keeps the flavor balanced without becoming too salty.
Why do my cookies turn out dry?
Overbaking is the most common cause of dry cookies. Remove them when the centers still look slightly underbaked. They will continue to set as they cool.
Can I add different mix-ins?
Absolutely, this recipe is very flexible. You can add nuts, white chocolate chips, or even toffee bits. Just keep the total amount of mix-ins similar for best results.
How do I know when the cookies are done?
Look for lightly golden edges and soft centers. The cookies may look slightly underdone in the middle, which is perfect. They will firm up as they cool on the baking sheet.
Can I make smaller cookies?
Yes, you can portion the dough into smaller sizes. Reduce the baking time by a few minutes and keep an eye on them. Smaller cookies will bake faster but still taste just as delicious.
A Bakery Favorite Right at Home
These Soft and Chewy Chocolate Chip Cookies (Bakery Style) bring the magic of a bakery straight into your kitchen.
They are rich, comforting, and perfectly textured with every bite. With simple steps and reliable results, this recipe is one you can return to whenever you want something truly special.


