
If you run out of eggs or just prefer not to use them, you don’t have to skip homemade cookies altogether.
I made these at home when I was out of eggs one day and needed a simple fix that actually worked. I’ll walk you through what to use instead and how to get the same soft, chewy texture you’d expect from a regular cookie.
The swap is easy, the ingredients are basic, and you really can’t tell the difference once they come out of the oven.

Why You’ll Love This Recipe
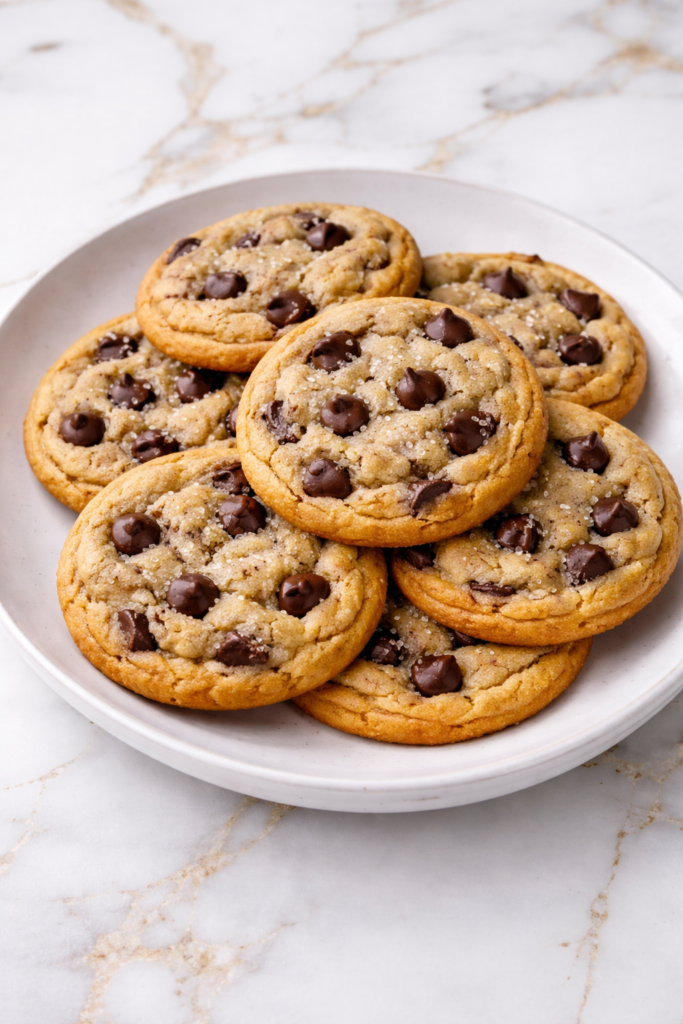
These Eggless Chocolate Chip Cookies (Soft & Chewy, No Egg) deliver all the classic flavor and texture you expect from a great cookie. They are soft in the center, slightly golden on the edges, and filled with rich chocolate in every bite. Even without eggs, the texture stays perfectly chewy and satisfying.
This recipe is especially helpful for households with egg allergies or when you simply run out of eggs. It uses simple pantry ingredients and comes together quickly, making it ideal for last-minute baking. You do not need any complicated substitutions or special techniques to get great results.
Another reason to love this recipe is how family-friendly it is. Kids can easily help with mixing and shaping the dough, and the process is simple enough for beginner bakers. It is a reliable go-to recipe that fits into busy schedules while still delivering homemade goodness.
Serves: 18 people
This recipe makes about 18 medium-sized cookies, depending on how you portion the dough. They are perfect for sharing with family, packing into lunchboxes, or enjoying as an everyday treat.
If you prefer smaller cookies, you can easily divide the dough into more portions. Just remember to slightly reduce the baking time to maintain that soft and chewy texture.
Ingredients You’ll Need
- 1/2 cup (1 stick) unsalted butter, softened
- 1/2 cup granulated sugar
- 1/2 cup brown sugar, packed
- 1/4 cup milk (room temperature)
- 1 teaspoon vanilla extract
- 1 1/2 cups all-purpose flour
- 1/2 teaspoon baking soda
- 1/4 teaspoon baking powder
- 1/2 teaspoon salt
- 1 cup semi-sweet chocolate chips
Pro Tips
Make sure your butter is softened but not melted, as this helps create the right texture. Properly creamed butter and sugar give the cookies a light and tender base.
Use room temperature milk to help the dough mix smoothly and evenly. Cold milk can cause the butter to firm up too quickly and affect the final texture.
Do not overmix once you add the dry ingredients. Mixing just until combined keeps the cookies soft and prevents them from becoming dense.
If you want thicker cookies, chill the dough for about 20–30 minutes before baking. This step helps control spreading and improves the overall structure.
For a more bakery-style look, press a few extra chocolate chips on top of each dough ball before baking. This simple step makes the cookies look more appealing and evenly filled.
Bake the cookies until the edges are lightly golden but the centers still look soft. They will continue to set as they cool, giving you that perfect chewy texture.
Tools You’ll Need
- Large mixing bowl
- Hand mixer or whisk
- Measuring cups and spoons
- Rubber spatula
- Baking sheet
- Parchment paper
- Cookie scoop or tablespoon
- Cooling rack
Substitutions and Variations
You can easily make these cookies dairy-free by using plant-based butter and a non-dairy milk such as almond or oat milk. This keeps the texture soft while making the recipe suitable for more dietary needs.
For a slightly different flavor, try using dark chocolate chips or milk chocolate chips instead of semi-sweet. Each variation brings its own level of sweetness and richness.
If you want to add texture, consider mixing in chopped nuts like walnuts or pecans. They provide a subtle crunch that pairs nicely with the soft cookie base.
You can also add a pinch of cinnamon for a warm, slightly spiced flavor. It adds a unique twist without overpowering the classic chocolate chip taste.
For a fun variation, mix in white chocolate chips or colorful candy pieces. This is especially popular with kids and makes the cookies feel festive and customizable.
Make Ahead Tips
This dough is very convenient to prepare in advance, especially if you want fresh cookies on demand. You can mix the dough and store it covered in the refrigerator for up to 48 hours. This resting time allows the flavors to develop and improves the texture slightly.
If you want to freeze the dough, scoop it into individual portions first. Place the dough balls on a tray to freeze until firm, then transfer them to a freezer-safe container for up to 2 months.
When baking from chilled or frozen dough, there is no need to fully thaw. Simply add an extra 1–2 minutes to the baking time and watch for lightly golden edges.
Instructions
Step 1: Preheat and Prepare
Preheat your oven to 350°F and line a baking sheet with parchment paper. This ensures even baking and prevents sticking.
Gather all your ingredients and tools before starting. This helps make the process smooth and stress-free.
Step 2: Cream Butter and Sugars
In a large bowl, combine the softened butter, granulated sugar, and brown sugar. Mix until the texture is light and creamy.
This step is important for creating a soft cookie base. Take your time to fully blend the mixture.
Step 3: Add Milk and Vanilla
Pour in the milk and vanilla extract, then mix until fully incorporated. The dough may look slightly looser at this stage.
Make sure everything is evenly combined before moving to the next step. This helps create a consistent texture throughout the cookies.
Step 4: Combine Dry Ingredients
In the same bowl, add the flour, baking soda, baking powder, and salt. Mix gently until just combined.
Avoid overmixing at this stage. The dough should be soft and slightly thick.
Step 5: Fold in Chocolate Chips
Add the chocolate chips and fold them into the dough using a spatula. Make sure they are evenly distributed.
This ensures every cookie has plenty of chocolate in each bite. You can reserve a few chips to press on top later.
Step 6: Scoop and Shape
Use a cookie scoop or tablespoon to portion the dough into evenly sized balls. Place them on the prepared baking sheet about 2 inches apart.
If desired, press a few extra chocolate chips onto the tops. This gives the cookies a more finished look.
Step 7: Bake the Cookies
Bake for 10–12 minutes, or until the edges are lightly golden. The centers should still look soft and slightly underbaked.
Keep a close eye during the last few minutes. Overbaking can make the cookies lose their soft texture.
Step 8: Cool and Set
Remove the cookies from the oven and let them rest on the baking sheet for 5 minutes. This allows them to firm up without drying out.
Transfer to a cooling rack to cool completely. The cookies will continue to set as they cool.
Serving Suggestions
These cookies are best enjoyed warm with a glass of cold milk. The soft texture and melted chocolate make them especially comforting.
They also pair nicely with tea or coffee for a simple afternoon treat. The sweetness balances well with warm drinks.
For a fun dessert, sandwich a scoop of ice cream between two cookies. This creates a delicious homemade ice cream sandwich.
You can crumble the cookies over yogurt or ice cream for added texture. This is a great way to use leftovers creatively.
Pack them into lunchboxes or snack containers for an easy homemade treat. They stay soft and enjoyable throughout the day.
Serve them on a platter for gatherings or celebrations. Their classic flavor makes them a crowd favorite.
Leftovers and Storage
Store leftover cookies in an airtight container at room temperature for up to 4 days. This helps maintain their soft and chewy texture.
If you want to keep them fresh longer, refrigerate them in a sealed container for up to a week. Allow them to come to room temperature before serving.
To freeze baked cookies, place them in layers separated by parchment paper in a freezer-safe container. They can be stored for up to 2 months.
When ready to enjoy, let them thaw at room temperature or warm them briefly in the microwave. This restores their soft texture.
Nutrition and Benefits
- These cookies are egg-free, making them suitable for those with egg allergies or dietary restrictions. They provide a safe and delicious alternative without compromising texture.
- The use of simple pantry ingredients makes this recipe accessible and easy to prepare. It is ideal for quick baking without special items.
- Homemade cookies allow better control over ingredient quality and sweetness levels. This can help you tailor the recipe to your preferences.
- The combination of carbohydrates and fats provides a satisfying treat. Enjoyed in moderation, they can be part of a balanced lifestyle.
- Baking at home encourages creativity and family involvement. It turns a simple recipe into a shared and enjoyable experience.
Recipe FAQ
Can I use a dairy-free milk in this recipe?
Yes, you can substitute the milk with almond, oat, or soy milk. These options work well and maintain the soft texture. Choose an unsweetened version for best results.
Why are my cookies too dry?
This usually happens from overbaking or adding too much flour. Make sure to measure ingredients carefully and remove cookies while centers are still soft. They will firm up as they cool.
Can I chill the dough?
Yes, chilling the dough can improve texture and prevent spreading. Even 20–30 minutes can make a difference. It also helps develop a deeper flavor.
Do these cookies taste different without eggs?
They still taste very similar to traditional cookies. The texture remains soft and chewy with a rich flavor. Most people will not notice the difference.
Can I make these cookies gluten-free?
You can try using a gluten-free all-purpose flour blend. Make sure it includes a binding agent like xanthan gum. Results may vary slightly in texture.
How do I make the cookies thicker?
Chilling the dough and slightly increasing the flour can help. Avoid flattening the dough before baking. This keeps the cookies soft and thick.
Can I double the recipe?
Yes, this recipe doubles easily without adjustments. Just make sure to mix thoroughly so ingredients are evenly combined. You may need to bake in batches.
A Simple Treat Everyone Can Enjoy
These Eggless Chocolate Chip Cookies (Soft & Chewy, No Egg) prove that you do not need eggs to create something truly delicious.
They are soft, rich, and easy to make, making them perfect for everyday baking or special moments. With simple ingredients and reliable results, this is a recipe you can return to whenever you want a comforting homemade treat.


