
If soft and chewy cookies aren’t really your thing, this one is for you. I personally love a thin, crispy cookie with a good snap, and it took me a few tries at home to get the texture just right.
I’ll walk you through exactly what to do to get that crunch from edge to edge without burning the bottoms.
A few small changes to the ingredients and bake time make all the difference, and once you try them this way, it’s hard to go back.

Why You’ll Love This Recipe
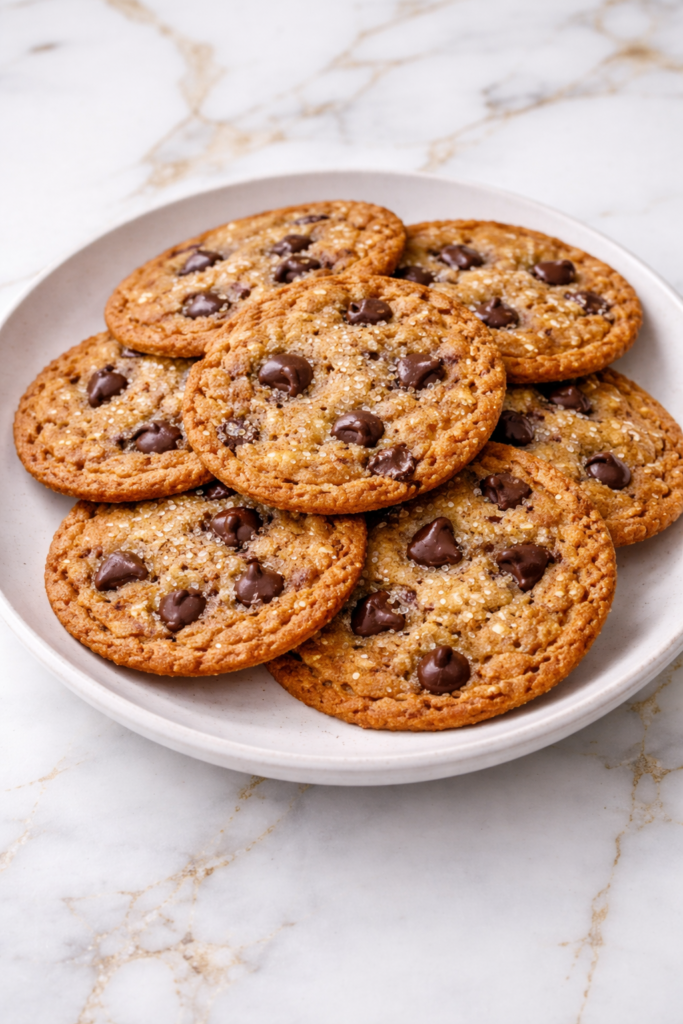
These Crispy Chocolate Chip Cookies (Thin & Crunchy Recipe) are perfect for anyone who enjoys a delicate, crisp texture rather than a thick and chewy bite. They spread beautifully in the oven, creating those signature thin edges that turn golden and slightly caramelized. Every bite delivers a satisfying crunch paired with rich chocolate flavor.
One of the best parts of this recipe is how easy it is to make with simple pantry staples. You do not need any special techniques to achieve that classic crisp texture. With just a few key tips, you can create cookies that look and taste like they came from a bakery.
These cookies are also incredibly versatile and great for sharing. They stack well, travel easily, and stay crisp for days, making them perfect for gatherings, lunchboxes, or simple everyday treats.
Serves: 22 people
This recipe yields about 22 thin cookies, depending on the size of your scoops. Because they are thinner, you naturally get more cookies from one batch.
You can make them slightly larger or smaller depending on your preference. Just remember that size will affect baking time, so adjust accordingly.
Ingredients You’ll Need
- 3/4 cup unsalted butter, melted and slightly cooled
- 1/2 cup granulated sugar
- 1/2 cup brown sugar, packed
- 1 large egg
- 1 teaspoon vanilla extract
- 1 1/2 cups all-purpose flour
- 1/2 teaspoon baking soda
- 1/4 teaspoon salt
- 1 cup semi-sweet chocolate chips
Pro Tips
Using melted butter is key to achieving thin and crispy cookies. It helps the dough spread more during baking, which creates those signature crisp edges.
Make sure the butter is not too hot when mixing. If it is too warm, it can affect the texture and cause the cookies to spread too quickly.
For extra crispiness, slightly flatten the dough before baking. This encourages even spreading and ensures a thin, uniform cookie.
Avoid adding too much flour, as this can make the cookies thicker and softer. Measure carefully using the scoop-and-level method.
Bake the cookies until they are golden brown all over, not just at the edges. This ensures they develop that perfect crunchy texture.
Allow the cookies to cool completely on a rack. They will continue to crisp up as they cool, which is essential for the final texture.
Tools You’ll Need
- Large mixing bowl
- Whisk or hand mixer
- Measuring cups and spoons
- Rubber spatula
- Baking sheets
- Parchment paper
- Cookie scoop or tablespoon
- Cooling rack
Substitutions and Variations
You can substitute the semi-sweet chocolate chips with dark or milk chocolate depending on your taste preference. Each option will slightly change the sweetness and richness of the cookies.
For a deeper flavor, try adding a tablespoon of milk to the dough. This can enhance spread and create an even lighter texture.
If you prefer a slightly nutty flavor, mix in chopped pecans or walnuts. They add a pleasant crunch that complements the crisp cookie base.
You can also sprinkle a small pinch of flaky sea salt on top before baking. This adds a sweet and salty contrast that enhances the chocolate flavor.
For a fun twist, consider adding a handful of toffee bits or coconut flakes. These small additions bring extra texture and make the cookies feel a bit more special.
Make Ahead Tips
This dough can easily be prepared ahead of time, making it a great option for busy schedules or planned baking days. You can mix the dough and store it covered in the refrigerator for up to 24 hours. This also helps deepen the flavor and slightly improves the texture.
If you prefer to freeze the dough, portion it into small scoops first for convenience. Place the dough balls on a baking sheet to freeze until firm, then transfer them to a freezer-safe container for up to 2 months.
When baking from chilled or frozen dough, you may need to let it sit at room temperature for a few minutes to soften slightly. Add an extra 1–2 minutes to the baking time to ensure the cookies spread and crisp properly.
Instructions
Step 1: Preheat and Prepare
Preheat your oven to 350°F and line baking sheets with parchment paper. This ensures even baking and prevents sticking.
Gather all your ingredients and tools before starting. This makes the process smoother and more enjoyable.
Step 2: Mix Butter and Sugars
In a large bowl, combine the melted butter, granulated sugar, and brown sugar. Whisk until the mixture is smooth and fully combined.
The mixture should look glossy and slightly thick. This step helps create the base for a crisp cookie.
Step 3: Add Egg and Vanilla
Add the egg and vanilla extract to the bowl. Mix until everything is fully incorporated.
The batter will become smoother and slightly lighter in color. This ensures even distribution of flavor.
Step 4: Add Dry Ingredients
Add the flour, baking soda, and salt to the mixture. Stir gently until just combined.
Be careful not to overmix, as this can affect the final texture. The dough should be soft and slightly loose.
Step 5: Fold in Chocolate Chips
Add the chocolate chips and fold them into the dough using a spatula. Make sure they are evenly distributed.
You can reserve a few chips to place on top of each cookie. This gives a more polished, bakery-style appearance.
Step 6: Scoop and Flatten
Use a tablespoon or cookie scoop to portion the dough onto the prepared baking sheets. Leave enough space between each portion for spreading.
Gently flatten each dough ball with your fingers or the back of a spoon. This helps create thin, even cookies.
Step 7: Bake Until Golden
Bake for 10–12 minutes, or until the cookies are evenly golden brown. The edges and centers should both be lightly browned for the best crunch.
Keep a close eye during the last few minutes. The cookies can quickly go from perfectly crisp to overbaked.
Step 8: Cool Completely
Remove the cookies from the oven and let them rest on the baking sheet for a few minutes. This allows them to firm up slightly.
Transfer to a cooling rack and let them cool completely. They will continue to crisp as they cool, which is essential for the final texture.
Serving Suggestions
These cookies are perfect served alongside a glass of cold milk for a classic and comforting pairing. The crisp texture contrasts nicely with the creamy drink.
They also pair wonderfully with coffee or tea, making them a great option for an afternoon treat. The light crunch complements warm beverages beautifully.
For a fun dessert idea, serve them with a scoop of ice cream on top or on the side. The crisp cookie adds a satisfying texture to a soft dessert.
You can also use them as a base for ice cream sandwiches. Their thin and sturdy texture makes them ideal for holding fillings.
Stack them in a jar or container for a simple and inviting presentation. They make a great addition to dessert tables or snack stations.
Pack them into lunchboxes or take them on the go. Their crisp texture holds up well, making them easy to transport.
Leftovers and Storage
Store leftover cookies in an airtight container at room temperature for up to 5 days. Keeping them sealed helps maintain their crisp texture.
If the cookies begin to soften, you can re-crisp them in a 300°F oven for a few minutes. Allow them to cool again to restore their crunch.
Avoid storing them in humid environments, as moisture can affect their texture. A dry, cool place works best.
You can also freeze baked cookies in a freezer-safe container for up to 2 months. Place parchment paper between layers to prevent sticking.
When ready to enjoy, let them thaw at room temperature. They will regain most of their crispness as they sit.
Nutrition and Benefits
- These cookies are lighter in texture compared to thick cookies, which can make them feel less heavy as a treat. This makes them a great option for those who prefer a crisp dessert.
- Making cookies at home allows you to control ingredient quality and sweetness levels. You can choose high-quality chocolate and adjust flavors as needed.
- The simple ingredient list makes this recipe accessible and easy to prepare. It is perfect for quick baking sessions without special ingredients.
- Their thin structure means portion sizes can feel more flexible. You can enjoy one or two without feeling overly full.
- Baking these cookies can be a fun activity for families. The simple steps make it easy for kids to help and learn basic kitchen skills.
Recipe FAQ
Why are my cookies not crispy?
This usually happens if they were not baked long enough. Make sure the cookies are evenly golden brown before removing them from the oven. They will continue to crisp as they cool.
Can I make these cookies thicker?
Yes, but that will change the texture from crispy to soft or chewy. To keep them thin, avoid adding extra flour and always flatten the dough. The shape before baking matters.
Why did my cookies spread too much?
This can happen if the butter was too warm or if there is not enough flour. Make sure the butter is cooled slightly before mixing. You can also chill the dough briefly if needed.
Can I use salted butter?
Yes, but reduce or omit the added salt in the recipe. This helps keep the flavor balanced. The cookies will still turn out delicious.
How do I keep them crispy longer?
Store them in an airtight container in a dry place. Adding a small packet of food-safe silica or keeping them away from moisture helps. Avoid refrigerating them.
Can I add other mix-ins?
Yes, you can add nuts, toffee bits, or coconut flakes. Just be mindful not to overload the dough. Too many add-ins can affect spreading and texture.
Can I double the recipe?
Absolutely, this recipe doubles easily. Just make sure to mix thoroughly so everything is evenly combined. You may need to bake in batches.
The Perfect Crunch in Every Bite
These Crispy Chocolate Chip Cookies (Thin & Crunchy Recipe) are proof that simple ingredients can create something truly special.
They deliver a light, golden crunch with rich chocolate in every bite. Whether you are baking for family, friends, or just yourself, this recipe is one you will reach for whenever you crave that perfect crisp cookie.


