
A little salt on top of a chocolate chip cookie might sound simple, but it completely changes the way it tastes.
I tried it at home after noticing it on cookies from a local bakery, and the sweet and salty combination was better than I expected.
I’ll walk you through how to get that balance just right so the salt brings out the chocolate flavor without overpowering the cookie.
It’s a small touch that makes a big difference, and once you try it this way, a plain cookie just won’t feel the same.

Why You’ll Love This Recipe
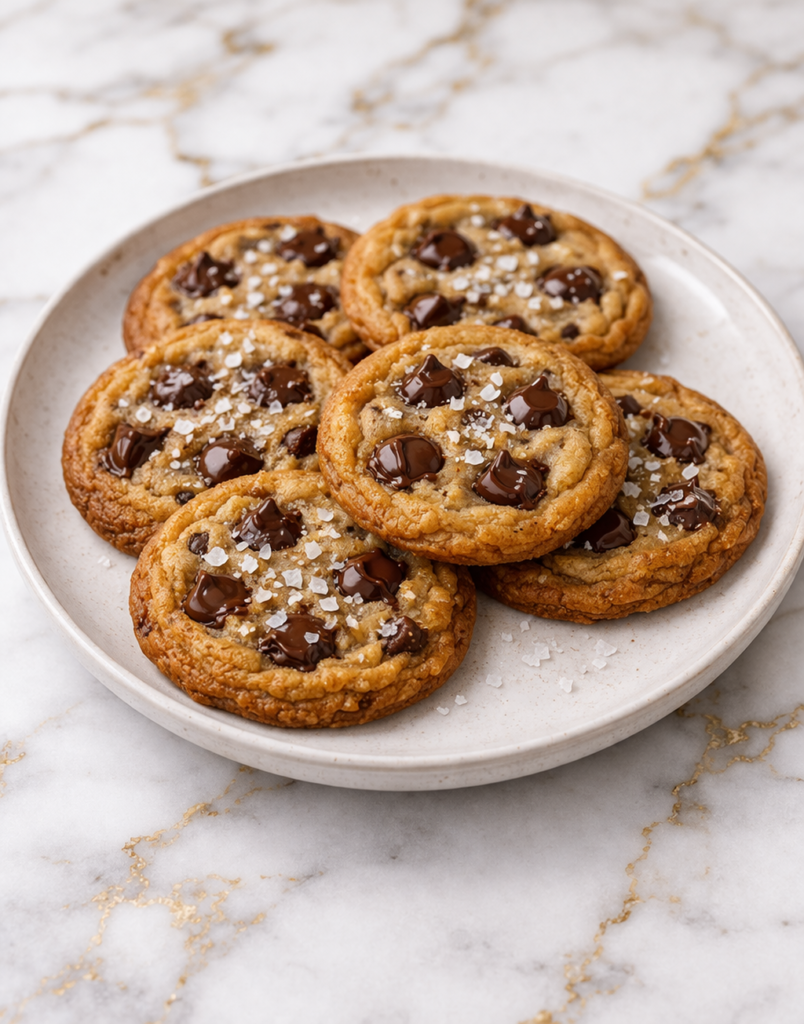
These Salted Chocolate Chip Cookies (Sweet & Salty Recipe) offer the perfect balance of flavors in every bite. The sweetness of the cookie dough and chocolate is enhanced by a light sprinkle of flaky sea salt, creating a contrast that makes the cookies even more satisfying. It is a simple addition that makes a big difference.
Another reason to love this recipe is how approachable it is. The steps are straightforward, and the ingredients are easy to find, making it perfect for both beginner and experienced bakers. You can create bakery-style cookies at home without any complicated techniques.
These cookies are also incredibly versatile and crowd-pleasing. They are perfect for family desserts, gatherings, or even gifting. The combination of sweet and salty flavors appeals to a wide range of tastes, making them a reliable favorite.
Serves: 20 people
This recipe yields about 20 medium-sized cookies, depending on how you portion the dough. They are perfect for sharing or enjoying over a few days.
If you prefer larger cookies, you can make fewer portions and slightly increase the baking time. Smaller cookies can also be made by reducing the size and adjusting the time accordingly.
Ingredients You’ll Need
- 1 cup (2 sticks) unsalted butter, softened
- 3/4 cup brown sugar, packed
- 1/2 cup granulated sugar
- 2 large eggs
- 2 teaspoons vanilla extract
- 2 1/4 cups all-purpose flour
- 1 teaspoon baking soda
- 1/2 teaspoon salt
- 1 1/2 cups semi-sweet chocolate chips
- Flaky sea salt, for topping
Pro Tips
Use high-quality flaky sea salt rather than regular table salt for the topping. It provides a better texture and a more balanced salty finish.
Make sure your butter is softened but not melted. This helps create a smooth dough and contributes to a soft, chewy texture.
Chilling the dough for at least 30 minutes helps prevent the cookies from spreading too much. It also enhances the flavor.
Do not overmix the dough once the flour is added. Mixing just until combined keeps the cookies tender.
For a bakery-style look, press a few extra chocolate chips on top of each dough ball before baking. This gives the cookies a more polished appearance.
Sprinkle the flaky sea salt on top immediately after baking. This allows it to stick while the cookies are still warm.
Tools You’ll Need
- Large mixing bowl
- Hand mixer or stand mixer
- Measuring cups and spoons
- Rubber spatula
- Baking sheets
- Parchment paper
- Cookie scoop or tablespoon
- Cooling rack
Substitutions and Variations
You can use dark chocolate chips instead of semi-sweet for a deeper, less sweet flavor. This pairs especially well with the salty topping.
For a sweeter version, try milk chocolate chips or a mix of milk and semi-sweet. This creates a more balanced sweetness.
If you want to add texture, mix in chopped nuts such as walnuts or pecans. They provide a nice contrast to the soft cookie.
You can also add a pinch of espresso powder to enhance the chocolate flavor. It deepens the overall taste without adding a coffee flavor.
For a unique twist, try adding caramel bits to the dough. The sweet caramel pairs beautifully with the salty finish.
Make Ahead Tips
This cookie dough is perfect for preparing ahead of time, which makes baking even more convenient. You can mix the dough and store it covered in the refrigerator for up to 72 hours. This resting time enhances the flavor and helps create a richer, more developed taste.
If you want to freeze the dough, scoop it into individual portions first for easy use later. Place the dough balls on a baking sheet to freeze until firm, then transfer them to a freezer-safe container for up to 2 months.
When baking from chilled or frozen dough, you can place the dough directly onto the baking sheet. Simply add an extra 1–3 minutes to the baking time and watch for golden edges.
Instructions
Step 1: Preheat and Prepare
Preheat your oven to 350°F and line baking sheets with parchment paper. This helps ensure even baking and easy cleanup.
Gather and measure all your ingredients ahead of time. This keeps the process smooth and organized.
Step 2: Cream Butter and Sugars
In a large mixing bowl, combine the softened butter, brown sugar, and granulated sugar. Mix until smooth and creamy.
This step creates the base for a soft and chewy cookie. Make sure everything is well incorporated.
Step 3: Add Eggs and Vanilla
Add the eggs one at a time, mixing well after each addition. Then stir in the vanilla extract until fully incorporated.
The mixture should look smooth and slightly fluffy. This helps ensure even texture in the cookies.
Step 4: Combine Dry Ingredients
Add the flour, baking soda, and salt to the bowl. Mix gently until just combined.
Avoid overmixing, as this can make the cookies dense. The dough should be soft and slightly thick.
Step 5: Fold in Chocolate Chips
Add the chocolate chips and fold them into the dough using a spatula. Make sure they are evenly distributed.
You can reserve a few chips to press onto the tops of the cookies for a more finished look.
Step 6: Scoop and Shape
Use a cookie scoop or tablespoon to portion the dough into evenly sized balls. Place them on the prepared baking sheets, leaving space between each.
If desired, gently press the tops slightly. This helps create even baking.
Step 7: Bake the Cookies
Bake for 10–12 minutes, or until the edges are lightly golden and set. The centers should still look soft.
Keep a close eye on the cookies during the final minutes. Overbaking can make them lose their soft texture.
Step 8: Add Sea Salt and Cool
Remove the cookies from the oven and immediately sprinkle a small pinch of flaky sea salt on top of each one. The warmth helps the salt stick and enhances the flavor.
Let the cookies rest on the baking sheet for 5 minutes before transferring to a cooling rack. This allows them to set properly.
Serving Suggestions
These cookies are best served slightly warm so the chocolate remains soft and melty. The contrast between sweet chocolate and flaky salt is especially enjoyable when fresh.
They pair beautifully with a glass of cold milk, creating a classic and comforting combination. The salt enhances the sweetness of the drink as well.
For a more indulgent dessert, serve them with a scoop of vanilla or caramel ice cream. The sweet and salty flavors complement creamy textures perfectly.
They also go well with coffee or espresso, making them ideal for an afternoon treat. The rich flavors pair nicely with warm beverages.
Serve them on a platter for gatherings or celebrations. Their elevated flavor makes them stand out among other desserts.
They can also be packaged as a thoughtful homemade gift. The balance of flavors makes them feel a bit more special.
Leftovers and Storage
Store leftover cookies in an airtight container at room temperature for up to 4 days. This helps maintain their soft and chewy texture.
If you prefer, refrigerate them for up to a week. Allow them to come to room temperature before serving for the best flavor.
To freeze baked cookies, place them in a freezer-safe container with parchment paper between layers. They can be stored for up to 2 months.
When ready to enjoy, thaw at room temperature or warm them briefly in the microwave. This helps restore their soft texture.
Keep cookies sealed tightly to prevent them from drying out. Proper storage ensures they stay fresh longer.
Nutrition and Benefits
- These cookies offer a satisfying balance of sweet and salty flavors, which can help curb cravings with smaller portions. The contrast makes each bite more enjoyable.
- Making cookies at home allows you to control the quality of ingredients used. You can choose better chocolate and adjust sweetness as needed.
- The use of simple pantry ingredients makes this recipe accessible and easy to prepare. It is perfect for everyday baking.
- Baking at home can be a relaxing and rewarding activity. It provides an opportunity to create something enjoyable from scratch.
- Sharing homemade cookies can create meaningful moments with family and friends. It turns a simple dessert into a memorable experience.
Recipe FAQ
Why add salt on top of cookies?
Flaky sea salt enhances the sweetness and brings out the chocolate flavor. It creates a balanced taste that feels more complex. A small amount goes a long way.
Can I skip the sea salt?
Yes, you can skip it if you prefer a traditional cookie. The cookies will still be delicious. However, the salt adds a unique flavor contrast.
Can I chill the dough?
Yes, chilling the dough helps improve texture and flavor. It also prevents the cookies from spreading too much. Even 30 minutes can make a difference.
What type of salt should I use?
Flaky sea salt is best for topping because of its texture and mild flavor. Avoid using regular table salt on top. It can taste too strong.
Why are my cookies too flat?
This can happen if the butter is too soft or the dough was not chilled. Try chilling the dough before baking. Measuring ingredients correctly also helps.
Can I use different chocolate?
Yes, you can use dark, milk, or even white chocolate. Each option changes the flavor slightly. Choose based on your preference.
How do I know when the cookies are done?
Look for lightly golden edges with soft centers. The cookies may appear slightly underbaked in the middle. They will firm up as they cool.
The Perfect Balance of Sweet and Salty
These Salted Chocolate Chip Cookies (Sweet & Salty Recipe) bring together the best of both worlds in one simple dessert.
They are soft, rich, and perfectly balanced with just a hint of salt to enhance every bite.
Whether you are baking for family or sharing with friends, this recipe is one that always delivers something special.


