
I started keeping a batch of cookie dough in my freezer so I could bake just a few cookies whenever I wanted them without starting from scratch.
This recipe is made for exactly that — you mix the dough once, freeze it in portions, and bake straight from frozen whenever a craving hits.
I’ll walk you through how to prep and store the dough the right way so it stays fresh and bakes up soft and chewy every time. It’s one of those small habits that makes homemade cookies a lot more doable on a busy day.
Why You’ll Love This Recipe
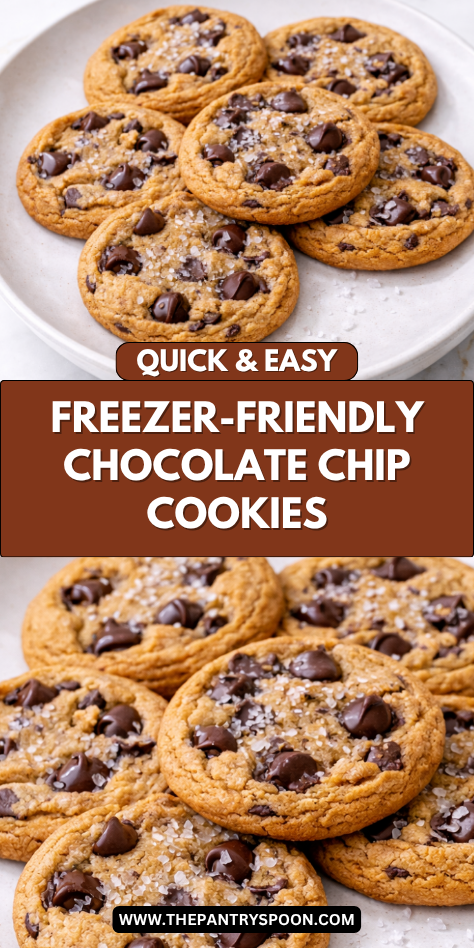
These Freezer-Friendly Chocolate Chip Cookies (Make Ahead Dough) are perfect for anyone who loves fresh cookies without the extra work every time. The dough can be prepared in advance and stored, so you can bake only what you need when you need it. This makes it a great solution for busy families or anyone who enjoys planning ahead.
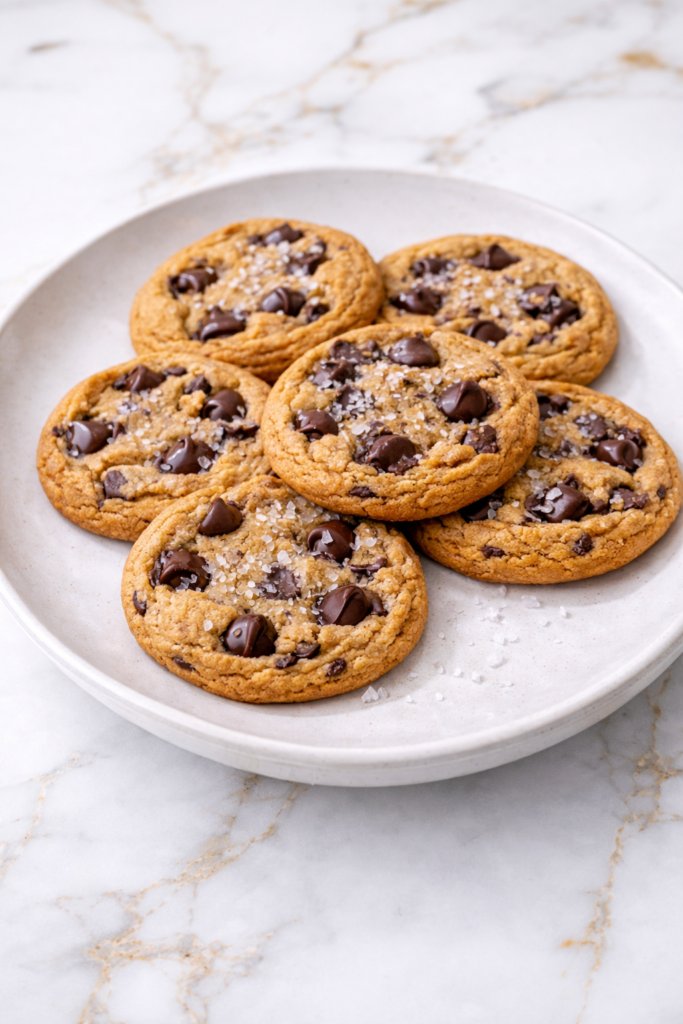
The flavor and texture are just as good as freshly made dough. The cookies come out soft in the center with slightly crisp edges and plenty of melted chocolate in every bite. Freezing the dough does not compromise the quality, which makes this recipe both practical and delicious.
Another reason to love this recipe is how flexible it is. You can portion the dough into different sizes, customize the mix-ins, and adjust the baking time depending on your preferences. It is a reliable base recipe that fits into any schedule.
Serves: 24 people
This recipe makes about 24 medium-sized cookies, depending on how you portion the dough. It is perfect for stocking your freezer with enough dough to last multiple baking sessions.
You can also divide the dough into smaller portions if you prefer baking just a few cookies at a time. This flexibility makes it ideal for both small households and larger gatherings.
Ingredients You’ll Need
- 1 cup (2 sticks) unsalted butter, softened
- 3/4 cup brown sugar, packed
- 1/2 cup granulated sugar
- 2 large eggs
- 2 teaspoons vanilla extract
- 2 1/4 cups all-purpose flour
- 1 teaspoon baking soda
- 1/2 teaspoon salt
- 1 1/2 cups semi-sweet chocolate chips
Pro Tips
For the best texture, make sure your butter is softened but not melted. This helps create a dough that is easy to work with and results in soft, chewy cookies.
When measuring flour, use the scoop-and-level method to avoid adding too much. Too much flour can make the cookies dense instead of tender.
Mix the dough just until the ingredients are combined. Overmixing can affect the texture and make the cookies less soft.
Chilling the dough before freezing helps it firm up and makes portioning easier. It also enhances the flavor slightly.
Use a cookie scoop to portion the dough evenly. This ensures consistent baking and makes it easier to grab individual portions from the freezer.
Label your container with the date and baking instructions. This makes it easy to use the dough later without guessing.
Tools You’ll Need
- Large mixing bowl
- Hand mixer or stand mixer
- Measuring cups and spoons
- Rubber spatula
- Baking sheet
- Parchment paper
- Cookie scoop
- Freezer-safe container or bag
- Cooling rack
Substitutions and Variations
You can substitute semi-sweet chocolate chips with dark or milk chocolate depending on your taste preference. Each option gives the cookies a slightly different flavor profile.
For added texture, mix in chopped nuts such as walnuts or pecans. They pair well with the chocolate and add a bit of crunch.
If you prefer a richer flavor, try adding a mix of chocolate chips and chocolate chunks. This creates pockets of melted chocolate throughout the cookies.
You can also add a pinch of cinnamon for a subtle warmth. It enhances the overall flavor without overpowering the classic taste.
For a dairy-free version, use plant-based butter and dairy-free chocolate chips. The dough will still freeze well and bake beautifully.
Make Ahead Tips
This recipe is designed specifically for making ahead, which makes it incredibly practical for busy households. After preparing the dough, you can portion it into individual cookie scoops and place them on a lined baking sheet. Let them chill in the refrigerator for about 30–60 minutes before transferring to the freezer.
Once the dough portions are firm, move them into a freezer-safe bag or container. This prevents them from sticking together and makes it easy to grab just a few at a time.
You can store the dough in the freezer for up to 2 months without sacrificing flavor or texture. Label the container with the date and baking instructions so everything is ready when you need it.
Instructions
Step 1: Prepare the Dough
In a large mixing bowl, combine the softened butter, brown sugar, and granulated sugar. Mix until smooth and creamy.
This step creates the base for a soft and chewy cookie. Make sure the mixture is well blended before moving on.
Step 2: Add Eggs and Vanilla
Add the eggs one at a time, mixing well after each addition. Stir in the vanilla extract until fully incorporated.
The mixture should look smooth and slightly fluffy. This helps create a consistent texture in the cookies.
Step 3: Mix in Dry Ingredients
Add the flour, baking soda, and salt to the bowl. Mix gently until just combined and no dry streaks remain.
Avoid overmixing at this stage. The dough should be soft and easy to handle.
Step 4: Fold in Chocolate Chips
Add the chocolate chips and fold them into the dough using a spatula. Make sure they are evenly distributed.
You can reserve a few chips to press on top later. This gives the cookies a more polished appearance.
Step 5: Portion the Dough
Use a cookie scoop to divide the dough into evenly sized portions. Place them on a parchment-lined baking sheet.
Keep the portions slightly spaced apart. This step makes freezing and baking more convenient later.
Step 6: Chill and Freeze
Place the baking sheet in the refrigerator for 30–60 minutes until the dough is firm. Then transfer the dough balls to a freezer-safe container.
Store in the freezer for up to 2 months. This keeps the dough fresh and ready to use at any time.
Step 7: Bake from Frozen
Preheat your oven to 350°F and line a baking sheet with parchment paper. Place the frozen dough balls onto the sheet, leaving space between each.
Bake for 11–13 minutes, adding a couple of extra minutes compared to fresh dough. The edges should be golden while the centers remain soft.
Step 8: Cool and Serve
Remove the cookies from the oven and let them rest on the baking sheet for 5 minutes. This helps them set without losing their soft centers.
Transfer to a cooling rack and allow them to cool slightly before serving. Enjoy warm or at room temperature.
Serving Suggestions
These cookies are best served warm with a glass of cold milk for a classic and comforting treat. The fresh-from-the-oven texture makes them especially satisfying.
They also pair well with coffee or tea, making them perfect for an afternoon break. The rich chocolate flavor complements warm drinks beautifully.
For a more indulgent dessert, serve them with a scoop of vanilla ice cream. The contrast between warm cookies and cold ice cream creates a delicious combination.
You can crumble them over ice cream or yogurt for added texture. This is a simple way to elevate a basic dessert.
Serve them at gatherings or events as a fresh-baked treat. Being able to bake them on demand makes them ideal for entertaining.
They also make thoughtful homemade gifts. Bake a small batch and share them with friends or neighbors.
Leftovers and Storage
Store baked cookies in an airtight container at room temperature for up to 4 days. This helps maintain their soft and chewy texture.
If you prefer, you can refrigerate them for up to a week. Allow them to come to room temperature before serving for the best flavor.
To freeze baked cookies, place them in a freezer-safe container with parchment between layers. They can be stored for up to 2 months.
When ready to enjoy, thaw at room temperature or warm them in the microwave for 10–15 seconds. This restores their fresh-baked softness.
Keep the dough stored separately in the freezer for the best results. Baking fresh cookies as needed provides the best texture and flavor.
Nutrition and Benefits
- This recipe allows you to bake only what you need, which can help with portion control. It reduces the temptation of having a full batch ready at once.
- Freezing dough helps reduce food waste and makes meal planning easier. You always have a dessert option available without extra preparation.
- Making cookies at home allows you to control ingredient quality and sweetness. You can adjust the recipe to suit your preferences.
- The combination of simple ingredients creates a comforting and satisfying treat. Enjoyed in moderation, it fits into a balanced lifestyle.
- Baking fresh cookies on demand can create special moments with family. It turns a simple dessert into a warm and enjoyable experience.
Recipe FAQ
Can I bake the dough without freezing it?
Yes, you can bake the dough right away if you prefer. The cookies will turn out just as delicious. Freezing simply adds convenience.
How long does the dough last in the freezer?
The dough can be stored for up to 2 months. For best flavor, try to use it within that time. Proper storage helps maintain quality.
Do I need to thaw the dough before baking?
No, you can bake the dough directly from frozen. Just add a couple of extra minutes to the baking time. This keeps the process simple.
Why are my cookies spreading too much?
This can happen if the butter was too soft or the dough was not chilled. Make sure to chill the dough before freezing. Proper measuring also helps.
Can I use different mix-ins?
Yes, you can add nuts, chocolate chunks, or even dried fruit. Just keep the total amount balanced. This ensures the dough holds together well.
Can I double the recipe?
Absolutely, this recipe doubles easily. Just make sure to mix everything thoroughly. You may need extra freezer space.
How do I know when the cookies are done?
Look for lightly golden edges with soft centers. The cookies may appear slightly underbaked in the middle. They will firm up as they cool.
Fresh Cookies Anytime You Want
These Freezer-Friendly Chocolate Chip Cookies (Make Ahead Dough) make it easy to enjoy homemade treats whenever the craving strikes.
With just a little preparation, you can have warm, fresh cookies ready in minutes.
It is a simple, practical recipe that brings both convenience and comfort to your kitchen.


