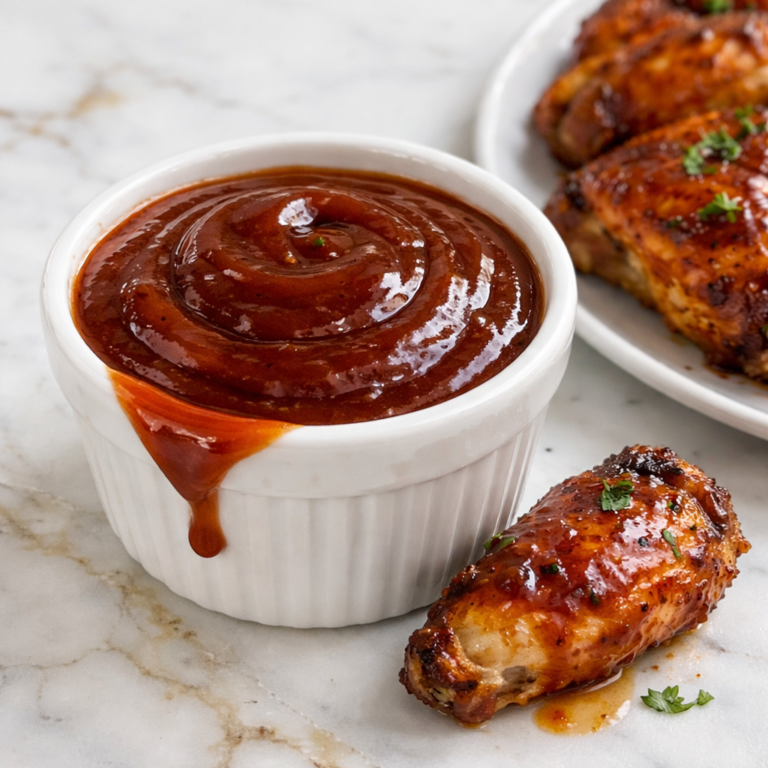
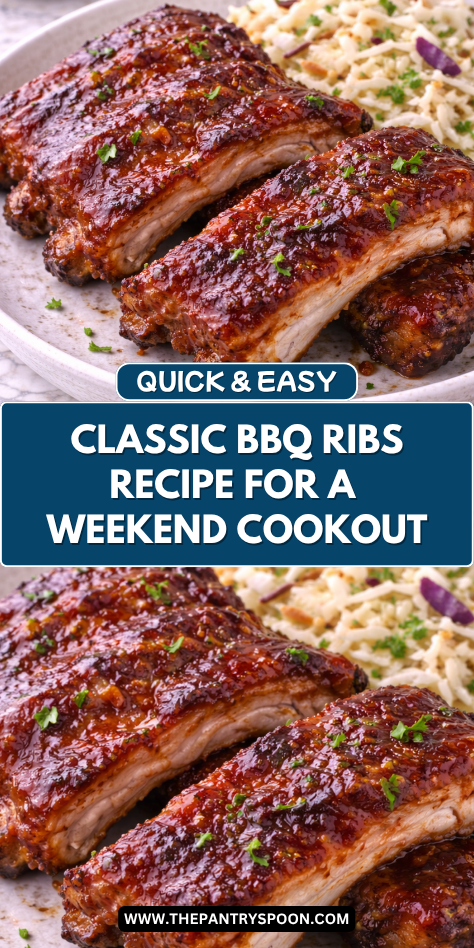
I always keep a good rib recipe nearby because some meals are worth slowing down for. Classic BBQ Ribs bring that rich, smoky, tender flavor people look forward to, and they make any dinner feel a little more special.
When I want something hearty and comforting, this is one of my favorite choices. The kind of meal that gets everyone reaching for extra napkins usually ends well.
I love that ribs can feel festive without being difficult to make at home. With a simple seasoning blend, steady cooking time, and a good barbecue sauce, the oven does most of the work.
The meat turns tender, the edges caramelize, and the kitchen smells amazing. Recipes like this remind me that homemade food can feel just as satisfying as restaurant favorites.
Why You’ll Love This Recipe
Classic BBQ Ribs are tender, flavorful, and coated in a sticky sauce that caramelizes beautifully. The dry rub adds depth, while slow cooking helps the meat become juicy and easy to bite. Every bite feels rich and comforting.
This recipe is also very approachable for home cooks. You do not need a smoker or complicated equipment to get great results. The oven creates reliable tenderness, and the final glaze gives that classic barbecue finish.
I also appreciate how family-friendly ribs can be. Serve them with simple sides, and dinner feels complete. They are great for weekend meals, celebrations, or any time you want a crowd-pleasing main dish.
Serves: 6 people
This recipe serves about six people, depending on appetite and side dishes. For larger eaters, plan for about half a rack per person. If serving several sides, smaller portions usually go a long way.
Ingredients You’ll Need
For the Ribs
- 2 racks pork baby back ribs (about 4 to 5 pounds total)
- 1 tablespoon olive oil
Dry Rub
- 2 tablespoons brown sugar
- 1 tablespoon paprika
- 1 teaspoon smoked paprika
- 1 teaspoon garlic powder
- 1 teaspoon onion powder
- 1 teaspoon kosher salt
- 1/2 teaspoon black pepper
- 1/2 teaspoon chili powder
- 1/2 teaspoon dry mustard
BBQ Sauce Glaze
- 1 1/2 cups barbecue sauce
- 1 tablespoon honey
- 1 tablespoon apple cider vinegar
- 1 teaspoon Worcestershire sauce
Optional for Serving
- Extra barbecue sauce
- Chopped parsley
- Pickles or coleslaw
Pro Tips
- Remove the thin membrane from the back of the ribs before seasoning. This helps the rub penetrate better and gives a more tender bite. Use a paper towel for a better grip when pulling it off.
- Let the ribs sit with the dry rub for at least 20 minutes before baking. If you have more time, refrigerate them for a few hours for deeper flavor. Even a short rest improves the final result.
- Bake the ribs covered first to trap moisture. This gentle steam helps tenderize the meat before the sauce is added. It is a key step for oven-baked ribs.
- Apply sauce near the end of cooking rather than at the start. Sugary sauces can burn if baked too long. Adding it later creates a glossy finish without bitterness.
- Use two layers of foil if wrapping tightly. This helps prevent leaks and keeps juices inside during the long bake.
- Let the ribs rest for a few minutes before slicing. Resting helps juices settle and makes serving cleaner and easier.
Tools You’ll Need
- Large rimmed baking sheet
- Heavy-duty aluminum foil
- Small mixing bowl
- Spoon or whisk
- Pastry brush
- Sharp knife
- Cutting board
- Measuring spoons and cups
- Tongs
- Oven mitts
Substitutions and Variations
Try Different Ribs
Use St. Louis-style ribs or spare ribs instead of baby back ribs. They may need a little more cooking time but stay delicious and tender.
Make It Spicier
Add cayenne pepper, hot sauce, or spicy barbecue sauce. This gives the ribs more heat while keeping the classic flavor.
Use a Sugar-Free Option
Choose sugar-free barbecue sauce and reduce the brown sugar in the rub. This keeps the recipe flavorful with less sweetness.
Change the Flavor Style
Use honey mustard sauce, smoky chipotle sauce, or Carolina-style sauce. A different glaze can make the same recipe feel brand new.
Make It Lighter
Serve smaller rib portions with extra vegetables or salad on the side. This keeps the meal balanced while still enjoying the rich main dish.

Make Ahead Tips
Classic BBQ Ribs are a smart make-ahead meal because the long cooking time can be split into easy steps. You can season the ribs with the dry rub up to 24 hours ahead and keep them covered in the refrigerator. This gives the spices more time to flavor the meat and makes prep faster the next day.
You can also bake the ribs until tender earlier in the day, then cool and refrigerate them. When ready to serve, brush with sauce and finish them in the oven or on the grill until hot and caramelized. This is especially helpful when cooking for guests.
Leftover cooked ribs can also be repurposed easily. Slice the meat off the bone for sandwiches, tacos, or baked potatoes later in the week.
Instructions
Step 1: Preheat the Oven
Heat the oven to 300°F. Low, steady heat helps the ribs become tender without drying out.
Line a large rimmed baking sheet or roasting pan with foil for easier cleanup.
Step 2: Prepare the Ribs
Remove the ribs from packaging and pat them dry with paper towels. Turn the racks over and locate the thin membrane on the bone side.
Slide a knife under one corner of the membrane, grip it with a paper towel, and pull it away. Discard the membrane.
Step 3: Make the Dry Rub
In a small bowl, combine brown sugar, paprika, smoked paprika, garlic powder, onion powder, salt, black pepper, chili powder, and dry mustard.
Stir until evenly mixed and no lumps remain.
Step 4: Season the Ribs
Rub the ribs lightly with olive oil on both sides. Sprinkle the dry rub generously over each rack and press it onto the surface.
Use all of the seasoning for full flavor. Let the ribs rest for 20 minutes at room temperature.
Step 5: Wrap and Bake
Place the ribs meat-side up on the prepared baking sheet. Cover tightly with foil, sealing the edges well.
Bake for 2 1/2 to 3 hours, depending on thickness. The meat should feel tender when pierced with a fork.
Step 6: Make the Sauce Glaze
During the last part of baking, combine barbecue sauce, honey, apple cider vinegar, and Worcestershire sauce in a bowl.
Stir until smooth. This mixture gives a balanced sweet, tangy, glossy finish.
Step 7: Uncover the Ribs
Carefully remove the hot pan from the oven and open the foil away from your face to avoid steam. Transfer any juices from the foil to a bowl if desired.
The ribs should be tender and slightly pulled back from the bones.
Step 8: Brush with Sauce
Increase the oven temperature to 425°F or switch to broil on low. Brush a generous layer of sauce glaze over the tops of the ribs.
Return the ribs uncovered to the oven.
Step 9: Caramelize the Finish
Cook for 8 to 12 minutes, watching closely, until the sauce bubbles and darkens slightly. Add a second coat of sauce during the last few minutes if desired.
Be careful not to let the sugars burn.
Step 10: Rest and Slice
Remove the ribs from the oven and let them rest for 10 minutes. This helps the juices settle before slicing.
Place on a cutting board and slice between the bones with a sharp knife.
Step 11: Serve
Transfer the ribs to a platter and drizzle with extra sauce if desired. Garnish with parsley or serve with pickles and slaw.
Serve warm while the glaze is sticky and fresh.
Serving Suggestions
Serve Classic BBQ Ribs with creamy coleslaw and baked beans for a traditional barbecue plate. The cool slaw balances the rich ribs nicely.
Cornbread or dinner rolls are always welcome alongside ribs. They help soak up extra sauce and complete the meal.
Roasted corn on the cob adds sweetness and color to the table. It is especially good for summer gatherings.
For a lighter plate, serve ribs with a crisp salad or grilled vegetables. Fresh sides help balance the richness.
Potato salad or macaroni salad make great choices for cookouts and family parties. These classic sides pair naturally with barbecue flavors.
Leftover rib meat can also be served over rice bowls or tucked into sandwiches the next day.
Leftovers and Storage
Allow leftover ribs to cool before storing. Wrap tightly in foil or place in airtight containers and refrigerate for up to four days.
To reheat, place ribs in a baking dish with a splash of water or extra sauce. Cover with foil and warm at 300°F for 20 to 25 minutes, or until heated through.
For quicker reheating, microwave individual portions in short intervals, covered loosely. The oven gives better texture and keeps the meat more tender.
Ribs freeze well for up to two months. Wrap portions tightly, then place in freezer-safe bags or containers.
Thaw overnight in the refrigerator before reheating. Add fresh sauce after warming if you want the glaze to taste bright again.
Nutrition and Benefits
- Pork ribs provide protein, which helps make the meal filling and satisfying.
- Oven-baking at home allows you to control the sauce, sodium, and sweetness more easily than many restaurant versions.
- Serving ribs with vegetables or salad can create a balanced family meal.
- Homemade dry rubs let you adjust spice levels for children or personal taste.
- Leftover meat can be reused in sandwiches, tacos, or bowls to reduce waste.
- A small portion can feel satisfying because the flavor is rich and hearty.
Recipe FAQ
Can I make Classic BBQ Ribs without removing the membrane?
Yes, but removing it is recommended. The membrane can stay chewy and block seasoning from reaching the meat. Taking it off usually gives better texture.
How do I know when the ribs are done?
The meat should be tender when pierced and slightly pulled back from the bone ends. It should bend easily when lifted with tongs. Avoid cooking until the meat completely falls apart.
Can I finish these on the grill?
Absolutely. After baking, brush with sauce and grill over medium heat for a few minutes per side. This adds smoky flavor and nice charred edges.
What type of barbecue sauce works best?
Use any sauce your family enjoys. Sweet, smoky, spicy, or tangy sauces all work well. Homemade or store-bought are both good options.
Can I use beef ribs instead?
Yes, but beef ribs are larger and usually need more cooking time. Watch tenderness rather than following the same timing exactly.
Why are my ribs tough?
They likely need more time at low heat. Ribs become tender slowly as connective tissue breaks down. Covering tightly during baking also helps.
Can I make these less sweet?
Yes, use a tangier sauce and reduce or skip the honey in the glaze. You can also lower the brown sugar in the rub. The ribs will still be flavorful.
Conclusion
Classic BBQ Ribs are the kind of meal that feels generous, comforting, and worth the little extra time. With simple steps and dependable results, they bring rich flavor and tender texture right from your own oven.
Whether for a family dinner, weekend treat, or special gathering, these ribs are always a welcome centerpiece. Keep this recipe close for those days when only sticky, tender barbecue will do.