
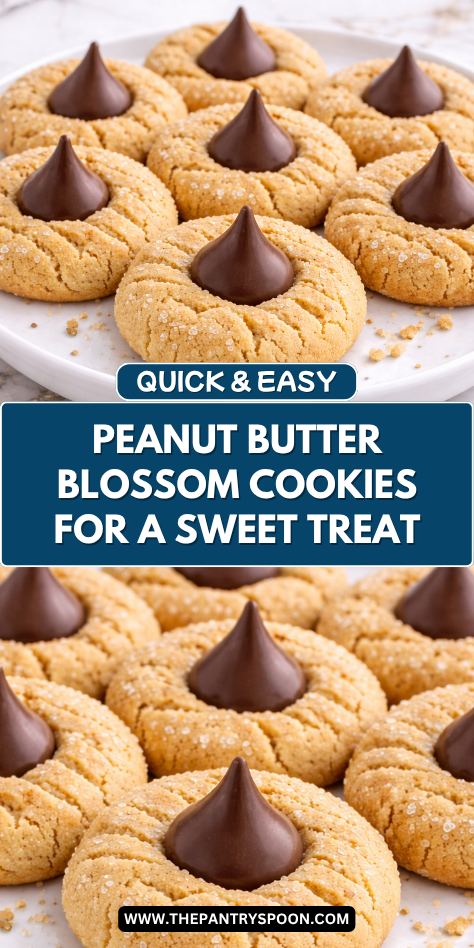
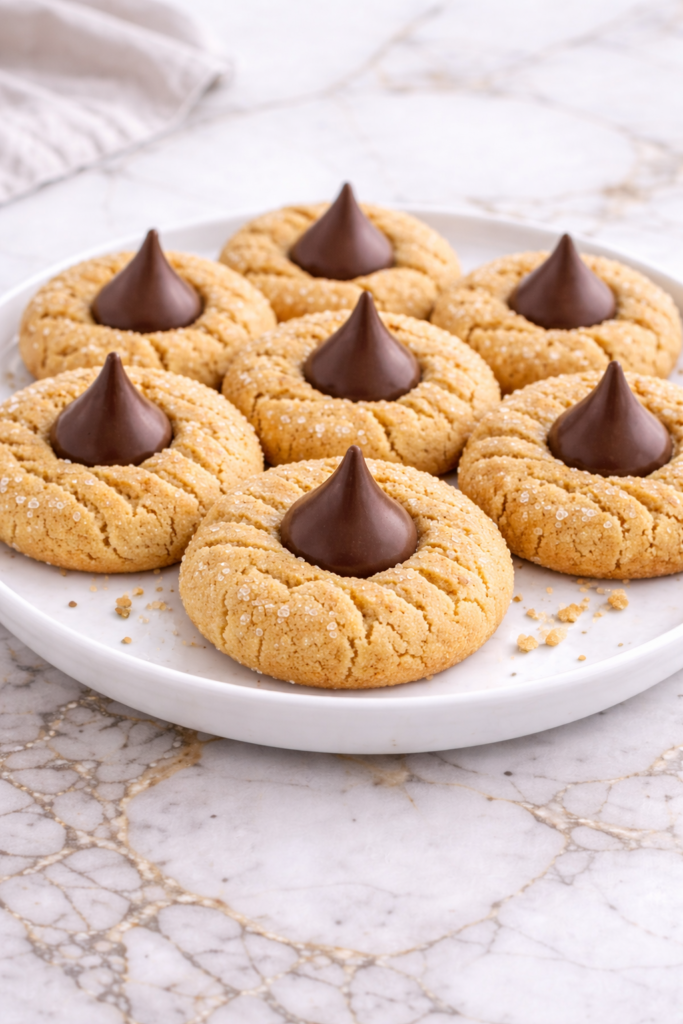
I always make room for classic cookies that bring people together, and Peanut Butter Blossom Cookies are one of those recipes. They are soft, sweet, and topped with a chocolate kiss that makes every tray feel a little special.
When I want something dependable for holidays, bake sales, or everyday treats, this is a recipe I trust every time. It has a familiar charm that never goes out of style.
I love how simple these cookies are to make with pantry basics and a little chocolate on top. The peanut butter dough bakes soft and tender, while the chocolate settles into the warm center perfectly.
They are fun to bake with children and just as welcome at grown-up gatherings. A recipe this beloved always deserves a place in the kitchen.
Why You’ll Love This Recipe
Peanut Butter Blossom Cookies are soft, chewy, and full of comforting peanut butter flavor. The chocolate center adds sweetness and makes each cookie feel complete. It is the kind of classic combination people always recognize and enjoy.
This recipe is also wonderfully beginner-friendly. The dough is easy to mix, shape, and roll in sugar. Even first-time bakers can get reliable results.
I also like how perfect these cookies are for sharing. They look festive on trays, travel well, and stay soft for days. That makes them ideal for holidays, school events, and family gatherings.
Serves: 30 people
This recipe makes about 30 medium cookies, depending on scoop size. Smaller cookies can stretch the batch further, while larger cookies make a bakery-style treat. They are rich enough that one or two often feels just right.
Ingredients You’ll Need
For the Cookie Dough
- 1/2 cup unsalted butter, softened
- 1/2 cup creamy peanut butter
- 1/2 cup granulated sugar
- 1/2 cup light brown sugar, packed
- 1 large egg
- 1 tablespoon milk
- 1 teaspoon vanilla extract
- 1 1/2 cups all-purpose flour
- 1 teaspoon baking soda
- 1/4 teaspoon salt
For Rolling and Topping
- 1/4 cup granulated sugar for rolling
- 30 chocolate kiss candies, unwrapped
Pro Tips
- Use room temperature butter for easier mixing and a smoother dough. Soft butter creams better with the sugars and helps create tender cookies.
- Measure flour carefully by spooning it into the cup and leveling it off. Too much flour can make the cookies dry or crumbly.
- Chill the dough for 20 to 30 minutes if it feels sticky. Slightly chilled dough is easier to roll and often bakes thicker cookies.
- Unwrap all chocolate kisses before the cookies come out of the oven. This makes it easier to press them in while the cookies are still warm.
- Do not overbake. The cookies should look set around the edges but still soft in the center. They finish setting as they cool.
- Press the chocolate into the cookies gently. A firm but careful press creates the classic cracked edges without flattening the cookie too much.
Tools You’ll Need
- Large mixing bowl
- Medium mixing bowl
- Hand mixer or stand mixer
- Measuring cups and spoons
- Rubber spatula
- Baking sheets
- Parchment paper or silicone baking mats
- Cookie scoop or spoon
- Cooling rack
Substitutions and Variations
Change the Chocolate
Use mini peanut butter cups or chocolate squares instead of kisses. This keeps the classic style with a fun twist.
Make It Dairy-Free
Use plant-based butter and dairy-free chocolate candies. The cookies still bake soft and delicious.
Try a Different Nut Butter
Use almond butter or sunflower seed butter if needed. The flavor changes slightly but the cookie remains comforting.
Add More Flavor
Mix in cinnamon, espresso powder, or a splash of maple extract. Small changes can make the cookies feel new.
Make It Extra Special
Roll the dough in colored sugar or coarse sparkling sugar. This gives the cookies a festive look for holidays and parties.
Make Ahead Tips
Peanut Butter Blossom Cookies are an excellent make-ahead recipe because both the dough and baked cookies store well. You can prepare the dough up to two days in advance, cover it tightly, and refrigerate until ready to bake. Chilled dough is often easier to scoop and shape.
You can also roll the dough into balls ahead of time and refrigerate or freeze them on a tray. When ready to bake, roll in sugar and bake straight from chilled or frozen, adding a minute or two if needed. This is especially helpful during holiday baking.
Baked cookies can be made several days early and stored in an airtight container. Add parchment between layers to protect the chocolate tops.
Instructions
Step 1: Preheat the Oven
Heat the oven to 375°F. Line baking sheets with parchment paper or silicone baking mats.
This helps the cookies bake evenly and release easily.
Step 2: Cream Butter and Sugars
In a large mixing bowl, beat the softened butter, peanut butter, granulated sugar, and brown sugar until light and creamy.
This usually takes 2 to 3 minutes with a hand mixer.
Step 3: Add Wet Ingredients
Add the egg, milk, and vanilla extract. Beat again until fully combined and smooth.
Scrape down the sides of the bowl if needed.
Step 4: Mix Dry Ingredients
In a separate bowl, whisk together the flour, baking soda, and salt.
This helps distribute the leavening evenly through the dough.
Step 5: Combine Wet and Dry Mixtures
Gradually add the dry ingredients to the peanut butter mixture. Mix on low speed or stir until a soft dough forms.
Do not overmix once the flour disappears.
Step 6: Chill if Needed
If the dough feels sticky or soft, chill it for 20 to 30 minutes. This step helps create thicker cookies and easier shaping.
If the dough is already firm enough, you can continue right away.
Step 7: Shape the Cookies
Scoop tablespoon-size portions of dough and roll into balls. Roll each ball in the extra granulated sugar.
Place on prepared baking sheets about 2 inches apart.
Step 8: Bake
Bake for 8 to 10 minutes. The cookies should look puffed and lightly golden around the edges.
The centers may still look soft, which is perfect.
Step 9: Add the Chocolate Kisses
Remove the baking sheets from the oven. Immediately press one unwrapped chocolate kiss into the center of each cookie.
The cookies will crack slightly around the edges, creating the classic blossom look.
Step 10: Cool Completely
Let the cookies cool on the baking sheet for 5 minutes. Then transfer them to a cooling rack.
Allow the chocolate to set fully before stacking or storing.
Step 11: Serve
Arrange on a tray or store in an airtight container. These cookies are delicious at room temperature.
They are especially nice with milk or coffee.
Serving Suggestions
Serve Peanut Butter Blossom Cookies on holiday trays with sugar cookies and brownies. Their classic shape adds instant charm.
Pair them with a cold glass of milk for an easy family treat. The peanut butter and chocolate combination feels timeless.
Add them to lunchboxes or snack plates for a homemade surprise. They travel well once fully cooled.
Serve with coffee or tea during afternoon visits. Their sweet, familiar flavor suits casual gatherings beautifully.
Wrap a stack in cellophane bags or tins for homemade gifts. They are always appreciated during the holidays.
For dessert boards, place them beside fruit and chocolate candies. They add variety and a nostalgic touch.
Leftovers and Storage
Store fully cooled Peanut Butter Blossom Cookies in an airtight container at room temperature for up to five days. Keep them in a cool, dry place so the chocolate stays firm.
Layer cookies with parchment paper if stacking. This helps protect the chocolate tops from smudging or sticking.
For longer storage, refrigerate the cookies for up to one week. Let them come to room temperature before serving for the softest texture.
These cookies also freeze well for up to two months. Freeze in airtight containers with parchment between layers.
Thaw at room temperature before serving. The flavor and texture hold up very nicely.
Nutrition and Benefits
- Peanut butter adds protein and rich flavor that helps the cookies feel satisfying.
- Homemade cookies allow better control over ingredients than many packaged treats.
- Portion-friendly cookies make serving and sharing simple.
- Baking at home can create meaningful family traditions and kitchen memories.
- The recipe uses common pantry staples, making it practical year-round.
- Cookies freeze well, which helps reduce waste and support make-ahead baking.
Recipe FAQ
Why did my cookies spread too much?
The dough may have been too warm or the butter too soft. Chilling the dough before baking often helps. Also measure flour carefully.
Can I use natural peanut butter?
Yes, but stir it very well first. Natural peanut butter can make the dough slightly softer or oilier depending on the brand.
Why did the chocolate melt too much?
The cookies were very hot when the kisses were added, which is normal. Let them cool undisturbed so the chocolate can firm back up.
Can I freeze the dough?
Yes, shape the dough into balls and freeze on a tray first. Transfer to a freezer bag and bake later, adding a little extra time.
How do I keep the cookies soft?
Do not overbake them, and store them in an airtight container once cooled. Slightly soft centers help maintain tenderness.
Can I make these gluten-free?
Yes, use a reliable gluten-free all-purpose flour blend. Results may vary slightly, but many blends work well.
Do I need to roll them in sugar?
It is traditional and adds sparkle and texture, but you can skip it if preferred. The cookies will still taste delicious.
A Classic Cookie Worth Baking Again
Peanut Butter Blossom Cookies are the kind of dependable treat that brings comfort, smiles, and sweet memories to the table. With simple ingredients, easy steps, and reliable results, they are always worth making again.
Whether baked for holidays, school events, or everyday dessert plates, these cookies fit naturally into family life. Keep this recipe close for the times when only a timeless homemade cookie will do.


