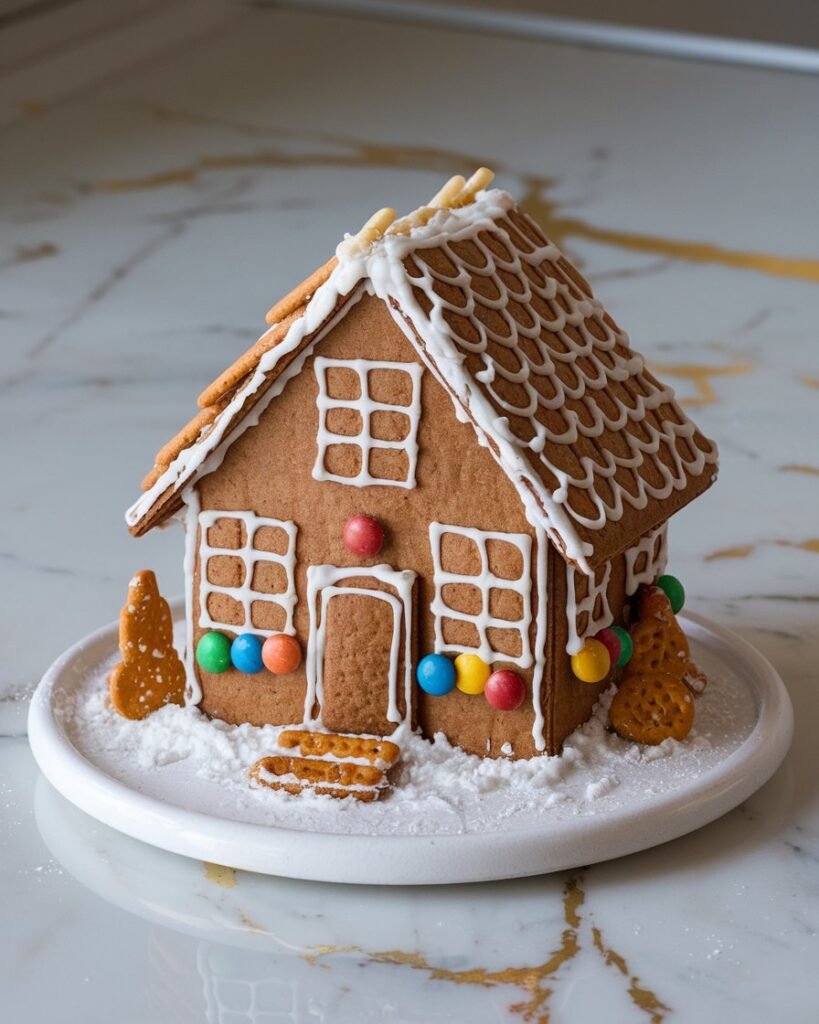
I can’t think of anything more festive than a gingerbread house standing proudly on the kitchen counter during the holidays.
The spicy-sweet aroma filling your home, the sticky fun of royal icing “glue,” and the pure joy of decorating with colorful candies—it’s a tradition worth keeping.
Whether you’re a first-timer or a seasoned pro, this classic recipe creates sturdy walls that won’t collapse (unlike my first attempt) while still tasting delicious.
Wonder what makes the perfect balance between structural integrity and flavor? The secret might surprise you…

Why You’ll Love this Classic Gingerbread House
When you’re looking for a holiday tradition that combines creativity, deliciousness, and heartwarming memories, nothing quite matches the magic of a homemade gingerbread house. I’m talking about that perfect blend of spicy-sweet aroma filling your kitchen while you craft a miniature masterpiece.
This recipe gives you sturdy walls that won’t collapse (unlike my first attempt years ago), with just the right balance of ginger, cinnamon, and molasses. The dough handles beautifully, and there’s something so satisfying about watching your architectural vision come to life. Ready to become the neighborhood gingerbread champion?
What Ingredients are in Classic Gingerbread House?
To create a truly spectacular gingerbread house that stands strong against hungry fingers and holiday humidity, you’ll need a perfect balance of sweet, spicy ingredients that deliver both structural integrity and delicious flavor.
- 1 cup butter
- 1 cup molasses
- ¾ cup brown sugar
- 1 egg
- 6½ cups flour
- 1 tablespoon ground ginger
- 2 teaspoons cinnamon
- 2 teaspoons allspice
- 2 teaspoons cloves
- 2½ teaspoons baking soda
- ½ teaspoon salt
For best results, make sure your spices are fresh—there’s nothing more disappointing than bland gingerbread when you’re looking for that warm, aromatic kick that makes the whole house smell like Christmas morning.
How to Make this Classic Gingerbread House
Step 1: Cream the Base
Beat 1 cup butter, 1 cup molasses, and ¾ cup brown sugar in a large bowl until thoroughly combined.
This mixture forms the flavorful foundation of your gingerbread, so don’t rush this step—a smooth, well-integrated base makes all the difference.
Step 2: Add the Egg and Dry Ingredients
Mix in 1 egg until fully incorporated, then gradually add your dry ingredients: 6½ cups flour, 1 tablespoon ground ginger, 2 teaspoons each of cinnamon, allspice, and cloves, 2½ teaspoons baking soda, and ½ teaspoon salt.
The kitchen will start smelling like a holiday wonderland as those spices bloom.
Step 3: Knead the Dough
Work the dough with your hands until it becomes smooth and pliable, about 3-5 minutes.
This tactile moment connects you to centuries of gingerbread makers before you—and honestly, who doesn’t love squishing dough between their fingers?
Step 4: Chill the Dough
Wrap your dough tightly in plastic wrap and refrigerate for 2 hours.
Patience is key here; this resting period allows the flavors to meld and makes the dough much easier to handle when rolling.
Step 5: Roll and Cut
Roll the chilled dough to a ¼-inch thickness on parchment paper, then cut out your house pieces using templates.
Too thin and your walls might collapse (architectural disaster!), too thick and they’ll be too heavy to stand—this thickness is just right.
Step 6: Bake to Perfection
Bake your gingerbread pieces at 300°F for 50-60 minutes until they’re firm and just slightly darkened at the edges.
The low, slow bake guarantees your pieces will be sturdy enough for construction while maintaining that perfect gingerbread flavor.
Step 7: Cool Completely
Allow your gingerbread pieces to cool fully before attempting any assembly.
Rushing this step is the number one cause of the dreaded mid-decoration collapse that can turn holiday joy into festive frustration.
Step 8: Assemble and Decorate
Using royal icing as your architectural “glue,” carefully assemble your house piece by piece, allowing each joint to set before adding the next.
Once the structure is stable, release your creativity with candies, additional frosting, and whatever edible decorations make your gingerbread dreams come true.
Using a stand mixer makes the creaming and mixing process much more efficient and ensures perfectly blended ingredients for your gingerbread house.
What to Serve with Classic Gingerbread House
While gingerbread houses are more crafts than cuisine, they deserve proper accompaniments when it’s finally time for the demolition party!
Serve mugs of rich hot chocolate with whipped cream peaks—the warm chocolate perfectly complements those spicy gingerbread flavors. A plate of soft sugar cookies offers a gentler sweet option for those who find gingerbread’s molasses kick too intense.
For the grown-ups, spiced mulled wine or eggnog with a splash of bourbon makes decorating (or destroying) your architectural masterpiece even merrier.
And don’t forget a bowl of fresh berries or citrus slices nearby—their bright acidity cuts through all that sweetness and reminds us that, yes, we’re actually eating our art project now.
Classic Gingerbread House Substitutions and Variations
- Vegan version: Replace egg with 3 tablespoons aquafaba (chickpea liquid) and use plant-based butter.
- Decorating beyond candy: Try dried fruit pieces, nuts, cereal, or pretzel sticks for roofing and architectural details.
- Construction shortcut: Make a village of mini houses using graham crackers instead of baking from scratch when time is tight.
Leftovers and Storage for this Classic Gingerbread House
Gingerbread houses are more decoration than dessert, but they remain edible for quite some time. Once assembled:
- Store your masterpiece at room temperature in a cool, dry place away from direct sunlight for up to 2-3 weeks.
- Cover loosely with plastic wrap overnight to prevent dust collection, but allow some airflow to prevent softening.
- For unassembled pieces, store flat in airtight containers with parchment between layers for up to 1 month.
- Freezing undecorated pieces works beautifully—wrap well and freeze for up to 3 months.
Remember that humidity is the enemy of crisp gingerbread. Unlike many baked goods, gingerbread actually hardens over time, which is perfect for maintaining structural integrity.
The flavor mellows nicely after a few days, too—though most houses end up more admired than eaten!
Final Thoughts
This classic gingerbread house recipe offers more than just a sweet treat—it creates an experience.
The warm blend of spices—ginger, cinnamon, allspice, and cloves—fills your kitchen with that unmistakable holiday aroma that signals winter celebrations have arrived. Perfect for those cozy December weekends when frost patterns the windows and you need a family project to bring everyone together, a gingerbread house becomes both tradition and keepsake.
While the dough requires patience with its chilling time and precise cutting, the reward comes in those quiet moments of concentration as walls rise and rooftops settle into place.
In the end, your gingerbread house stands as both architectural achievement and memory marker of the season.