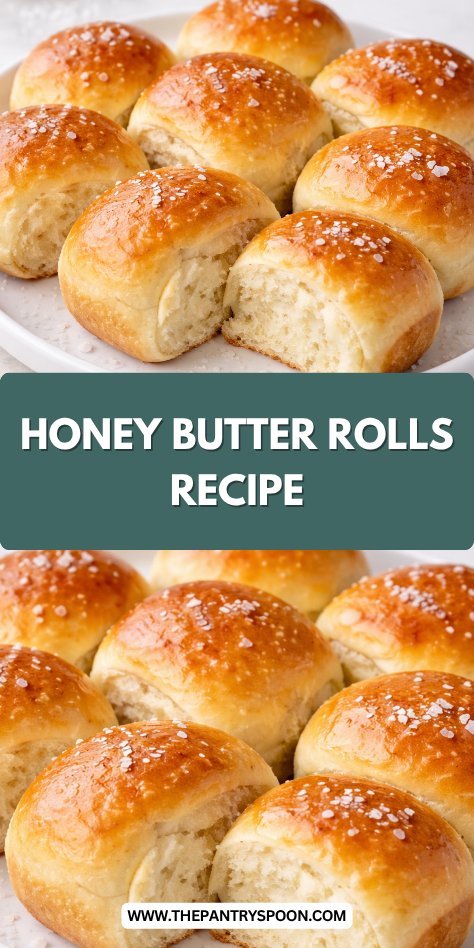
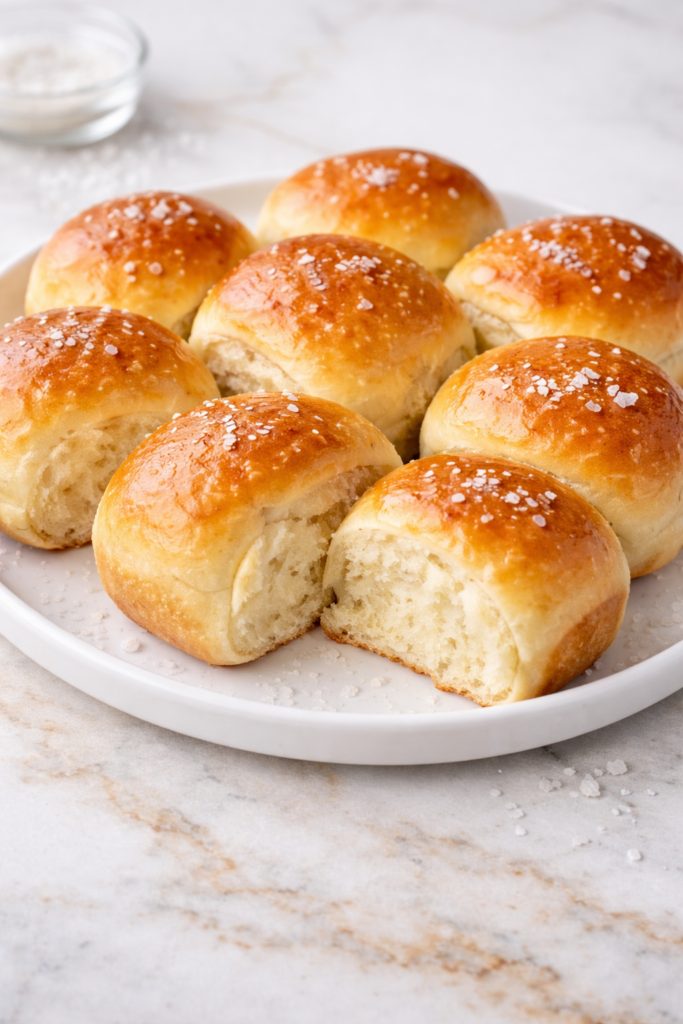
I’m absolutely obsessed with these honey butter rolls, and I know you will be too. There’s something magical about breaking open a warm, pillowy roll and watching the steam escape, then slathering it with just a bit more butter (because why not?).
The subtle sweetness from the honey balances perfectly with the rich buttery flavor, creating what might be the ultimate comfort food. Ready to discover how simple these irresistible rolls are to make in your own kitchen?
Why You’ll Love these Honey Butter Rolls
Once you smell these honey butter rolls baking in your oven, you’ll understand why they’re about to become a family favorite.
The pillowy texture with that perfect golden crust creates bread roll nirvana.
These rolls strike that magical balance between sweet and savory, with honey adding just enough sweetness without overwhelming.
Can anything beat tearing into a warm roll as butter melts into every nook and cranny? Not in my bread book.
Plus, they’re surprisingly forgiving for beginners.
No fancy equipment needed, just your hands and a bit of patience.
What Ingredients are in Honey Butter Rolls?
These perfectly soft and slightly sweet rolls require just a handful of pantry staples that come together to create pure bread magic.
- 1 cup warm milk (100-110°F)
- 1/3 cup unsalted butter, melted
- 2-2¼ teaspoons instant yeast
- 1/3 to 1/2 cup honey
- 1 large egg
- 1/2 teaspoon salt
- 3½ to 4½ cups all-purpose or bread flour
- Additional melted butter for brushing after baking
The quality of your ingredients really matters here—fresh yeast and good honey make all the difference, and don’t be afraid to splurge on some high-quality butter for that final brush on top.
How to Make these Honey Butter Rolls
Step 1: Prepare the Oven and Pan
Preheat your oven to somewhere between 350-400°F, with 375°F being that sweet spot that works for most home ovens.
Grease your baking pan generously—nobody wants their gorgeous rolls sticking to the pan after all that work.
Step 2: Prepare the Liquid Mixture
Warm 1 cup of milk and 1/3 cup of melted unsalted butter together until they reach that perfect yeast-activating temperature of 100-110°F.
This temperature is vital—too cold and your yeast will snooze, too hot and you’ll kill the poor little organisms.
Step 3: Activate the Yeast
Stir 2-2¼ teaspoons of instant yeast and 1/3 to 1/2 cup of honey into your warm milk mixture.
Let this sit for about 5-10 minutes until it gets foamy and bubbly, which is basically your yeast throwing a tiny party to let you know they’re alive and ready to work.
Step 4: Add Remaining Ingredients
Add 1 large egg and 1/2 teaspoon of salt to your yeast mixture, then gradually incorporate 3½ to 4½ cups of flour.
You mightn’t need all the flour—what we’re after is a dough that’s slightly sticky but workable.
Step 5: Knead and Shape the Dough
Knead the dough until it becomes smooth and elastic, then divide and shape it into 12 equal-sized rolls.
The trick to perfectly round rolls? Cup your hand over the dough and make small circular motions while applying gentle pressure.
For the best results, use a stand mixer to knead your dough as it provides consistent, thorough kneading without tiring your arms.
Step 6: Let the Rolls Rise
Place your shaped rolls in the greased pan, cover them with a clean kitchen towel, and let them rise for anywhere from 10-60 minutes.
They should look puffy and almost doubled in size, like they’ve been doing some serious carb-loading.
Step 7: Bake to Golden Perfection
Bake those beauties for 15-25 minutes until they’ve achieved that Instagram-worthy golden brown color.
Every oven has its own personality, so start checking at the 15-minute mark.
Step 8: Apply the Finishing Touch
Immediately brush the hot rolls with additional melted butter, which will soak into the warm bread and create that irresistible sheen and flavor.
For an extra touch of heaven, mix some honey with softened butter and spread it over the warm rolls—this little step takes them from delicious to absolutely divine.
What to Serve with Honey Butter Rolls
These pillowy, sweet rolls are the perfect sidekick to almost any meal, but they truly shine alongside certain companions.
For dinner, pair them with hearty beef stew or roast chicken—the rolls are perfect for sopping up those savory gravies and juices. They’re also wonderful with a bowl of butternut squash soup, where the sweetness of the rolls complements the earthy flavors.
For breakfast or brunch, serve them warm with additional honey butter and a side of fresh fruit. They make morning coffee taste even better, especially a robust dark roast that cuts through their sweetness.
And don’t forget holiday meals—these rolls are the unsung heroes of Thanksgiving and Christmas dinner tables, quietly stealing the show from fancier dishes.
Honey Butter Rolls Substitutions and Variations
• Flour Options: Substitute up to half the all-purpose flour with whole wheat flour for a nuttier flavor.
For gluten-free rolls, use a 1:1 gluten-free baking blend plus 1 teaspoon of xanthan gum.
• Dairy Alternatives: Replace milk with almond, oat, or coconut milk for a dairy-free version.
Use vegan butter or coconut oil instead of regular butter.
• Sweetener Swaps: Maple syrup or agave nectar can replace honey.
For less sweetness, reduce to 1/4 cup.
• Flavor Boosters: Fold in 1 tablespoon of orange zest or 1 teaspoon of cinnamon for a seasonal twist.
Fresh herbs like rosemary or thyme (2 teaspoons) create a savory-sweet balance.
• Finishing Touches: Sprinkle with flaky sea salt before baking, or mix 1/4 cup of finely chopped nuts into the dough.
Top with sesame or poppy seeds for extra texture.
• Shape Variations: Make slider buns by shaping into smaller rounds, or create a pull-apart loaf by arranging rolls in a bundt pan.
Leftovers and Storage for these Honey Butter Rolls
These pillowy rolls stay fresh at room temperature for 2-3 days when stored in an airtight container or sealed bag.
For longer storage, refrigerate for up to a week, though they may lose some softness.
To freeze, wrap cooled rolls individually in plastic wrap, then place in a freezer bag for up to 3 months.
Thaw at room temperature or overnight in the refrigerator.
Revive day-old rolls by wrapping them in foil and heating at 300°F for 5-7 minutes.
For that fresh-baked taste, sprinkle a few drops of water on each roll before reheating.
A quick 10-second microwave zap works in a pinch, but the texture isn’t quite the same.
While these rolls are heavenly straight from the oven, the honey flavor actually deepens slightly overnight, making them perfect companions for tomorrow’s soup or sandwich.
Final Thoughts
There’s something magical about homemade honey butter rolls that store-bought versions can never capture. The gentle sweetness from the honey, the pillow-soft texture, and that irresistible golden crown make these rolls a standout on any table.
They’re versatile enough for Sunday family dinners yet special enough for holiday gatherings when you want to impress without spending hours in the kitchen. These rolls shine brightest when served alongside hearty soups or roasted meats, where their subtle sweetness provides the perfect counterpoint to savory dishes.
And honestly, watching everyone reach for seconds might just become your favorite part of the meal.