
I make Coconut Flour Sandwich Bread when I want a simple homemade loaf that feels wholesome and dependable. It slices beautifully for toast or sandwiches, and the soft texture makes it easy to enjoy any day of the week. It is one of those recipes that feels especially helpful to keep around.
My family loves this bread for breakfast toast, quick lunches, and afternoon snacks with butter or jam. It uses straightforward ingredients and bakes into a loaf that feels homemade and satisfying. When I want a reliable bread recipe with a lighter feel, this is one I gladly make again.
Why You’ll Love This Recipe
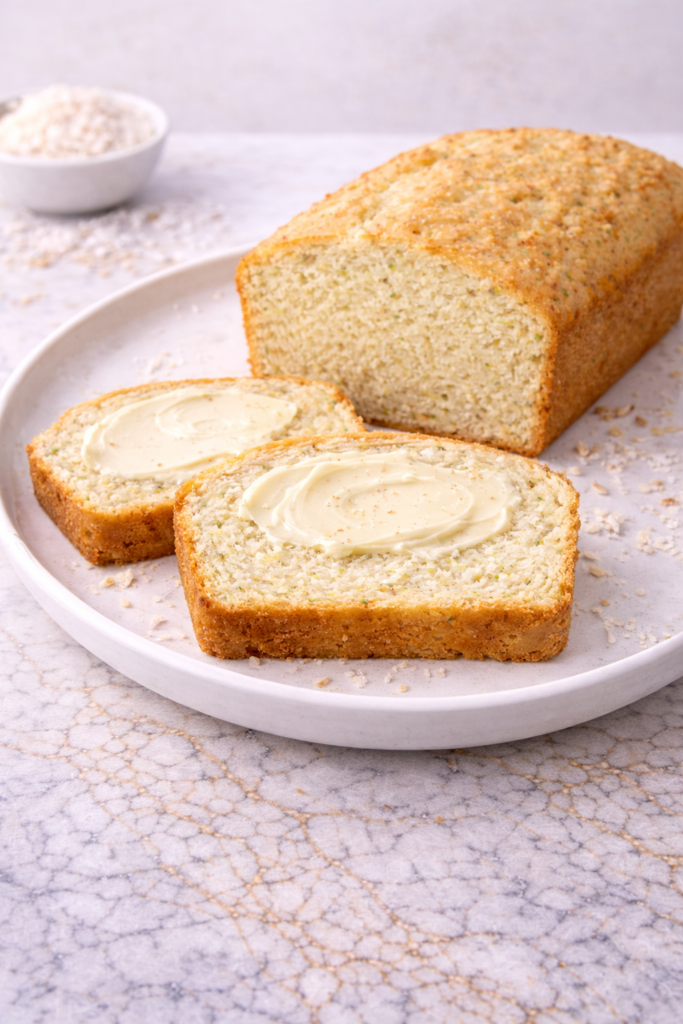
Coconut Flour Sandwich Bread has a soft crumb, mild flavor, and sturdy texture that works well for slicing. It is gentle enough for sandwiches but still delicious toasted with your favorite toppings. The flavor is simple and easy to pair with sweet or savory meals.
This recipe is also very practical for home bakers. It uses pantry ingredients, mixes quickly, and bakes in one loaf pan. There is no yeast, kneading, or long rise time to manage.
Another reason to love it is how flexible it can be. Use it for toast, grilled sandwiches, French toast, or snack slices. It stores well and can be frozen for later use.
Serves: 10 people
This recipe makes 1 standard loaf, which yields about 10 slices depending on thickness. If slicing thinner for sandwiches, you may get more servings. It is also easy to double and bake two loaves at once.
Ingredients You’ll Need
Main Ingredients
- 3/4 cup coconut flour
- 1/4 cup ground flaxseed (optional for texture)
- 1 teaspoon baking powder
- 1/2 teaspoon baking soda
- 1/2 teaspoon salt
- 6 large eggs
- 1/2 cup unsweetened almond milk or milk of choice
- 1/3 cup melted coconut oil or unsalted butter
- 1 tablespoon honey or maple syrup
- 1 teaspoon apple cider vinegar
Optional Toppings
- Sesame seeds
- Poppy seeds
- Rolled oats
- Sunflower seeds
Optional for Serving
- Butter
- Jam
- Nut butter
- Avocado
- Turkey or cheese slices
Coconut flour absorbs a lot of liquid, so measuring carefully is very important. Spoon it into the measuring cup and level it off rather than packing it tightly. Eggs help give structure and softness to the loaf.
Pro Tips
Measure coconut flour carefully
Too much coconut flour can make the bread dry or dense. Use level measurements for the best texture.
Let the batter rest briefly
Coconut flour absorbs moisture quickly. A short rest of a few minutes helps the batter thicken before baking.
Use room temperature eggs
Room temperature eggs mix more smoothly into the batter. This can help create a more even texture.
Line the loaf pan
Parchment paper makes removing the loaf much easier. It also helps protect delicate edges.
Cool fully before slicing
The loaf continues setting as it cools. Slicing too early can make it crumbly.
Toast for best texture
Many people enjoy coconut flour bread most when lightly toasted. It gives the slices a wonderful finish.
Tools You’ll Need
- 8×4-inch or 9×5-inch loaf pan
- Mixing bowls
- Measuring cups
- Measuring spoons
- Whisk
- Rubber spatula
- Parchment paper
- Cooling rack
- Serrated bread knife
Having ingredients measured and ready before starting helps this recipe move smoothly. Since the batter thickens quickly, it is helpful to work in an organized way.
Substitutions and Variations
Make It Dairy-Free
Use coconut oil and non-dairy milk. The bread will still bake beautifully.
Add Seeds
Stir in sunflower seeds, chia seeds, or pumpkin seeds for extra texture. This adds a hearty feel.
Use Different Sweetener
Swap honey for maple syrup or omit it for a more savory loaf. The flavor remains mild and versatile.
Boost the Flavor
Add garlic powder, herbs, or onion powder for a savory sandwich bread version. This pairs well with lunch fillings.
Make It Nut-Free
Use oat milk or another nut-free milk instead of almond milk. Always check labels if allergies are a concern.
Make Ahead Tips
Coconut Flour Sandwich Bread is a practical recipe to make ahead because it stores very well once baked. You can bake the loaf a day or two before you need it, let it cool completely, then wrap it tightly and keep it at room temperature or in the refrigerator. This makes busy mornings and lunches much easier.
You can also slice the loaf after cooling and store the slices with parchment paper between them. This allows you to grab only what you need without thawing or opening the whole loaf. It is especially helpful for toast and quick sandwiches.
For longer storage, freeze the fully cooled loaf or individual slices. Having homemade bread ready in the freezer is always convenient.
Instructions
Step 1: Prepare the Oven and Pan
Preheat the oven to 350°F (175°C). Line an 8×4-inch or 9×5-inch loaf pan with parchment paper, leaving a little overhang on the sides for easy lifting later. Lightly grease any exposed areas if needed.
Step 2: Mix the Dry Ingredients
In a medium mixing bowl, whisk together the coconut flour, flaxseed if using, baking powder, baking soda, and salt. Stir until evenly combined with no visible lumps. This helps the loaf bake more evenly.
Step 3: Mix the Wet Ingredients
In a large bowl, whisk the eggs until smooth and lightly frothy. Add the almond milk, melted coconut oil or butter, honey or maple syrup, and apple cider vinegar. Whisk until fully blended.
Step 4: Combine Wet and Dry Mixtures
Add the dry ingredients to the wet ingredients. Stir with a spatula or whisk until no dry spots remain. The batter will begin to thicken quickly as the coconut flour absorbs moisture.
Step 5: Let the Batter Rest
Allow the batter to sit for 3 to 5 minutes. This gives the coconut flour time to fully hydrate and helps create a better final texture. The batter should become thicker but still spreadable.
Step 6: Fill the Loaf Pan
Transfer the batter into the prepared loaf pan. Smooth the top gently with a spatula. Sprinkle with seeds or oats if using toppings.
Step 7: Bake the Bread
Place the pan in the preheated oven and bake for 40 to 50 minutes. The loaf should be golden on top and feel set in the center. A toothpick inserted in the middle should come out mostly clean.
Step 8: Cool in the Pan
Remove the loaf from the oven and let it cool in the pan for 10 to 15 minutes. This helps it firm up before moving.
Step 9: Finish Cooling
Use the parchment paper to lift the loaf onto a wire rack. Let it cool completely before slicing. Full cooling gives the cleanest slices and best texture.
Step 10: Slice and Serve
Use a serrated knife to cut even slices. Serve plain, toasted, or filled with your favorite sandwich ingredients.
Serving Suggestions
Toast slices and spread with butter, jam, or honey for an easy breakfast. The bread develops a lovely texture when toasted.
Use it for turkey, ham, egg salad, or grilled vegetable sandwiches. Its sturdy slices hold fillings nicely.
Top with avocado, tomato, and a sprinkle of salt for a quick lunch. This is one of my favorite simple options.
Serve with soup or salad instead of regular bread. It adds a homemade touch to lighter meals.
Make French toast using thicker slices. The mild flavor pairs beautifully with cinnamon and fruit.
Cut into cubes and toast for homemade croutons. This is a smart way to use end pieces.
Leftovers and Storage
Store cooled Coconut Flour Sandwich Bread in an airtight container or wrapped tightly. Keep it at room temperature for up to two days or refrigerate for up to one week. Refrigeration often helps preserve freshness longer.
Because this bread is moist, avoid sealing it while still warm. Trapped steam can affect texture. Always let it cool completely first.
For freezing, wrap slices individually or place parchment paper between slices in a freezer-safe bag. Freeze for up to three months. Thaw at room temperature or toast directly from frozen.
If the bread feels firmer after chilling, lightly toast it before serving. Toasting often improves texture beautifully.
Nutrition and Benefits
- Coconut flour is naturally high in fiber, which can help make meals more satisfying.
- Eggs provide protein and help create structure in the loaf.
- Homemade bread lets you control ingredients and sweetness levels.
- This recipe uses no yeast, making it quicker and simpler than many breads.
- The loaf works for both sweet and savory meals, adding flexibility to meal planning.
Recipe FAQ
Why is coconut flour bread different from regular bread?
Coconut flour absorbs much more liquid than wheat flour, so the recipe uses more eggs and moisture. This creates a different but pleasant texture. It is usually softer and more delicate.
Can I replace coconut flour with almond flour?
No, they do not swap evenly. Coconut flour and almond flour behave very differently in baking. Use a recipe designed specifically for almond flour instead.
Why did my bread turn out dry?
Too much coconut flour or overbaking are common causes. Measure carefully and check the loaf near the lower end of baking time. Cooling properly also helps texture.
Can I make this without flaxseed?
Yes, the flaxseed is optional. It adds texture and a slightly heartier crumb, but the bread still works without it.
How do I get cleaner slices?
Let the loaf cool completely before cutting. Use a serrated knife and gentle sawing motion. Warm bread is more likely to crumble.
Can I make muffins instead of a loaf?
Yes, this batter can often be baked in muffin tins. Reduce the baking time and check for doneness earlier. Muffins are great for meal prep.
Does it taste like coconut?
The flavor is mild and not strongly coconut-like. Most people notice a neutral, slightly sweet taste. It pairs well with many toppings and fillings.
Conclusion
Coconut Flour Sandwich Bread is a simple homemade loaf that brings comfort, convenience, and dependable results to everyday meals.
It offers soft slices that work beautifully for toast, sandwiches, and quick snacks.
Whether baked for meal prep or shared fresh from the oven, it fits naturally into family routines.
Its easy method, versatile flavor, and reliable texture make it worth making again and again.


