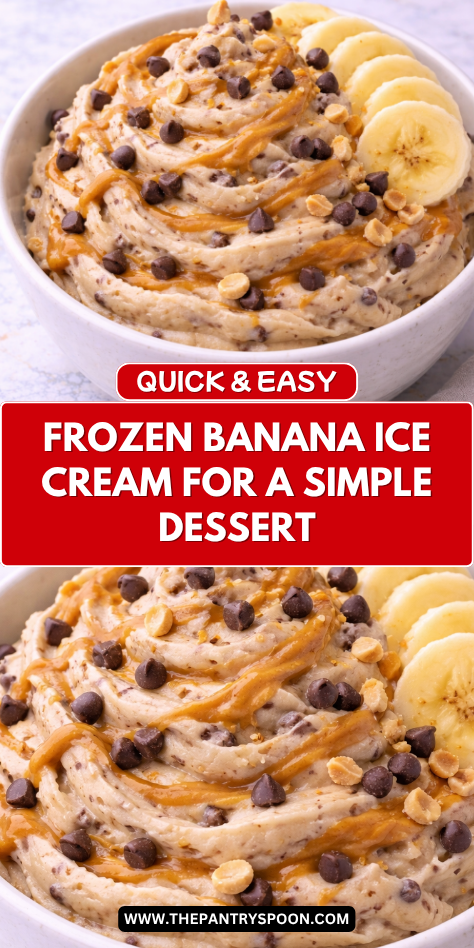
I started making this on warm afternoons when I wanted something cold and creamy that didn’t require an ice cream maker or a long list of ingredients. Frozen bananas blend into the smoothest, most surprisingly satisfying ice cream with nothing else required, which still feels like a small trick every time I make it.
The texture is genuinely creamy and the natural sweetness of the banana is enough on its own, though it’s easy to take in any direction you like with a few simple additions.
I’ll show you how to freeze and blend them so yours comes out perfectly smooth every time. It’s the simplest frozen dessert I know and one of the most satisfying.
Why You’ll Love This Recipe
Frozen Banana Ice Cream is incredibly creamy and naturally sweet, making it a wonderful alternative to traditional ice cream. The bananas blend into a smooth, soft-serve texture that feels indulgent without requiring added sugar or heavy ingredients.
It’s also one of the easiest recipes you can make, requiring minimal preparation and just a few simple steps. With no special equipment beyond a blender or food processor, it’s perfect for busy families or anyone looking for a quick homemade treat.
Another reason this recipe stands out is its flexibility. You can enjoy it as-is or customize it with flavors like chocolate, peanut butter, or berries, making it a versatile option that never gets boring.
Serves: 2–3 people
This recipe makes about two to three servings, depending on portion size. It’s easy to scale up by simply freezing more bananas, making it a great option for both small and larger households.
Ingredients You’ll Need
- 3 ripe bananas, sliced and frozen
- 1–2 tablespoons milk (optional, for blending)
- ½ teaspoon vanilla extract (optional)
Optional add-ins:
- 2 tablespoons cocoa powder
- 2 tablespoons peanut butter
- ¼ cup frozen berries
- 1–2 teaspoons honey or maple syrup (if desired)
Pro Tips
Use very ripe bananas with plenty of brown spots for the best natural sweetness. This eliminates the need for added sugar and enhances the overall flavor.
Slice the bananas before freezing to make blending easier. Smaller pieces help your blender or food processor work more efficiently and create a smoother texture.
Freeze the bananas in a single layer on a baking sheet before transferring them to a container. This prevents them from sticking together and makes portioning easier.
Blend patiently and stop to scrape down the sides as needed. The mixture may look crumbly at first, but it will eventually turn smooth and creamy.
Add liquid sparingly, only if needed to help the blending process. Too much liquid can make the ice cream less thick and creamy.
Serve immediately for a soft-serve consistency or freeze for 1–2 hours for a firmer texture. Both options are delicious depending on your preference.
Tools You’ll Need
- Blender or food processor
- Baking sheet
- Parchment paper (optional)
- Knife and cutting board
- Spatula
Substitutions and Variations
If you don’t have milk on hand, you can use any plant-based alternative such as almond, oat, or coconut milk. Each option adds a subtle flavor while maintaining a creamy consistency.
For a richer version, you can blend in a spoonful of Greek yogurt or coconut cream. This creates a slightly thicker and more indulgent texture.
Chocolate lovers can add cocoa powder or a handful of chocolate chips for a deeper flavor. This variation turns the simple base into a more dessert-like treat.
You can also mix in frozen strawberries, mango, or blueberries for a fruity twist. These additions bring color and a refreshing flavor to the ice cream.
For a fun topping, consider adding chopped nuts, granola, or a drizzle of nut butter just before serving. These small touches add texture and make the treat feel extra special.
Make Ahead Tips
Frozen Banana Ice Cream is one of the easiest desserts to prep ahead, making it perfect for busy days or last-minute cravings. The key is to always have ripe bananas sliced and stored in your freezer so you can blend them whenever you need a quick treat.
You can prepare multiple batches of frozen banana slices at once and store them in freezer-safe bags for up to two months. This way, you always have the base ready without any extra effort.
If you prefer a firmer texture, you can also blend the ice cream ahead of time and freeze it in an airtight container. Let it sit at room temperature for 5–10 minutes before scooping to soften slightly.
Instructions
Step 1: Slice and Freeze the Bananas
Peel the ripe bananas and slice them into even pieces, about ½ inch thick. Arrange the slices in a single layer on a parchment-lined baking sheet.
Place the baking sheet in the freezer for at least 2–3 hours, or until the banana slices are completely frozen. This step ensures a smooth and creamy texture when blended.
Step 2: Transfer to Blender
Once frozen, transfer the banana slices to a high-speed blender or food processor. Make sure not to overcrowd the machine to allow for even blending.
At this stage, the bananas will be firm, so it’s important to use a sturdy blender or process in batches if needed. This helps achieve a consistent texture.
Step 3: Begin Blending
Start blending on a low setting, gradually increasing the speed as the bananas begin to break down. Stop occasionally to scrape down the sides with a spatula.
At first, the mixture may look crumbly or chunky, but continue blending. It will gradually transform into a smooth, creamy consistency.
Step 4: Add Optional Ingredients
If needed, add 1–2 tablespoons of milk to help the blending process. You can also add vanilla extract or any optional flavor additions like cocoa powder or peanut butter at this stage.
Blend again until everything is fully incorporated and the mixture is silky smooth. Be careful not to add too much liquid, as it can affect the thickness.
Step 5: Adjust Texture and Taste
Taste the mixture and adjust as desired by adding a touch of honey, maple syrup, or additional flavorings. Blend briefly again to combine.
If you prefer a thicker texture, avoid adding extra liquid. For a softer consistency, a small splash of milk can help achieve the desired result.
Step 6: Serve Immediately or Freeze
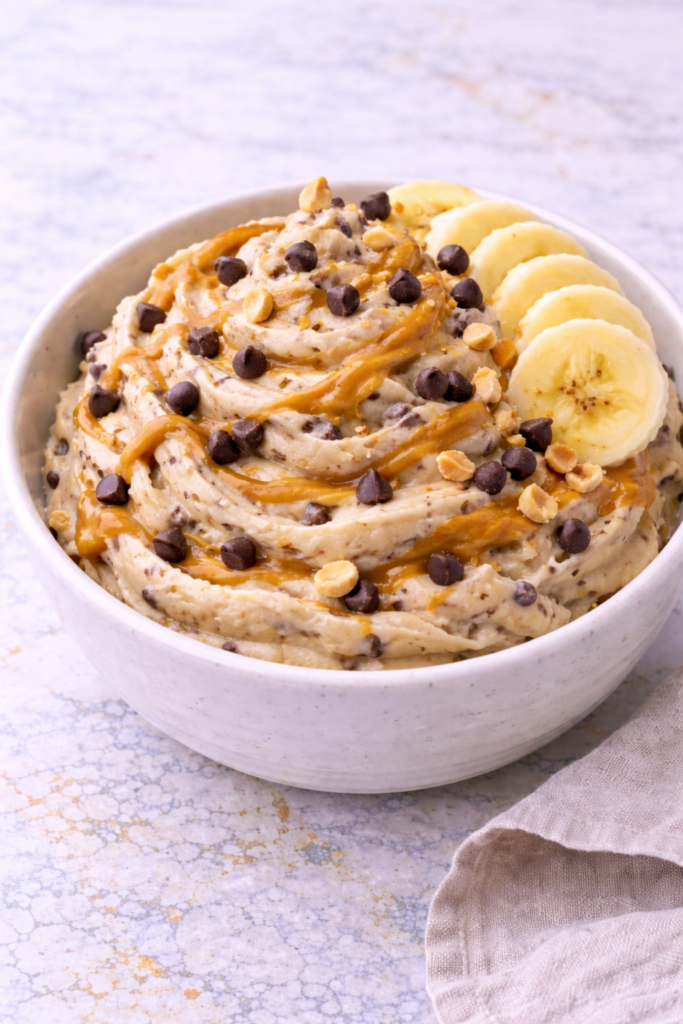
For a soft-serve texture, scoop the ice cream directly into bowls and serve immediately. It will be smooth, creamy, and easy to enjoy right away.
If you prefer a firmer, scoopable texture, transfer the mixture to a container and freeze for 1–2 hours. This allows it to set more like traditional ice cream.
Step 7: Scoop and Enjoy
Once the ice cream reaches your preferred consistency, scoop it into bowls or cones. Use a warm spoon or ice cream scoop for easier serving.
Add toppings if desired and serve immediately. The fresh, creamy texture is best enjoyed right after preparation.
Serving Suggestions
Frozen Banana Ice Cream is delicious on its own, served in a bowl with a spoon for a quick and satisfying treat. Its naturally sweet flavor makes it enjoyable without any extra additions.
For a more indulgent experience, top it with chocolate chips, chopped nuts, or a drizzle of peanut butter. These toppings add texture and elevate the overall flavor.
It also works beautifully as a base for a sundae, paired with fresh fruit, granola, or a light drizzle of chocolate sauce. This makes it feel like a more complete dessert while still keeping it simple.
You can serve it in cones for a fun, ice cream shop-style presentation that kids especially enjoy. This small touch makes it feel like a special treat.
For a breakfast-inspired option, pair it with pancakes or waffles instead of syrup. The creamy texture and natural sweetness create a unique and delicious twist.
Leftovers and Storage
Store any leftover Frozen Banana Ice Cream in an airtight container in the freezer. It will keep well for up to one week, though the texture is best within the first few days.
Before serving, allow the ice cream to sit at room temperature for about 5–10 minutes to soften. This makes it easier to scoop and improves the overall texture.
If the ice cream becomes too firm, you can briefly re-blend it to restore its creamy consistency. This is especially helpful if it has been stored for several days.
Avoid repeated thawing and refreezing, as this can affect both texture and flavor. Keeping it properly sealed helps maintain its freshness.
For best results, store it in a shallow container to allow for quicker and more even softening. This small detail makes serving much easier.
Nutrition and Benefits
- Bananas are naturally rich in potassium, which supports heart health and proper muscle function. They also provide a good source of energy through natural carbohydrates.
- This recipe contains no added refined sugar when made with just bananas, making it a healthier alternative to traditional ice cream. It’s naturally sweet and satisfying.
- The simple ingredient list makes it easy to control what goes into your dessert. This is especially helpful for families looking for cleaner, more wholesome options.
- Adding ingredients like nut butter or berries can increase protein, fiber, and antioxidant content. These additions make the treat more balanced and nutritious.
- Because it’s dairy-optional, this recipe can be easily adapted for those with dietary restrictions. It’s a flexible dessert that suits a variety of needs.
Recipe FAQ
Why is my banana ice cream not creamy?
If the texture is not creamy, it may need more blending time. Frozen bananas go through a crumbly stage before becoming smooth. Be patient and continue blending, scraping down the sides as needed.
Can I make this without a blender?
A food processor works just as well and is often easier for this recipe. It can handle the frozen bananas more effectively. A strong appliance is key to achieving the right texture.
How ripe should the bananas be?
The bananas should be very ripe with brown spots on the peel. This ensures maximum sweetness and flavor. Less ripe bananas may result in a less sweet and slightly starchy taste.
Can I add protein powder?
Yes, you can add a scoop of protein powder during blending. You may need to add a little extra milk to maintain a smooth texture. This is a great way to make it more filling.
Why is my ice cream too hard after freezing?
Freezing for too long can make it very firm. Let it sit at room temperature for a few minutes before scooping. This helps soften it to a more scoopable consistency.
Can I mix flavors together?
Absolutely, combining ingredients like cocoa powder and peanut butter or berries and vanilla creates unique flavor combinations. Just be mindful of balancing sweetness and texture. Experimenting can lead to new favorites.
Is this suitable for kids?
Yes, this recipe is very kid-friendly due to its natural sweetness and creamy texture. It’s a great way to offer a healthier dessert option. Kids can also help customize it with their favorite mix-ins.
Conclusion
Frozen Banana Ice Cream is a simple, reliable recipe that turns everyday ingredients into a creamy and satisfying treat. It’s quick to prepare, easy to customize, and perfect for both kids and adults.
With its natural sweetness and smooth texture, it’s a dessert you can feel good about making again and again. It brings together ease, comfort, and flavor in a way that fits effortlessly into any day.