
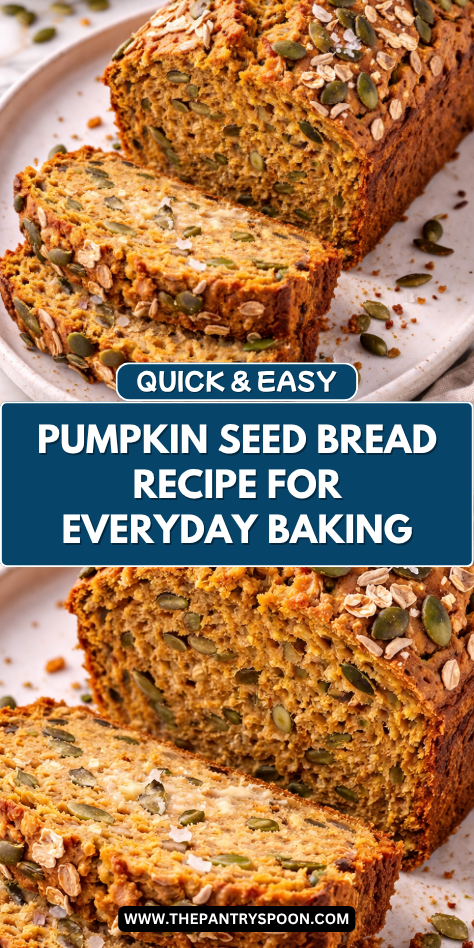
I always appreciate a homemade bread that feels nourishing and practical, and Pumpkin Seed Power Bread is one I come back to often. It has a hearty texture, mild flavor, and enough substance to make breakfast or snack time feel satisfying.
When I want something dependable to slice through the week, this loaf is a great choice. It feels wholesome without being complicated.
I love that this bread works for so many parts of the day. I have toasted it for breakfast, packed it for lunches, and served it with soup at dinner.
The pumpkin seeds add crunch and richness, while the loaf stays tender and easy to enjoy. A recipe that is this flexible always earns a place in my kitchen.
Why You’ll Love This Recipe
Pumpkin Seed Power Bread is hearty, flavorful, and easy to fit into everyday meals. The seeds add a pleasant crunch, while the loaf itself stays soft enough for sandwiches and toast. It feels filling and comforting without being too heavy.
This recipe is also simple to make with pantry basics. Once mixed, it bakes into a sturdy loaf that slices beautifully. It is a reliable option for home bakers of many skill levels.
I also like how family-friendly it is. The flavor is mild, making it easy to pair with sweet or savory toppings. That means everyone can enjoy it in their own way.
Serves: 12 people
This recipe makes one standard loaf with about twelve slices, depending on thickness. Thin slices work well for toast, while thicker slices are great for sandwiches. If serving a crowd, making two loaves is an easy option.
Ingredients You’ll Need
Dry Ingredients
- 2 cups all-purpose flour
- 1 cup whole wheat flour
- 1 cup old-fashioned rolled oats
- 1/2 cup raw pumpkin seeds, plus extra for topping
- 2 tablespoons flaxseed meal
- 1 tablespoon baking powder
- 1 teaspoon baking soda
- 1 teaspoon salt
- 1 teaspoon ground cinnamon, optional
Wet Ingredients
- 2 large eggs
- 1 1/2 cups buttermilk
- 1/3 cup honey
- 1/4 cup olive oil or melted butter
- 1 teaspoon vanilla extract
Optional Add-Ins
- 1/4 cup chopped walnuts
- 1/4 cup raisins or dried cranberries
- 1 tablespoon chia seeds
Pro Tips
- Measure flour by spooning it into the cup and leveling it off. Scooping directly from the bag can add too much flour and make the loaf dense. Proper measuring helps keep the bread tender.
- Stir the batter only until combined. Overmixing can develop too much gluten and create a tough texture. A few small streaks of flour are fine.
- Toast the pumpkin seeds lightly before adding them for deeper flavor. Just a few minutes in a dry skillet can make a big difference. Let them cool first.
- Line the loaf pan with parchment paper for easier removal. This helps the bread lift out cleanly and cool evenly.
- If the top browns too quickly, loosely cover with foil during the last part of baking. This protects the crust while the center finishes cooking.
- Let the bread cool fully before slicing. Warm bread can crumble more easily, while cooled bread cuts into cleaner slices.
Tools You’ll Need
- 9×5-inch loaf pan
- Large mixing bowl
- Medium mixing bowl
- Whisk
- Rubber spatula or wooden spoon
- Measuring cups and spoons
- Cooling rack
- Parchment paper, optional
- Toothpick or cake tester
Substitutions and Variations
Make It Dairy-Free
Use unsweetened dairy-free yogurt thinned with a little milk alternative instead of buttermilk. This keeps the loaf moist and tender.
Change the Flour Mix
Use more whole wheat flour or swap part of the flour for oat flour. This adds a heartier texture while keeping the loaf recognizable.
Add More Flavor
Stir in cinnamon, nutmeg, or orange zest. Small additions can make the bread feel fresh and seasonal.
Boost the Texture
Add walnuts, sunflower seeds, or dried fruit. These mix-ins bring crunch and variety to each slice.
Make It Heartier
Spread slices with nut butter or use them for sandwiches with eggs or turkey. The sturdy loaf handles filling toppings very well.
Make Ahead Tips
Pumpkin Seed Power Bread is a wonderful loaf to prepare ahead because it stores well and slices easily throughout the week. You can mix the dry ingredients in a bowl or container a few days early, then add the wet ingredients when ready to bake. This saves time on busy mornings or meal prep days.
The fully baked loaf can also be made one to two days ahead. Once cooled, wrap it tightly and keep it at room temperature so it stays soft. Many people find the texture even better the next day after the loaf has settled.
For longer storage, slice the bread first and freeze individual pieces. This makes it easy to thaw only what you need for toast, sandwiches, or snacks.
Instructions
Step 1: Preheat the Oven
Heat the oven to 350°F. Position the rack in the center for even baking.
Grease a 9×5-inch loaf pan or line it with parchment paper for easier removal.
Step 2: Combine the Dry Ingredients
In a large bowl, whisk together the all-purpose flour, whole wheat flour, oats, pumpkin seeds, flaxseed meal, baking powder, baking soda, salt, and cinnamon if using.
Mix until the seeds and oats are evenly distributed through the flour mixture.
Step 3: Mix the Wet Ingredients
In a medium bowl, whisk together the eggs, buttermilk, honey, olive oil or melted butter, and vanilla extract.
Whisk until smooth and fully blended.
Step 4: Combine Wet and Dry Mixtures
Pour the wet mixture into the bowl of dry ingredients. Stir gently with a spatula or wooden spoon just until combined.
Do not overmix. The batter should be thick and slightly rustic.
Step 5: Add Optional Mix-Ins
If using walnuts, dried fruit, or chia seeds, fold them in now. Stir only enough to spread them evenly through the batter.
This keeps the loaf tender while adding texture.
Step 6: Fill the Pan
Transfer the batter to the prepared loaf pan. Spread the top evenly with a spatula.
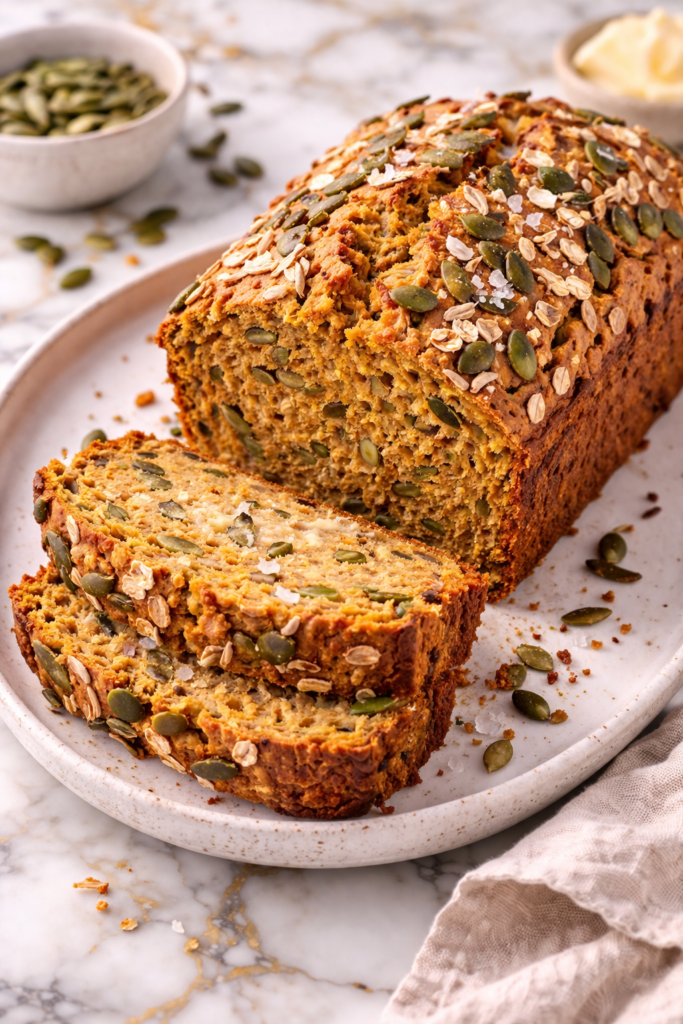
Sprinkle extra pumpkin seeds over the surface for a simple, attractive finish.
Step 7: Bake the Bread
Bake for 50 to 65 minutes, depending on your oven. The top should be golden brown and the center should test clean with a toothpick.
If the loaf browns too quickly, loosely tent foil over the top during the last 15 minutes.
Step 8: Cool in the Pan
Place the pan on a cooling rack and let the bread rest for 10 to 15 minutes. This helps it firm up before removing.
Carefully lift or turn the loaf out of the pan.
Step 9: Cool Completely
Let the bread cool fully on the rack before slicing. This step helps the crumb set and prevents crumbling.
Warm bread smells tempting, but patience gives cleaner slices.
Step 10: Slice and Serve
Use a serrated knife for neat slices. Serve plain, toasted, or topped with your favorite spreads.
This loaf works well for breakfast, snacks, or light meals.
Serving Suggestions
Toast slices and spread with butter or honey for a simple breakfast. The pumpkin seeds add a nice crunch with every bite.
Top warm slices with cream cheese or nut butter for a filling snack. Both options pair well with the mild flavor of the bread.
Use thicker slices for sandwiches with turkey, cheese, or sliced egg. The loaf is sturdy enough to hold fillings well.
Serve alongside soup or chili for an easy dinner side. It adds warmth and substance to lighter meals.
Pair with fruit and yogurt for a balanced morning plate. This makes breakfast feel complete without much effort.
Cube day-old slices and toast them for homemade croutons. They are especially good on hearty salads.
Leftovers and Storage
Store cooled Pumpkin Seed Power Bread tightly wrapped at room temperature for up to three days. Keep it in a bread box or airtight container to help maintain softness.
For longer freshness, refrigerate the loaf for up to one week. Let slices come to room temperature or toast them before serving for the best texture.
To freeze, wrap the whole loaf or individual slices tightly in plastic wrap, then place in a freezer-safe bag. Freeze for up to two months.
Thaw slices at room temperature or place directly into the toaster. This makes quick breakfasts and snacks very easy.
If the bread becomes slightly dry after a few days, toasting restores much of its appeal.
Nutrition and Benefits
- Pumpkin seeds provide healthy fats, plant-based protein, and satisfying crunch.
- Oats and whole wheat flour add fiber that can help make the bread more filling.
- Homemade bread allows you to control sweetness and ingredient quality.
- This loaf works for breakfast, snacks, or meals, making it practical for weekly planning.
- Seeds and optional nuts can add extra minerals and texture.
- Sliced and frozen portions help reduce waste and save time later.
Recipe FAQ
Can I use only all-purpose flour?
Yes, you can replace the whole wheat flour with more all-purpose flour. The loaf will be lighter and softer in texture. It will still bake well.
Can I make Pumpkin Seed Power Bread without eggs?
Yes, use flax eggs or a commercial egg replacer. The texture may be slightly denser, but the loaf should still hold together nicely.
Why is my bread dense?
Too much flour or overmixing are common causes. Measure flour carefully and stir only until combined. Also check that your baking powder and baking soda are fresh.
Can I use quick oats instead of rolled oats?
Yes, quick oats can be used if needed. The texture will be a little softer and less hearty. Rolled oats give the best structure.
How do I know when the loaf is done?
Insert a toothpick or cake tester into the center. If it comes out clean or with a few dry crumbs, the bread is ready. The top should also feel firm.
Can I make muffins instead of a loaf?
Yes, divide the batter into a lined muffin tin and bake at 350°F. Start checking for doneness around 18 to 24 minutes.
Do pumpkin seeds need to be shelled?
Yes, use shelled pumpkin seeds, often labeled pepitas. Unshelled seeds are too tough for this loaf. Raw or roasted both work.
Conclusion
Pumpkin Seed Power Bread is the kind of dependable loaf that makes everyday meals easier and more satisfying. With simple ingredients, hearty texture, and reliable results, it is worth baking again and again.
Whether you toast it for breakfast, pack it for lunch, or serve it with dinner, this bread fits naturally into family life. Keep this recipe nearby for a wholesome homemade option you can count on.


