
If you’ve never baked with chia seeds before, these cupcakes are a great place to start because they do something really clever inside the batter.
They add a subtle texture and help keep everything moist without changing the flavor in any noticeable way.
The fresh strawberry comes through in every bite, making these taste bright and a little fruity in the best way.
I’ll walk you through each step so they turn out light, tender, and just sweet enough to feel like a real treat.
Why You’ll Love This Recipe
These strawberry chia cupcakes are all about fresh flavor and soft texture. The strawberries add natural sweetness while the chia seeds bring a gentle crunch and added depth. It’s a combination that feels both light and satisfying.
They’re also easy to prepare, making them perfect for both beginner bakers and busy days. With simple ingredients and clear steps, you can create cupcakes that feel homemade and comforting. It’s a reliable recipe you can come back to often.
Another reason to love these cupcakes is their versatility. You can adjust the sweetness, add toppings, or experiment with different flavors. These strawberry chia cupcakes fit easily into everyday baking.
Serves: 12 cupcakes
This recipe makes twelve soft and flavorful cupcakes that are perfect for sharing. The portions are light yet satisfying, and you can easily adjust the quantity as needed.
Ingredients You’ll Need
- 1 cup all-purpose flour
- 1/2 cup sugar
- 1/2 teaspoon baking powder
- 1/2 teaspoon baking soda
- 1/4 teaspoon salt
- 1 tablespoon chia seeds
- 1/2 cup milk (dairy or plant-based)
- 1/3 cup vegetable oil
- 1 teaspoon vanilla extract
- 1 tablespoon lemon juice
- 1 cup fresh strawberries, finely chopped
Pro Tips
Use fresh, ripe strawberries for the best flavor. They should be sweet and slightly soft. This enhances the cupcakes naturally.
Chop the strawberries into small, even pieces. This helps distribute them evenly throughout the batter. It improves texture.
Let the chia seeds soak briefly in the milk before mixing. This helps them soften slightly. It creates a better consistency.
Do not overmix the batter once combined. Overmixing can make the cupcakes dense. Mix just until everything is incorporated.
Use room temperature ingredients for smoother mixing. This helps create a consistent batter. It improves the final result.
Fill the cupcake liners evenly for consistent baking. This ensures all cupcakes cook at the same rate. It makes a difference.
Tools You’ll Need
- Mixing bowls
- Whisk
- Spatula
- Muffin tin
- Cupcake liners
- Measuring cups
- Measuring spoons
Substitutions and Variations
You can use whole wheat flour instead of all-purpose flour for a slightly denser texture. This adds a bit more fiber. It’s an easy swap.
If you prefer a dairy-free version, use almond milk or oat milk. This keeps the cupcakes soft and moist. It works well.
For extra sweetness, you can add a drizzle of honey or a light glaze on top. This enhances the flavor. Adjust based on preference.
You can also experiment by adding a few blueberries for a mixed berry version. This adds variety. It’s a simple variation.
If you want a citrus touch, increase the lemon juice slightly or add lemon zest. This brightens the flavor. It’s a great addition.
Make Ahead Tips
These cupcakes are easy to prepare ahead, making them perfect for busy schedules or special occasions. You can mix the dry ingredients in advance and store them in an airtight container. This helps speed up the baking process later.
You can also chop the strawberries ahead of time and store them in the refrigerator. Keeping them fresh and ready makes assembly quicker. It helps simplify preparation.
If needed, you can bake the cupcakes a day in advance and store them at room temperature. This allows the flavors to settle and develop. It keeps the texture soft and enjoyable.
Instructions
Step 1: Preheat the Oven
Preheat your oven to 350°F (175°C). Line a muffin tin with cupcake liners. This helps prevent sticking and ensures easy removal.
Step 2: Prepare the Dry Ingredients
In a large mixing bowl, whisk together the flour, sugar, baking powder, baking soda, salt, and chia seeds. Mix until everything is evenly combined. This creates a smooth base.
Step 3: Prepare the Wet Ingredients
In another bowl, combine the milk, vegetable oil, vanilla extract, and lemon juice. Stir until well mixed. The mixture should be smooth.
Step 4: Combine the Batter
Pour the wet ingredients into the bowl with the dry ingredients. Stir gently until just combined. Avoid overmixing to keep the cupcakes soft.
Step 5: Add Strawberries
Fold in the chopped strawberries gently. Make sure they are evenly distributed throughout the batter. This ensures consistent flavor.
Step 6: Fill the Liners
Divide the batter evenly among the cupcake liners, filling each about two-thirds full. This allows room for the cupcakes to rise. Keep portions even.
Step 7: Bake the Cupcakes
Place the muffin tin in the oven and bake for 18 to 22 minutes. The cupcakes are done when a toothpick inserted in the center comes out clean. Avoid overbaking.
Step 8: Cool Before Serving
Remove the cupcakes from the oven and let them cool in the pan for a few minutes. Transfer them to a wire rack to cool completely. This helps maintain texture.
Serving Suggestions
These cupcakes are delicious on their own, but you can also add a light glaze or frosting. This adds a touch of sweetness. It enhances the overall flavor.
They pair well with fresh fruit or a simple yogurt on the side. This adds balance and freshness. It creates a complete snack or dessert.
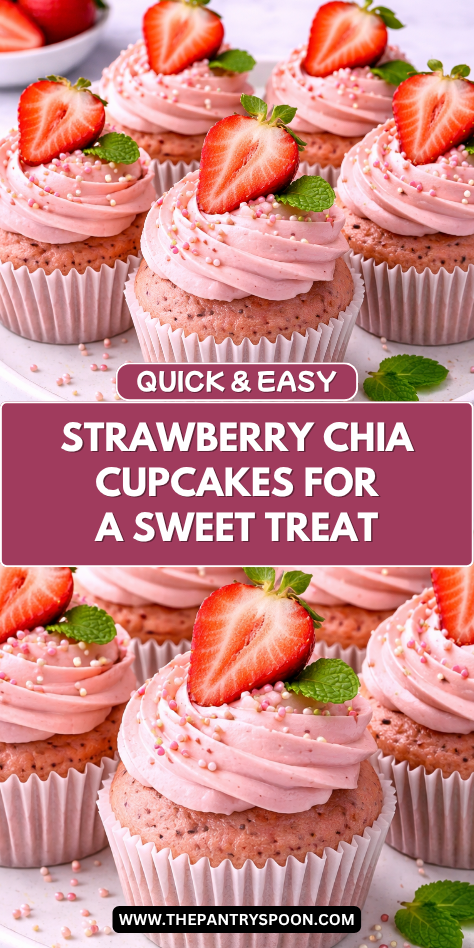
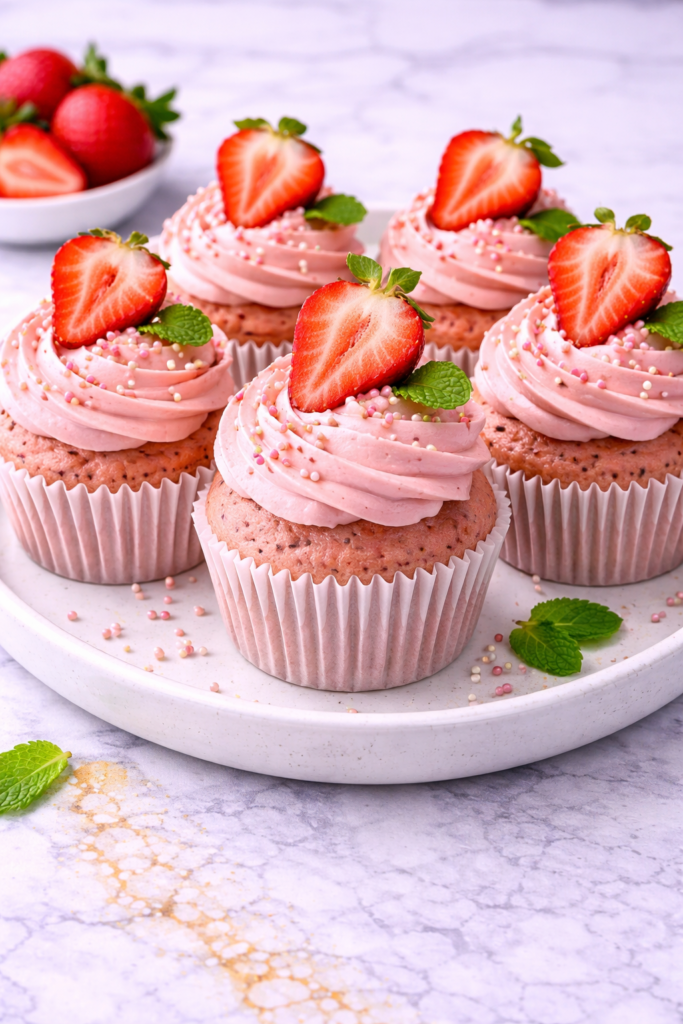
For special occasions, you can decorate them with sliced strawberries or a dusting of powdered sugar. This makes them more visually appealing. It’s a simple touch.
Leftovers and Storage
Store any leftover cupcakes in an airtight container at room temperature for up to 2 days. This helps keep them soft and fresh. Avoid exposure to air.
For longer storage, keep them in the refrigerator for up to 4 days. Let them come to room temperature before serving for the best texture. This improves the taste.
You can also freeze the cupcakes for up to 1 month. Wrap them individually and store in a freezer-safe container. Thaw before serving.
Nutrition and Benefits
- Strawberries provide natural sweetness and are rich in vitamins. They add both flavor and nutrition.
- Chia seeds contain fiber and healthy fats, adding a nutritional boost. They also contribute to texture.
- Using plant-based milk can make this recipe suitable for different dietary needs. It keeps the cupcakes light.
- The recipe uses simple ingredients, making it easy to adapt to your preferences. It offers flexibility.
- These cupcakes offer a balance of light sweetness and wholesome ingredients, making them a thoughtful treat option.
Recipe FAQ
Can I use frozen strawberries instead of fresh?
Yes, frozen strawberries can be used, but make sure to thaw and drain them first. This prevents excess moisture. It helps maintain texture.
Can I make these cupcakes gluten-free?
Yes, you can use a gluten-free flour blend. The texture may vary slightly. Choose a blend suitable for baking.
Why are my cupcakes dense?
Overmixing the batter can cause density. Mix gently until just combined. This helps keep them light.
Can I reduce the sugar?
Yes, you can reduce the sugar slightly if desired. Keep in mind it may affect sweetness and texture. Adjust carefully.
Can I add frosting to these cupcakes?
Yes, a light cream cheese or vanilla frosting works well. It adds extra flavor. Choose based on preference.
How do I know when the cupcakes are done?
Insert a toothpick into the center of a cupcake. If it comes out clean, they are ready. Avoid overbaking.
Can I make mini cupcakes instead?
Yes, use a mini muffin tin and reduce the baking time. Check them earlier to avoid overbaking. They make a great bite-sized option.
A Light and Fresh Treat for Everyday Baking
These strawberry chia cupcakes are a simple way to bring fresh, balanced flavor into your baking routine. They combine natural sweetness with a soft texture to create a treat that feels both light and satisfying.
Whether you’re making them for a snack, dessert, or sharing with family, this recipe fits naturally into everyday life. With easy preparation and flexible ingredients, it’s one you can enjoy again and again.


