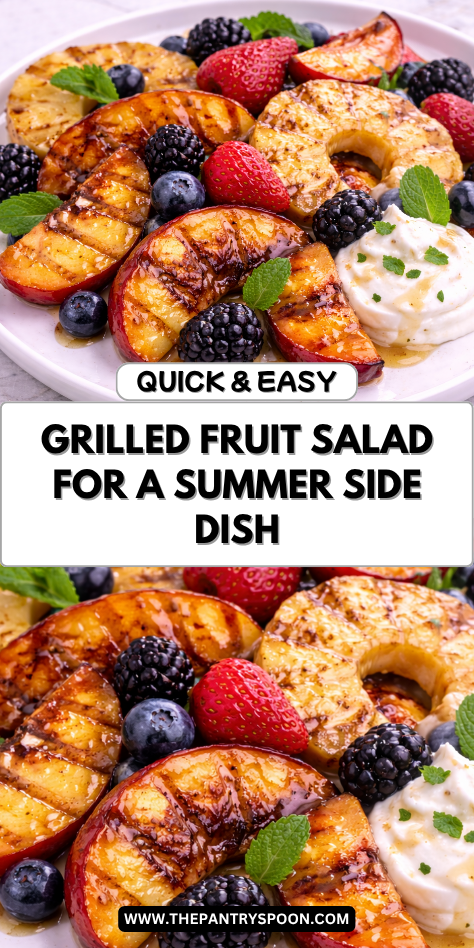
I make Grilled Fruit Salad when I want something fresh, colorful, and a little different from the usual side dishes. The heat of the grill brings out the natural sweetness of fruit and adds a light caramelized flavor that feels special with very little effort. It always looks beautiful on the table.
My family loves this salad during warm weather meals, cookouts, and easy weekend dinners outside. It pairs well with grilled meats, brunch foods, or light lunches. When I want a dish that feels bright, simple, and memorable, this is one I enjoy making.
Why You’ll Love This Recipe
Grilled Fruit Salad is sweet, juicy, and full of fresh texture. Grilling gives the fruit warm golden edges and a deeper flavor while keeping the centers tender and bright. Every bite feels refreshing and satisfying.
This recipe is also very practical for home cooks. It uses simple ingredients, works with many fruits, and comes together quickly once the grill is hot. There is no complicated prep or special technique needed.
Another reason to love it is how flexible it can be. Serve it as a side dish, brunch addition, dessert, or light snack. You can use whatever fruit is in season and adjust the flavors to suit your family.
Serves: 6 people
This recipe serves about 6 people as a side dish or light dessert. If part of a larger cookout spread, it can stretch even further. It is easy to double for gatherings or parties.
Ingredients You’ll Need
Fruit
- 2 cups pineapple chunks or rings
- 2 peaches or nectarines, halved and pitted
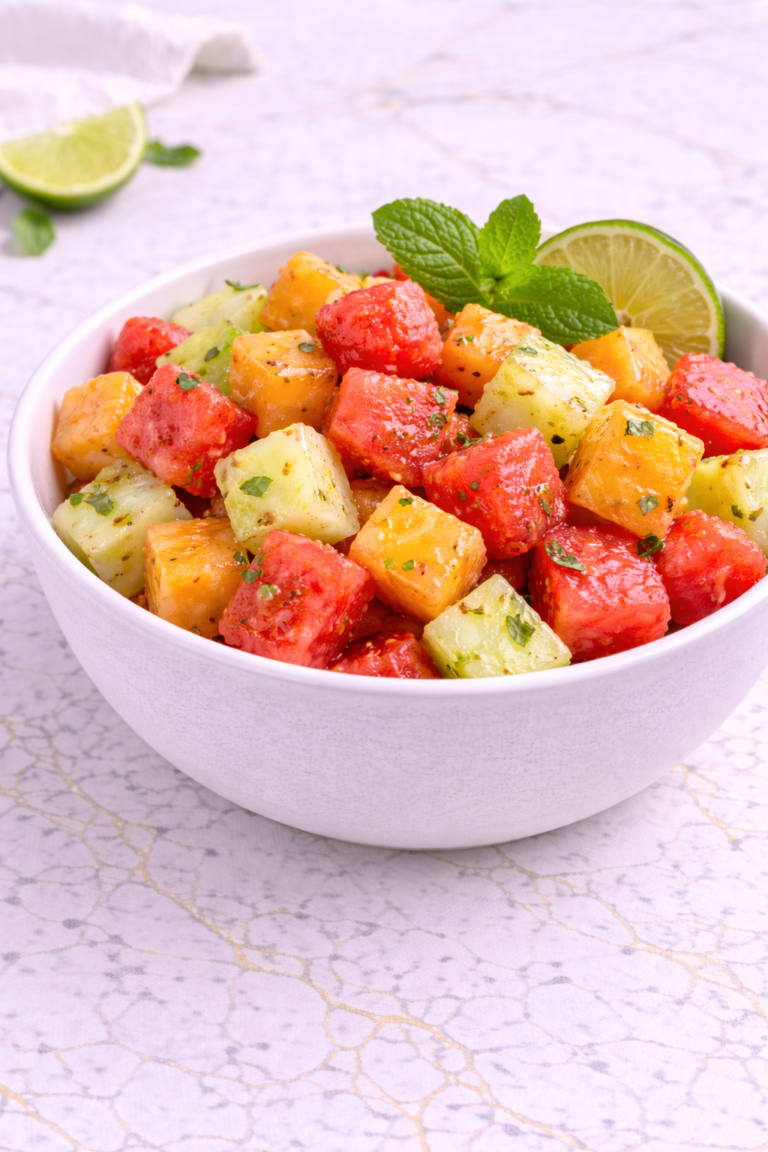
- 2 cups watermelon wedges, thickly sliced
- 2 bananas, peeled and halved lengthwise
- 1 pint strawberries, hulled
- 2 kiwis, peeled and sliced (not grilled, added fresh)
Dressing
- 2 tablespoons honey
- 1 tablespoon lime juice
- 1 tablespoon orange juice
- 1 teaspoon finely grated lime zest
- 1 tablespoon olive oil
Optional Toppings
- Fresh mint leaves
- Toasted coconut flakes
- Chopped pistachios
- Greek yogurt
- Extra drizzle of honey
Choose fruit that is ripe but still firm enough to hold its shape on the grill. Softer fruit can still be used, but handle it gently. A mix of colors and textures makes the salad especially inviting.
Pro Tips
Oil the grill grates lightly
A lightly oiled grill helps prevent sticking, especially with sweeter fruit. Use tongs and a paper towel for safety.
Use firm ripe fruit
Very soft fruit can fall apart on the grill. Firm ripe fruit gives the best texture and grill marks.
Do not overcook
Fruit only needs a few minutes per side. Too much time can make it mushy.
Cut pieces large enough to handle
Bigger slices or halves are easier to flip than tiny pieces. You can cut them smaller after grilling.
Add delicate fruit fresh
Some fruits like kiwi or berries are best added after grilling. This gives the salad more texture variety.
Dress just before serving
Adding the dressing at the end keeps the fruit fresh and glossy. It also prevents excess liquid from collecting early.
Tools You’ll Need
- Outdoor grill or grill pan
- Tongs
- Large platter or serving bowl
- Small bowl for dressing
- Measuring spoons
- Knife and cutting board
- Pastry brush (optional)
- Spatula for delicate fruit
Having everything prepped before heating the grill makes this recipe very easy. Fruit cooks quickly, so ready ingredients help the process move smoothly.
Substitutions and Variations
Use Seasonal Fruit
Swap in mango, plums, pears, apples, or grapes depending on the season. This keeps the salad fresh and interesting year-round.
Make It Vegan
Use maple syrup instead of honey in the dressing. The salad will still taste bright and delicious.
Add Creaminess
Top with whipped ricotta, yogurt, or mascarpone. This turns it into more of a dessert-style dish.
Boost the Crunch
Sprinkle with toasted almonds, walnuts, pecans, or granola. Crunchy toppings contrast nicely with juicy fruit.
Add Herbs
Try basil or mint in place of or alongside the citrus dressing. Fresh herbs make the flavors feel extra lively.
Make Ahead Tips
Grilled Fruit Salad is easy to prepare ahead, which makes it a great choice for cookouts and gatherings. You can wash, peel, slice, and store the fruit in separate containers in the refrigerator up to one day in advance. Keeping the fruit chilled and ready makes grilling quick and simple later.
The dressing can also be mixed ahead and stored in a sealed jar for up to three days. Shake or stir it again before using, since the honey and juices may settle. This small step saves time right before serving.
If needed, you can grill the fruit a few hours early and refrigerate it. Serve chilled or let it come closer to room temperature before adding the dressing and toppings.
Instructions
Step 1: Preheat the Grill
Heat an outdoor grill or grill pan to medium heat. Clean the grates well and lightly oil them to help prevent sticking. A properly heated grill gives the best marks and caramelization.
Step 2: Prepare the Fruit
Cut the pineapple, peaches, watermelon, and bananas into large pieces that are easy to handle. Hull the strawberries and slice the kiwi, keeping kiwi aside to add fresh later. Pat wetter fruit dry with paper towels if needed.
Step 3: Make the Dressing
In a small bowl, whisk together the honey, lime juice, orange juice, lime zest, and olive oil. Stir until smooth and combined. Set aside until serving time.
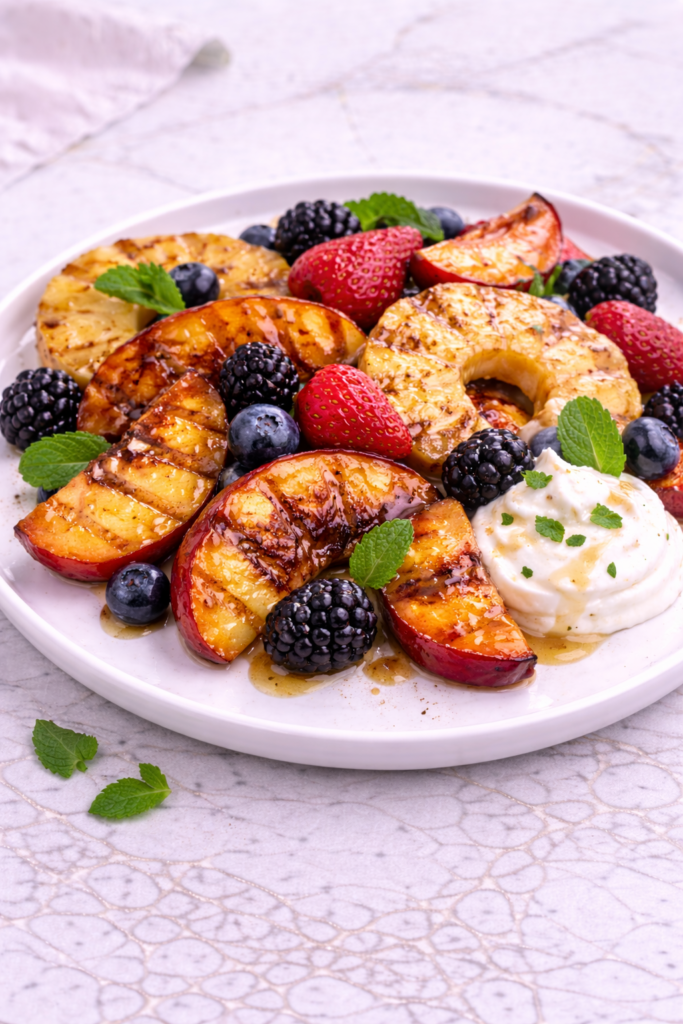
Step 4: Grill the Pineapple
Place the pineapple on the grill. Cook for 2 to 3 minutes per side until warm with golden grill marks. Transfer to a platter.
Step 5: Grill the Peaches
Place peach halves cut-side down on the grill. Cook for 3 to 4 minutes, then turn briefly if desired. Remove once tender with clear grill marks.
Step 6: Grill the Watermelon
Place watermelon wedges on the grill for about 1 to 2 minutes per side. Grill just long enough to warm slightly and mark the surface. Overcooking can soften it too much.
Step 7: Grill the Bananas and Strawberries
Place banana halves cut-side down for 1 to 2 minutes until lightly golden. If grilling strawberries, use a grill basket or skewers and cook briefly just until warmed. Remove carefully.
Step 8: Cut and Assemble
Once the grilled fruit is cool enough to handle, cut larger pieces into bite-size chunks or slices. Add everything to a large serving bowl or platter. Stir in the fresh kiwi slices.
Step 9: Dress and Finish
Drizzle the dressing over the fruit just before serving. Toss gently or leave arranged on a platter. Add mint, toasted coconut, nuts, or yogurt if desired.
Serving Suggestions
Serve Grilled Fruit Salad beside grilled chicken, burgers, or fish at summer meals. The sweet fruit balances savory dishes beautifully.
Add it to a brunch spread with pancakes, waffles, or eggs. It brings color and freshness to the table.
Serve as a light dessert topped with yogurt or whipped cream. This is especially nice after a heavier meal.
Spoon it over vanilla ice cream or pound cake. Warm grilled fruit makes a simple dessert feel extra special.
Pack leftovers into containers for lunches or snacks. It tastes delicious chilled the next day.
Serve on a buffet table with fresh herbs and toppings on the side. Guests can build their own bowl.
Leftovers and Storage
Store leftover Grilled Fruit Salad in an airtight container in the refrigerator for up to three days. The fruit will soften over time but still taste delicious. Stir gently before serving again.
If possible, store the dressing separately and add it fresh when serving leftovers. This helps keep the fruit from becoming too juicy too soon.
Leftover fruit is excellent served cold, spooned over yogurt, or blended into smoothies. It can also be added to oatmeal or cottage cheese.
Freezing is not ideal for the full salad because the texture changes, but extra grilled pineapple or peaches can be frozen separately for smoothies later.
Nutrition and Benefits
- Fruit provides vitamins, minerals, hydration, and natural sweetness.
- Using many colors of fruit adds a variety of nutrients and antioxidants.
- Grilling enhances flavor without needing heavy sauces or added sugar.
- Citrus dressing adds brightness while using simple ingredients.
- This dish can be a lighter side or dessert option for family meals.
Recipe FAQ
What fruits grill best?
Pineapple, peaches, nectarines, watermelon, bananas, and mango all grill very well. Firmer fruits hold their shape best. Softer fruit should be handled gently.
Do I need to peel everything first?
Not always. Pineapple, bananas, and kiwi should be peeled. Peaches and nectarines can be grilled with the skin on if you like.
Can I make this indoors?
Yes, a grill pan on the stove works nicely. You can also use a hot cast-iron skillet for some fruits. The flavor will still be delicious.
Why did my fruit stick to the grill?
The grill may not have been hot enough or lightly oiled. Fruit also releases more easily once it has seared properly. Give it another moment before turning.
Can I skip the dressing?
Yes, the fruit tastes wonderful on its own. The dressing simply adds extra brightness and shine. Serve it plain if preferred.
Is this recipe vegan?
It can be vegan very easily. Just use maple syrup instead of honey in the dressing. Everything else is naturally plant-based.
Can I use frozen fruit?
Fresh fruit is best for grilling because it holds shape better. Frozen fruit often becomes too soft once thawed. Save frozen fruit for smoothies instead.
Conclusion
Grilled Fruit Salad is a simple recipe that brings fresh color, natural sweetness, and dependable ease to the table.
It turns everyday fruit into something warm, bright, and a little special with very little effort.
Whether served as a side dish, brunch favorite, or light dessert, it fits naturally into family meals.
Its flexible ingredients, quick method, and fresh flavor make it worth making again and again.